Managing Group Licenses
How to purchase, assign, and remove licenses on your CalendarBridge group account — including adding and deleting users and creating or deleting managed sync connections.
Purchase additional licenses
-
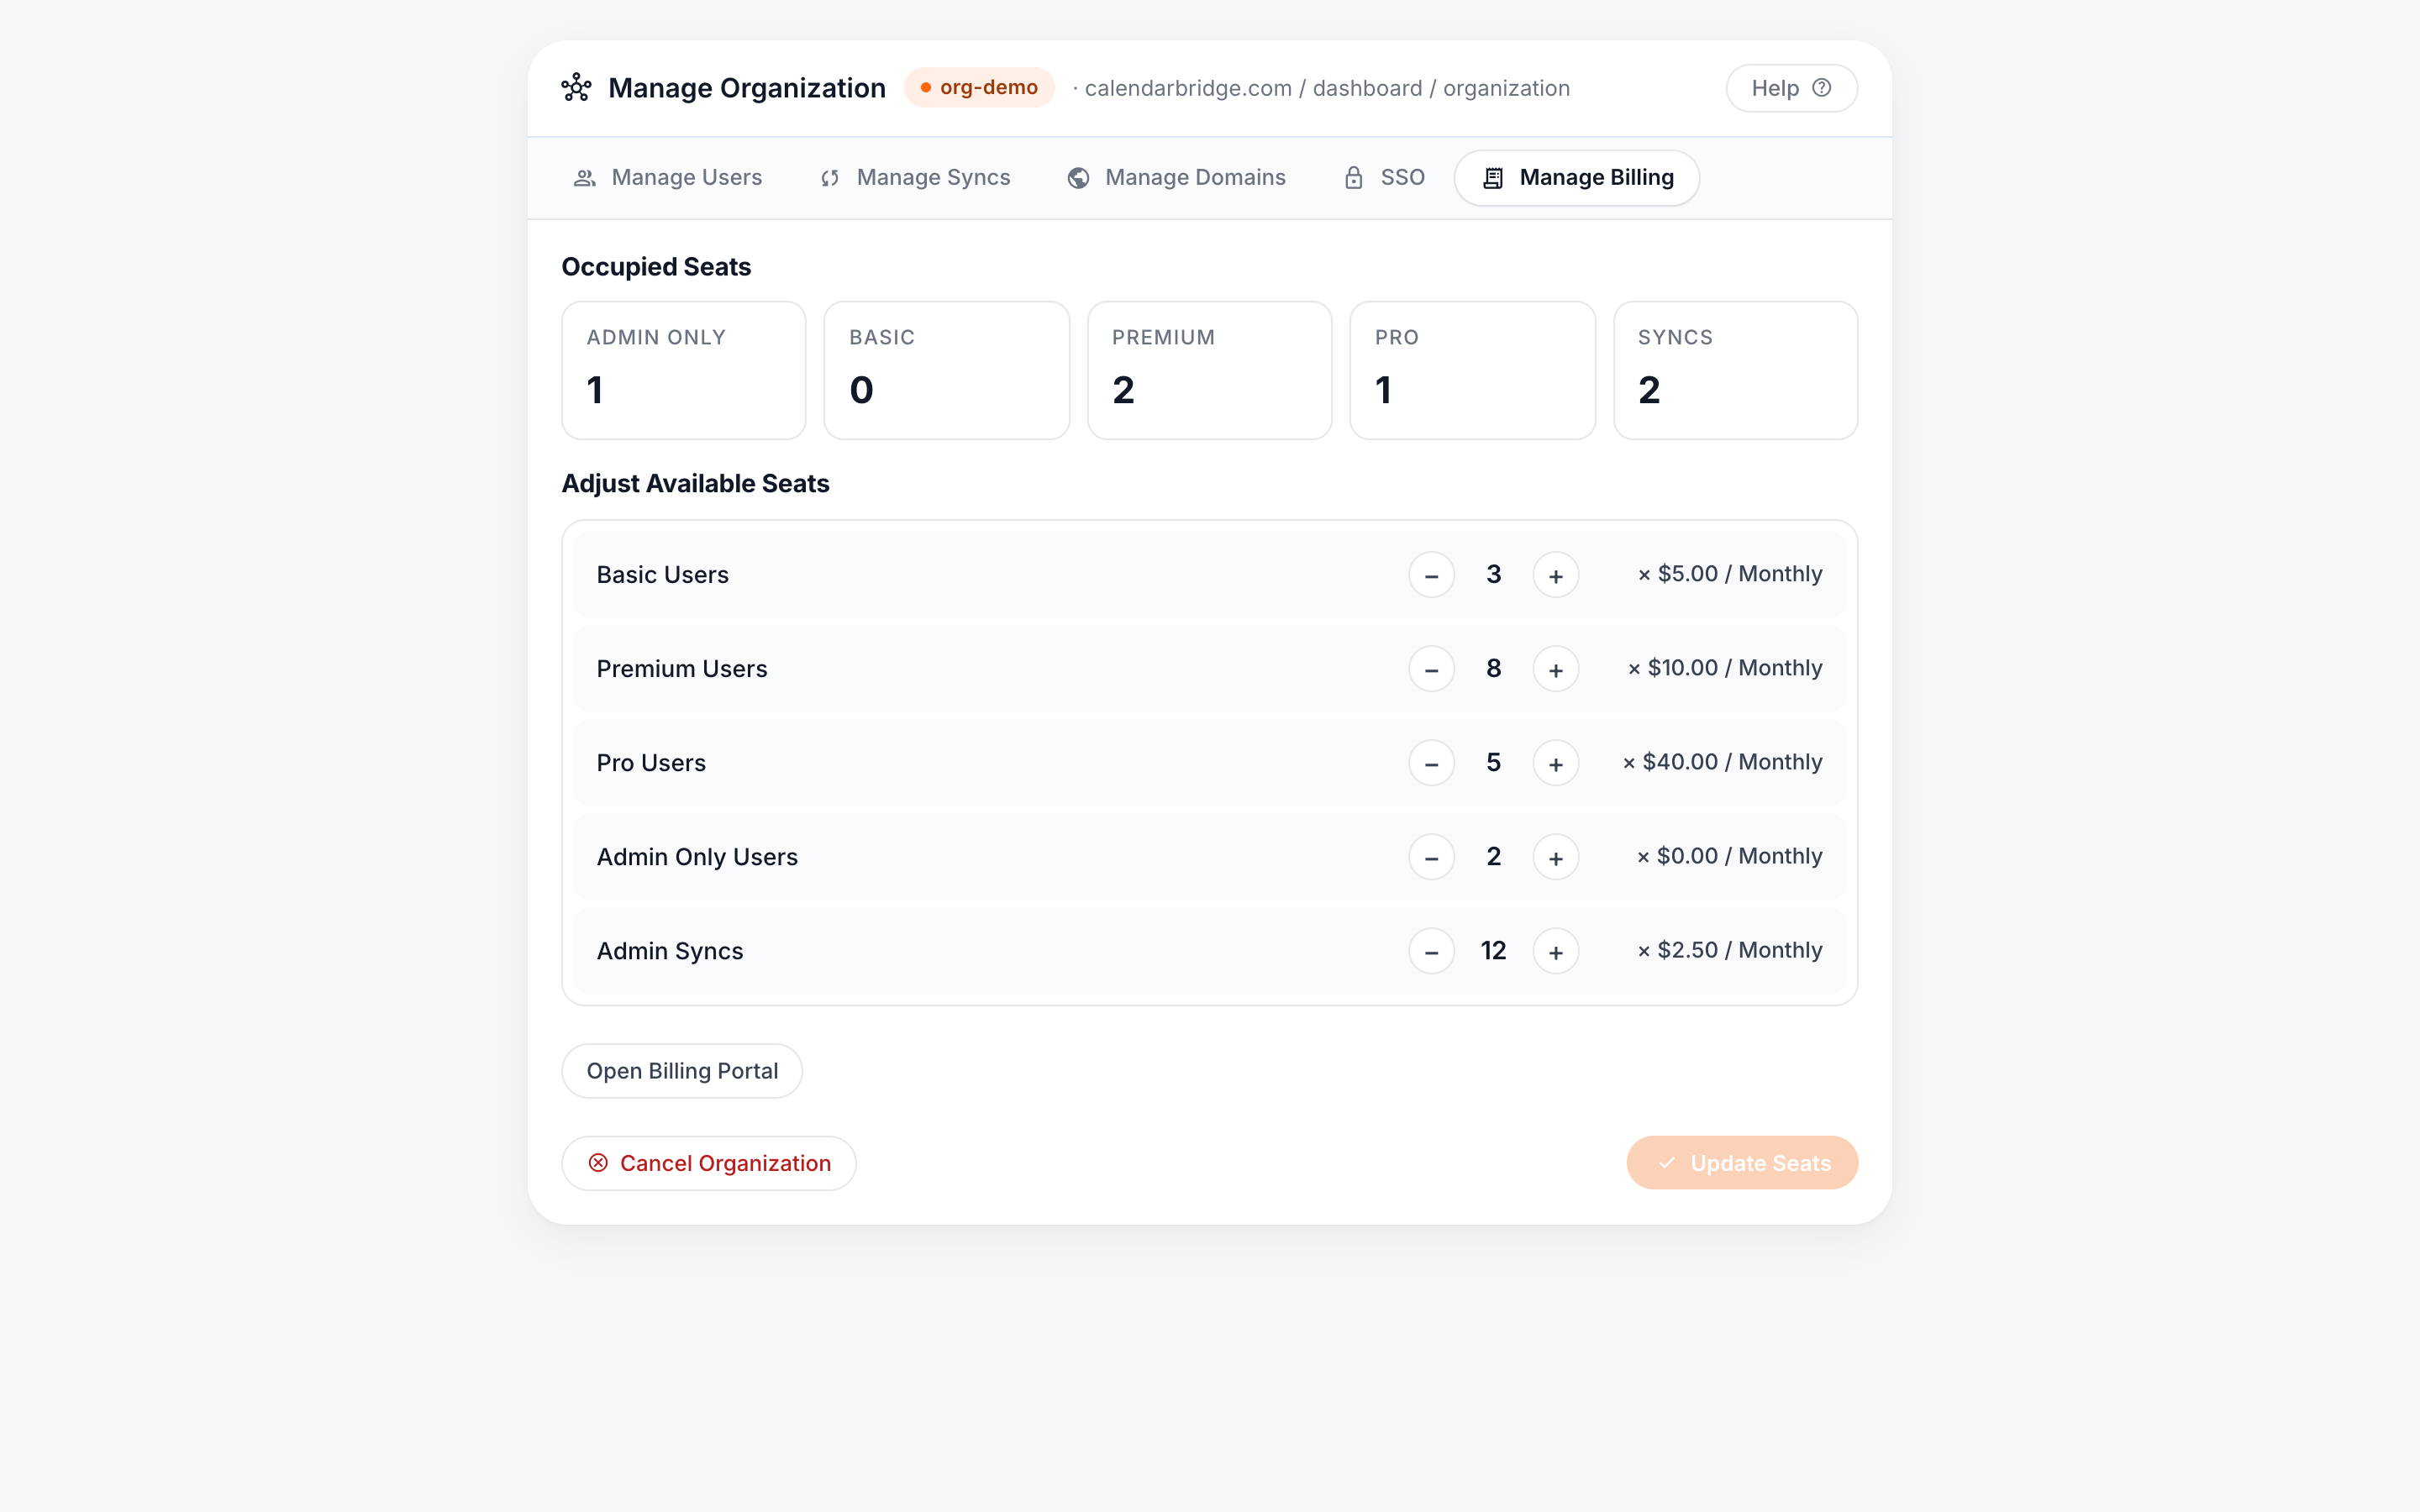
Go to the Manage Billing tab of the admin portal
-
Increment the number of available seats
Use the plus buttons for the license(s) you want to purchase, then click “Add/Remove Seats.”
-
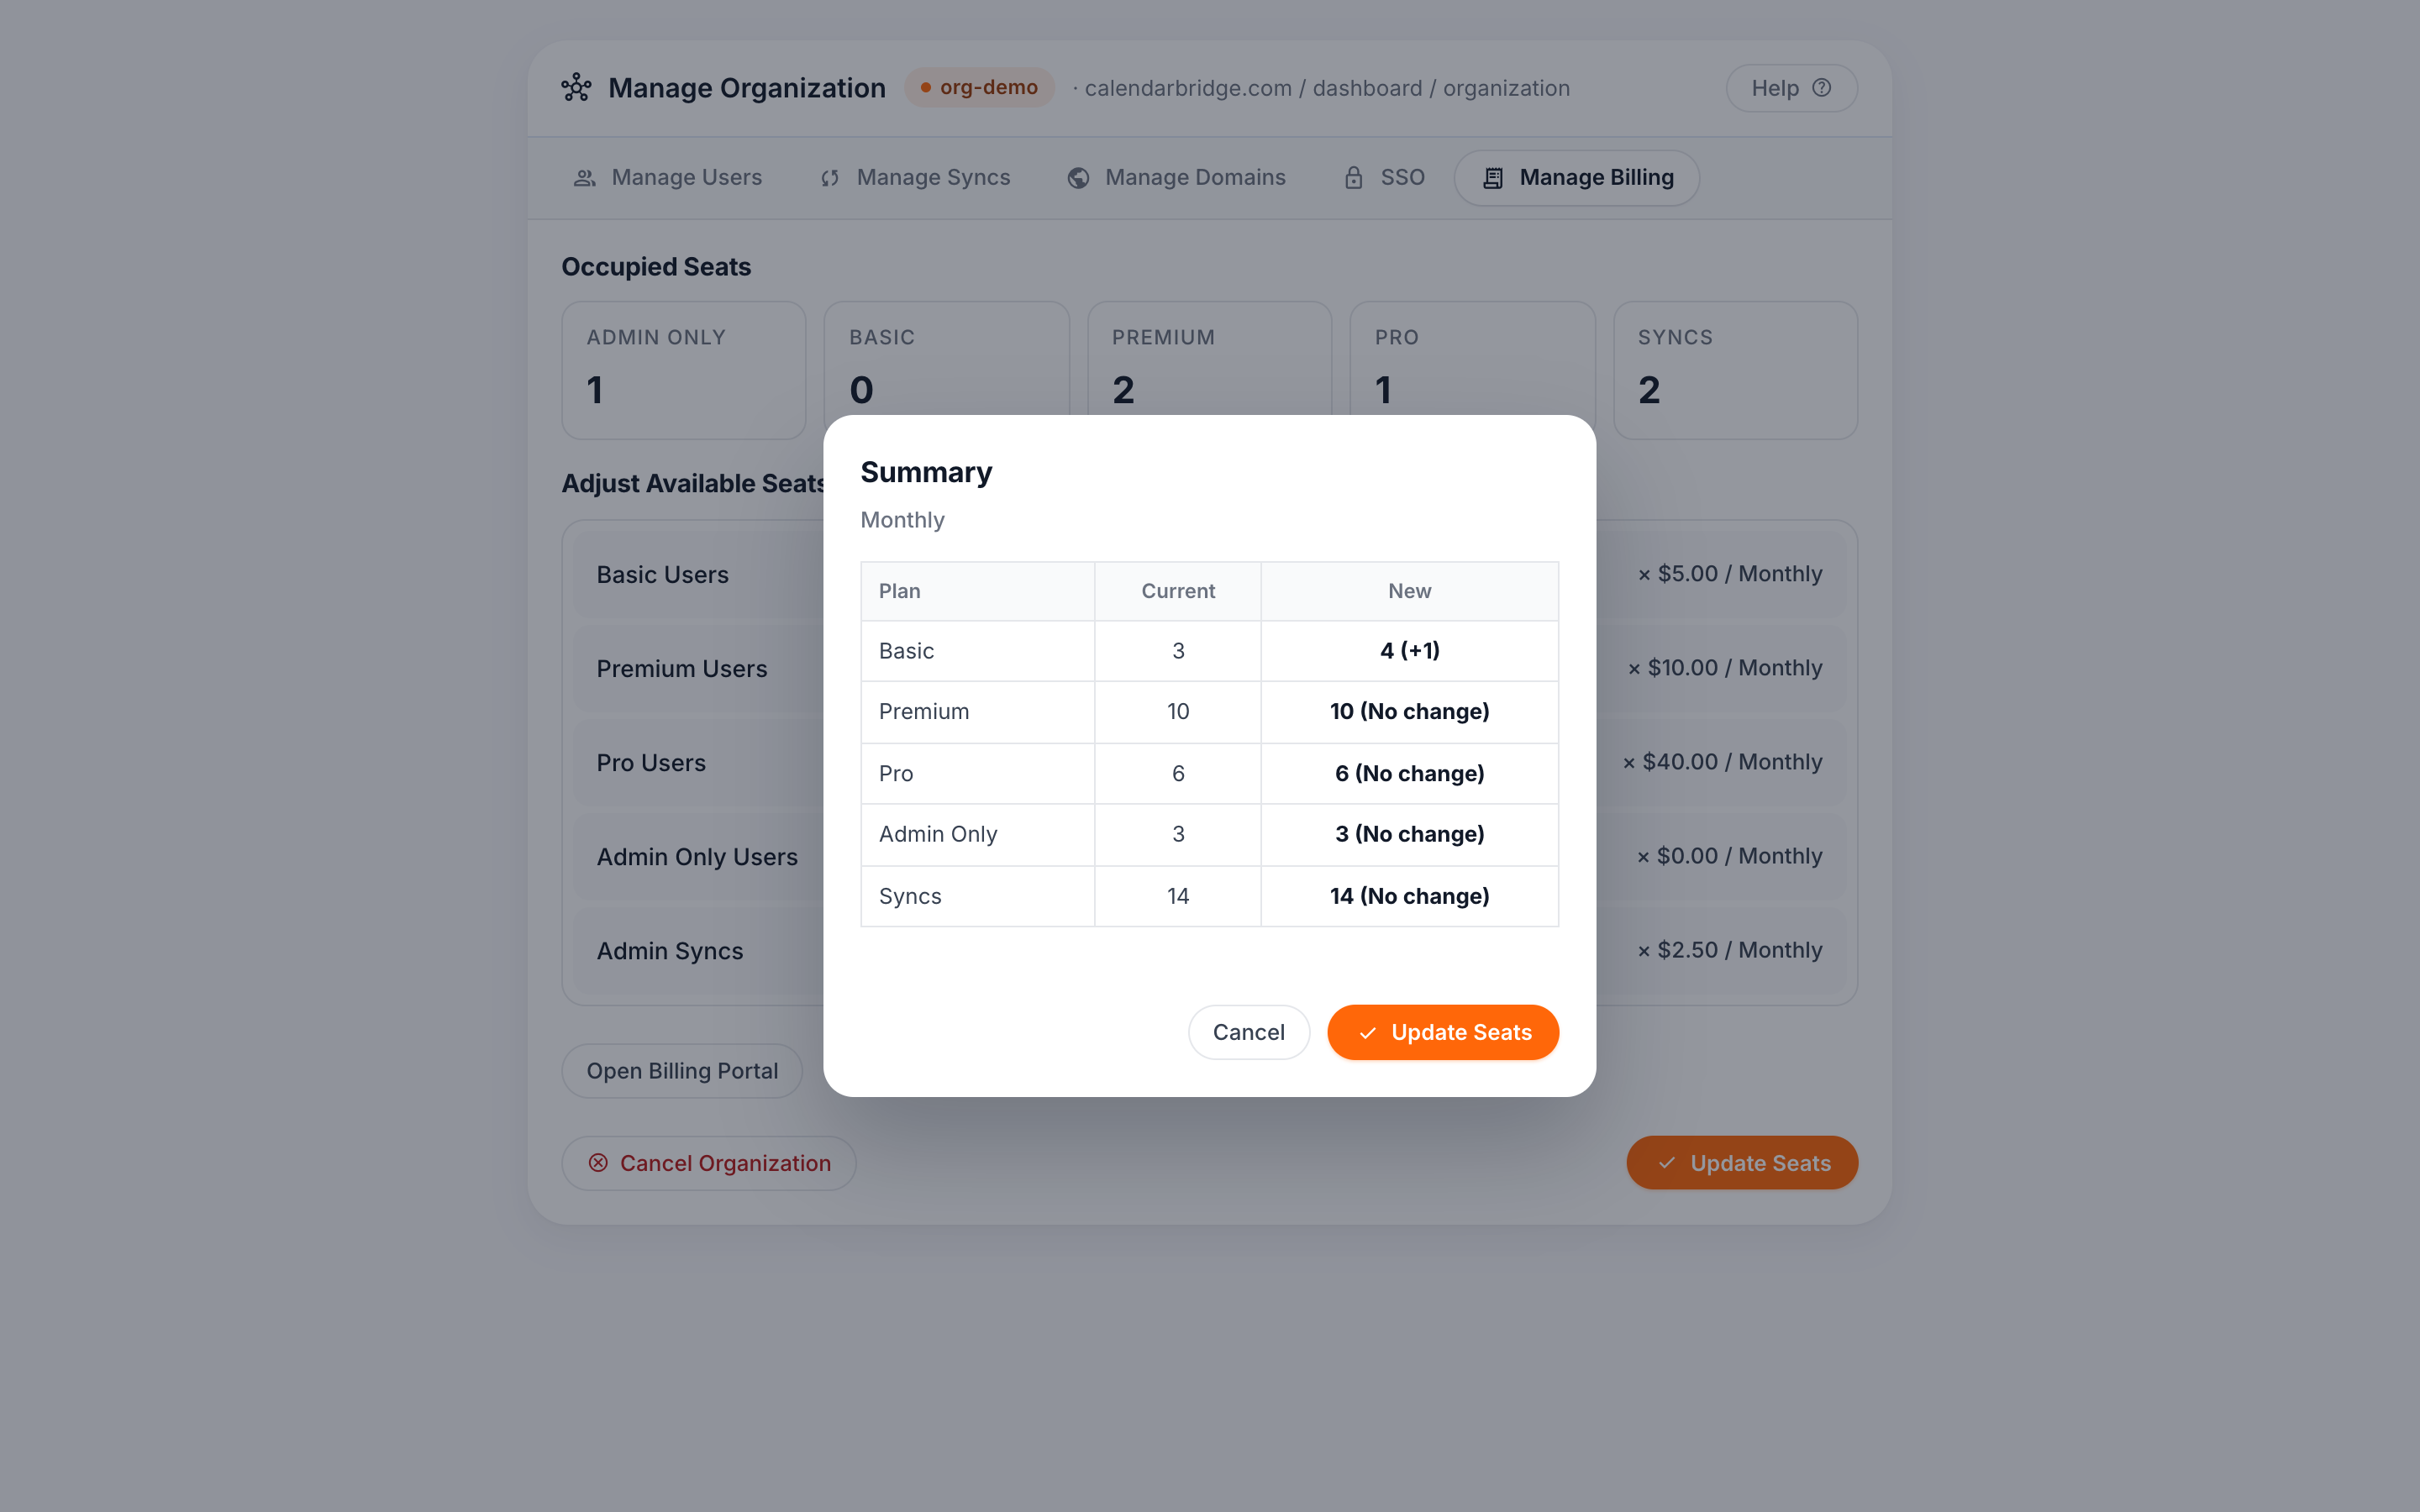
Click “Confirm”
Your card will be billed an amount that is pro-rated based on the time remaining in the current billing cycle.
Assign a user license / add a user
If you do not have any available user seats/licenses, you will first need to purchase additional licenses, as described above. A user license is assigned by adding a user to the group account. (There is no concept of an unlicensed user in CalendarBridge.)
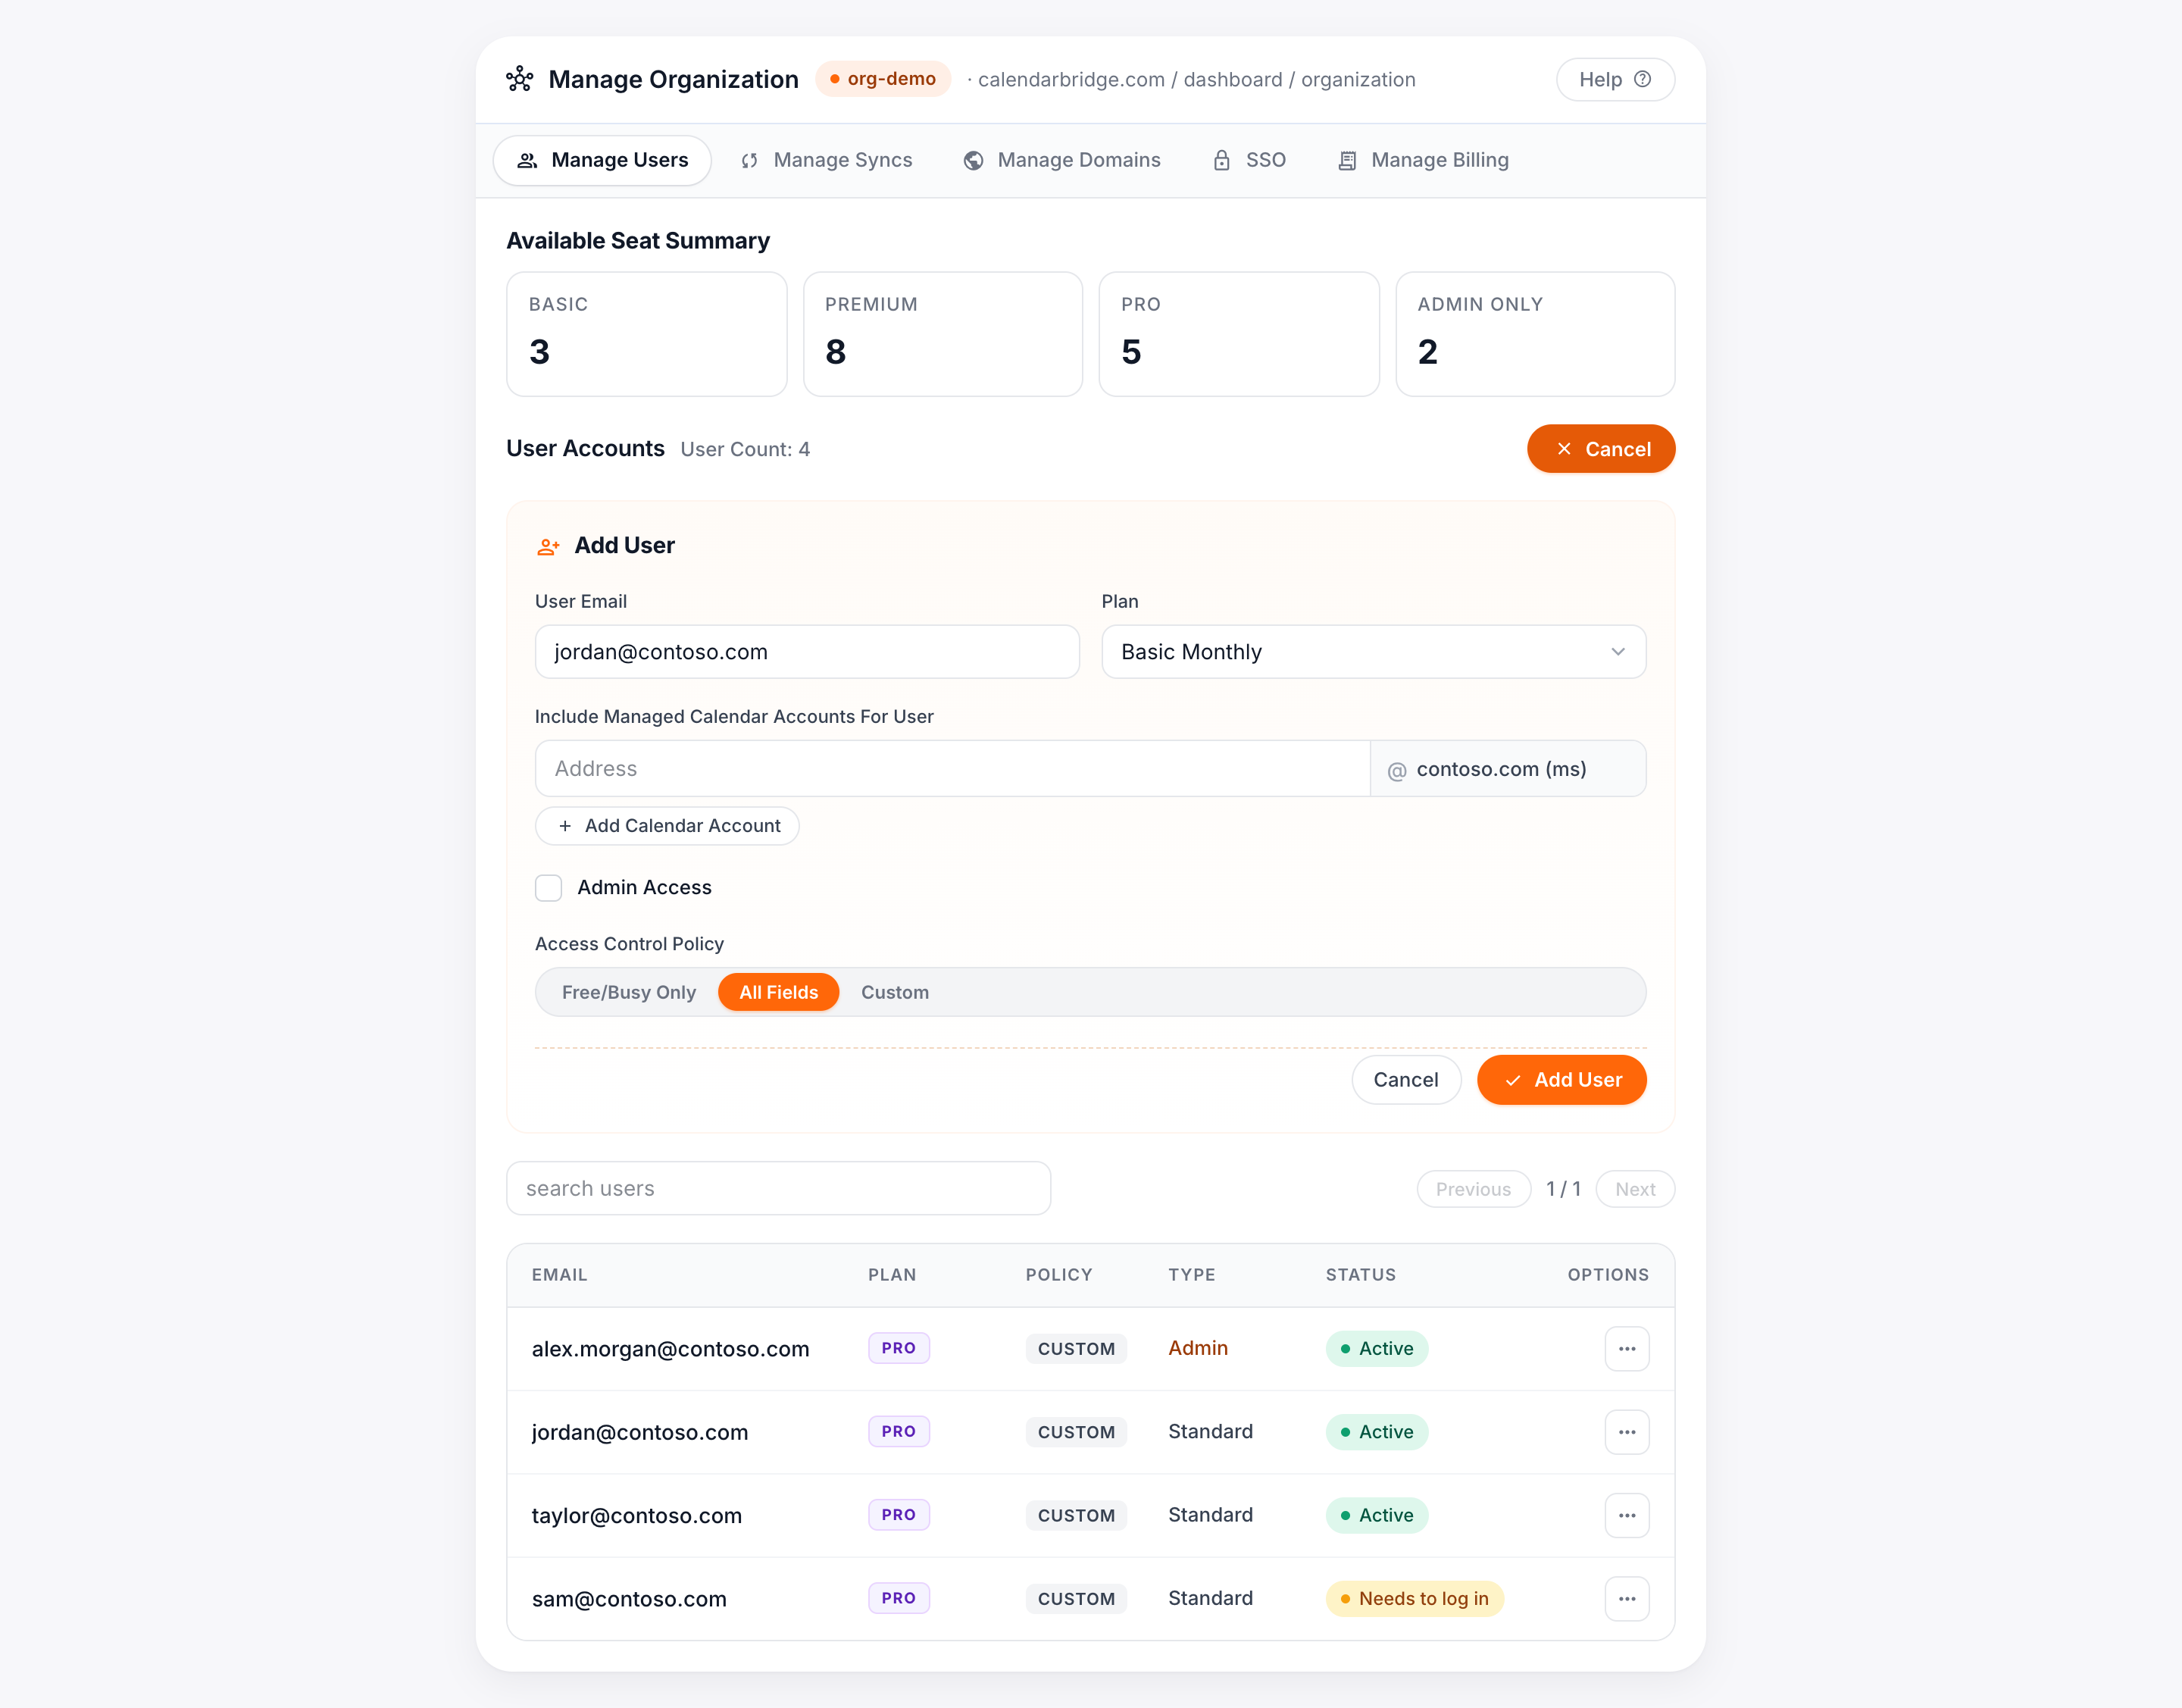
If you have at least one available user license/seat, the Manage Users panel will include an “Add User” section:
- Enter the user’s email address in the User Email text box. This is the address with which the user will log in; it has no impact on which calendars they can connect.
- In the “Plan” dropdown, choose the license to assign. If you have an authorized domain, you can additionally pre-connect one or more calendar accounts to the new user’s account.
- (Optional) Preconnect a calendar account on an authorized domain. This streamlines setup for the user, and enables adding calendar accounts for which the user does not have the credentials (e.g., a boss’s calendar added to an assistant’s dashboard). Enter the calendar’s email address below “Include Managed Calendar Accounts for User,” then click “Add Calendar Account.”
- Configure an access-control policy for the user. This applies to all sync connections the user creates. Options: Free/Busy only (no event details synced), All Fields, or Custom (select which fields).
- Confirm and provision the license. Click “Add User” to provision the license and trigger an invite email. The user then appears at the bottom of the Manage Users panel with their plan, access-control policy, edit/delete buttons, and a button to re-send the invite.
Unassign a user license / delete a user
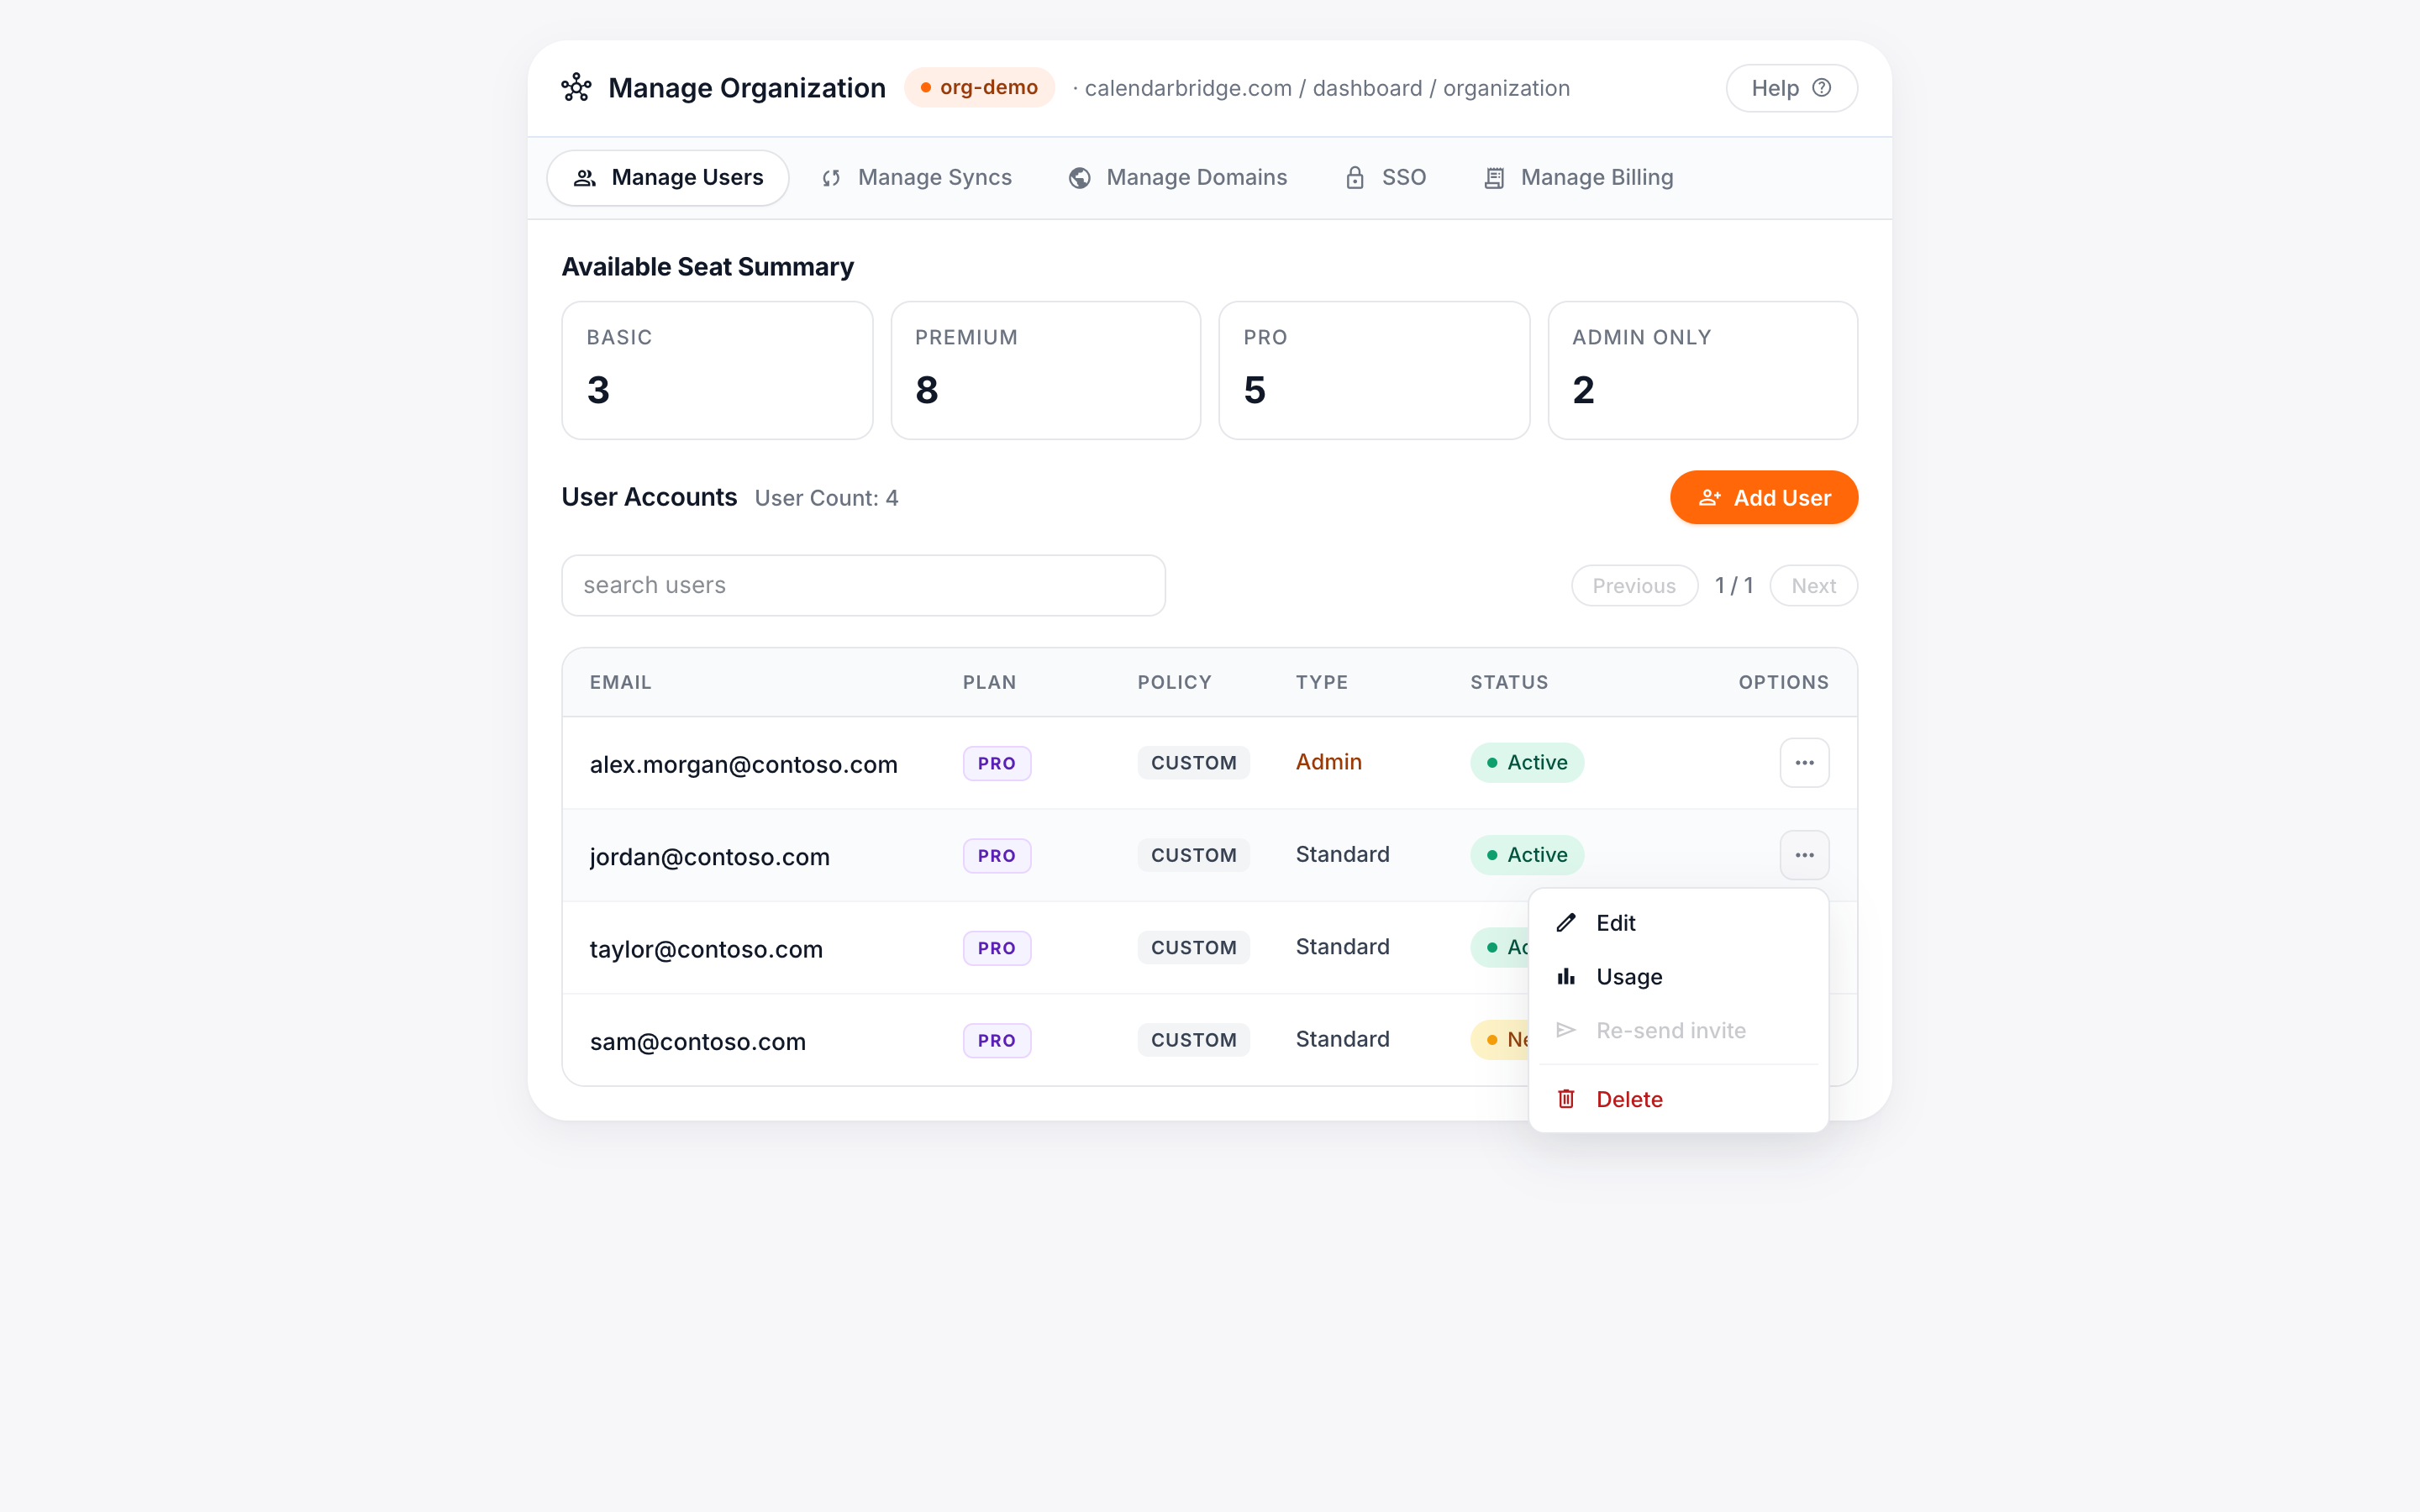
To unassign a user license — and return it to the pool of available licenses — delete the user from the Manage Users tab. Find the user at the bottom of the panel and click “Delete.”
A confirmation window will pop up. Click “Delete” to delete the user and return the license to the pool.
Assign a sync license / create a managed sync connection
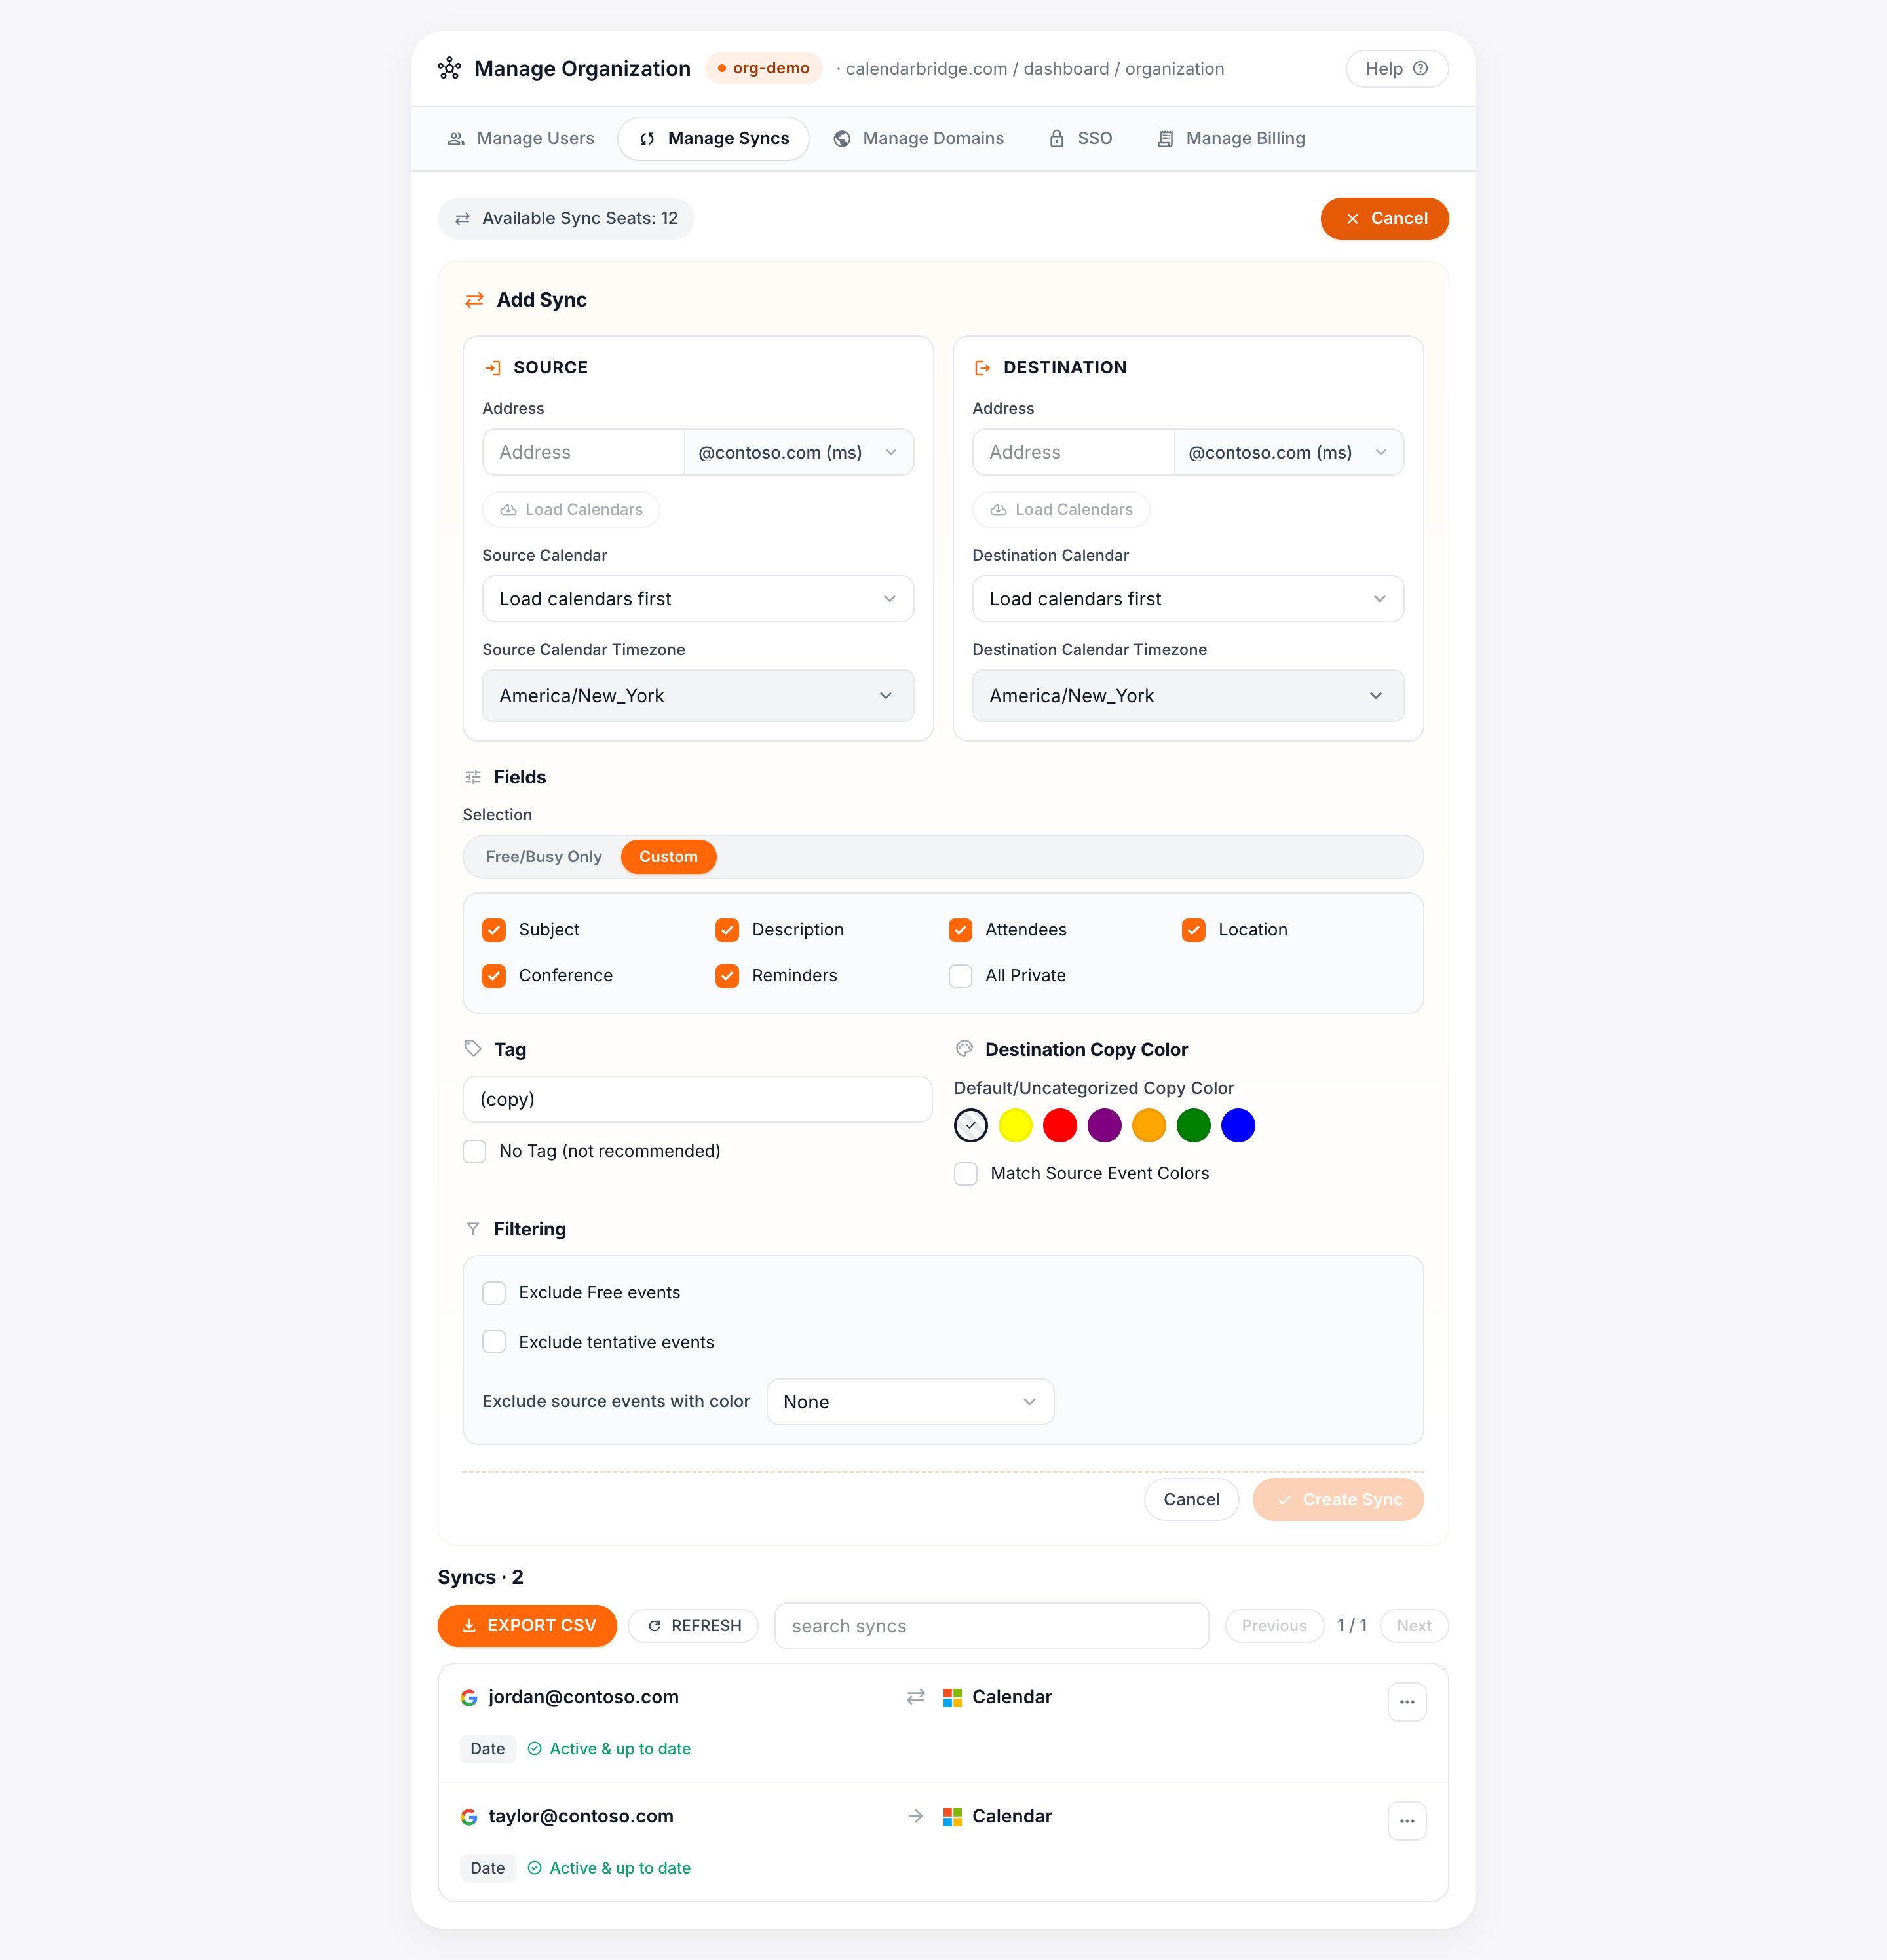
If you have no available sync seats/licenses, purchase additional licenses first. A sync license is assigned by creating a sync connection. If you have at least one available sync license, the Manage Syncs panel includes an “Add Sync” section:
Configure the source calendar
Enter the email address associated with the calendar, select the desired calendar, and (for Microsoft calendars) select the source calendar time zone. For Google calendars the time zone is detected automatically.
Configure the destination calendar
Enter the destination calendar’s email address and select the calendar. You can also choose a color for event copies on the destination calendar; if you don’t, copies use the destination calendar’s default color.
Configure privacy settings
Choose Free/Busy only, All Fields, or Custom. Fields you can sync include Subject, Attendees (copied into the description field, not the attendees field, to avoid invites being re-sent), Description, Location, Conference details, and Reminders. The All Private option marks event copies private so other users in your organization see them as simply “busy” in Outlook Scheduling Assistant and Google Find a Time.
Configure event subject tags
By default, CalendarBridge adds “(copy)” to event-copy subjects. You can replace it with custom text, or disable tagging entirely (not recommended). Note: subject tags are not configurable for users on a free trial.
Create the sync connection
When everything is configured, create the sync connection. Events begin syncing within minutes; sync creation generally completes within 5–10 minutes but can take up to an hour for calendars with many events or during high usage.
Unassign a sync license / delete a managed sync connection
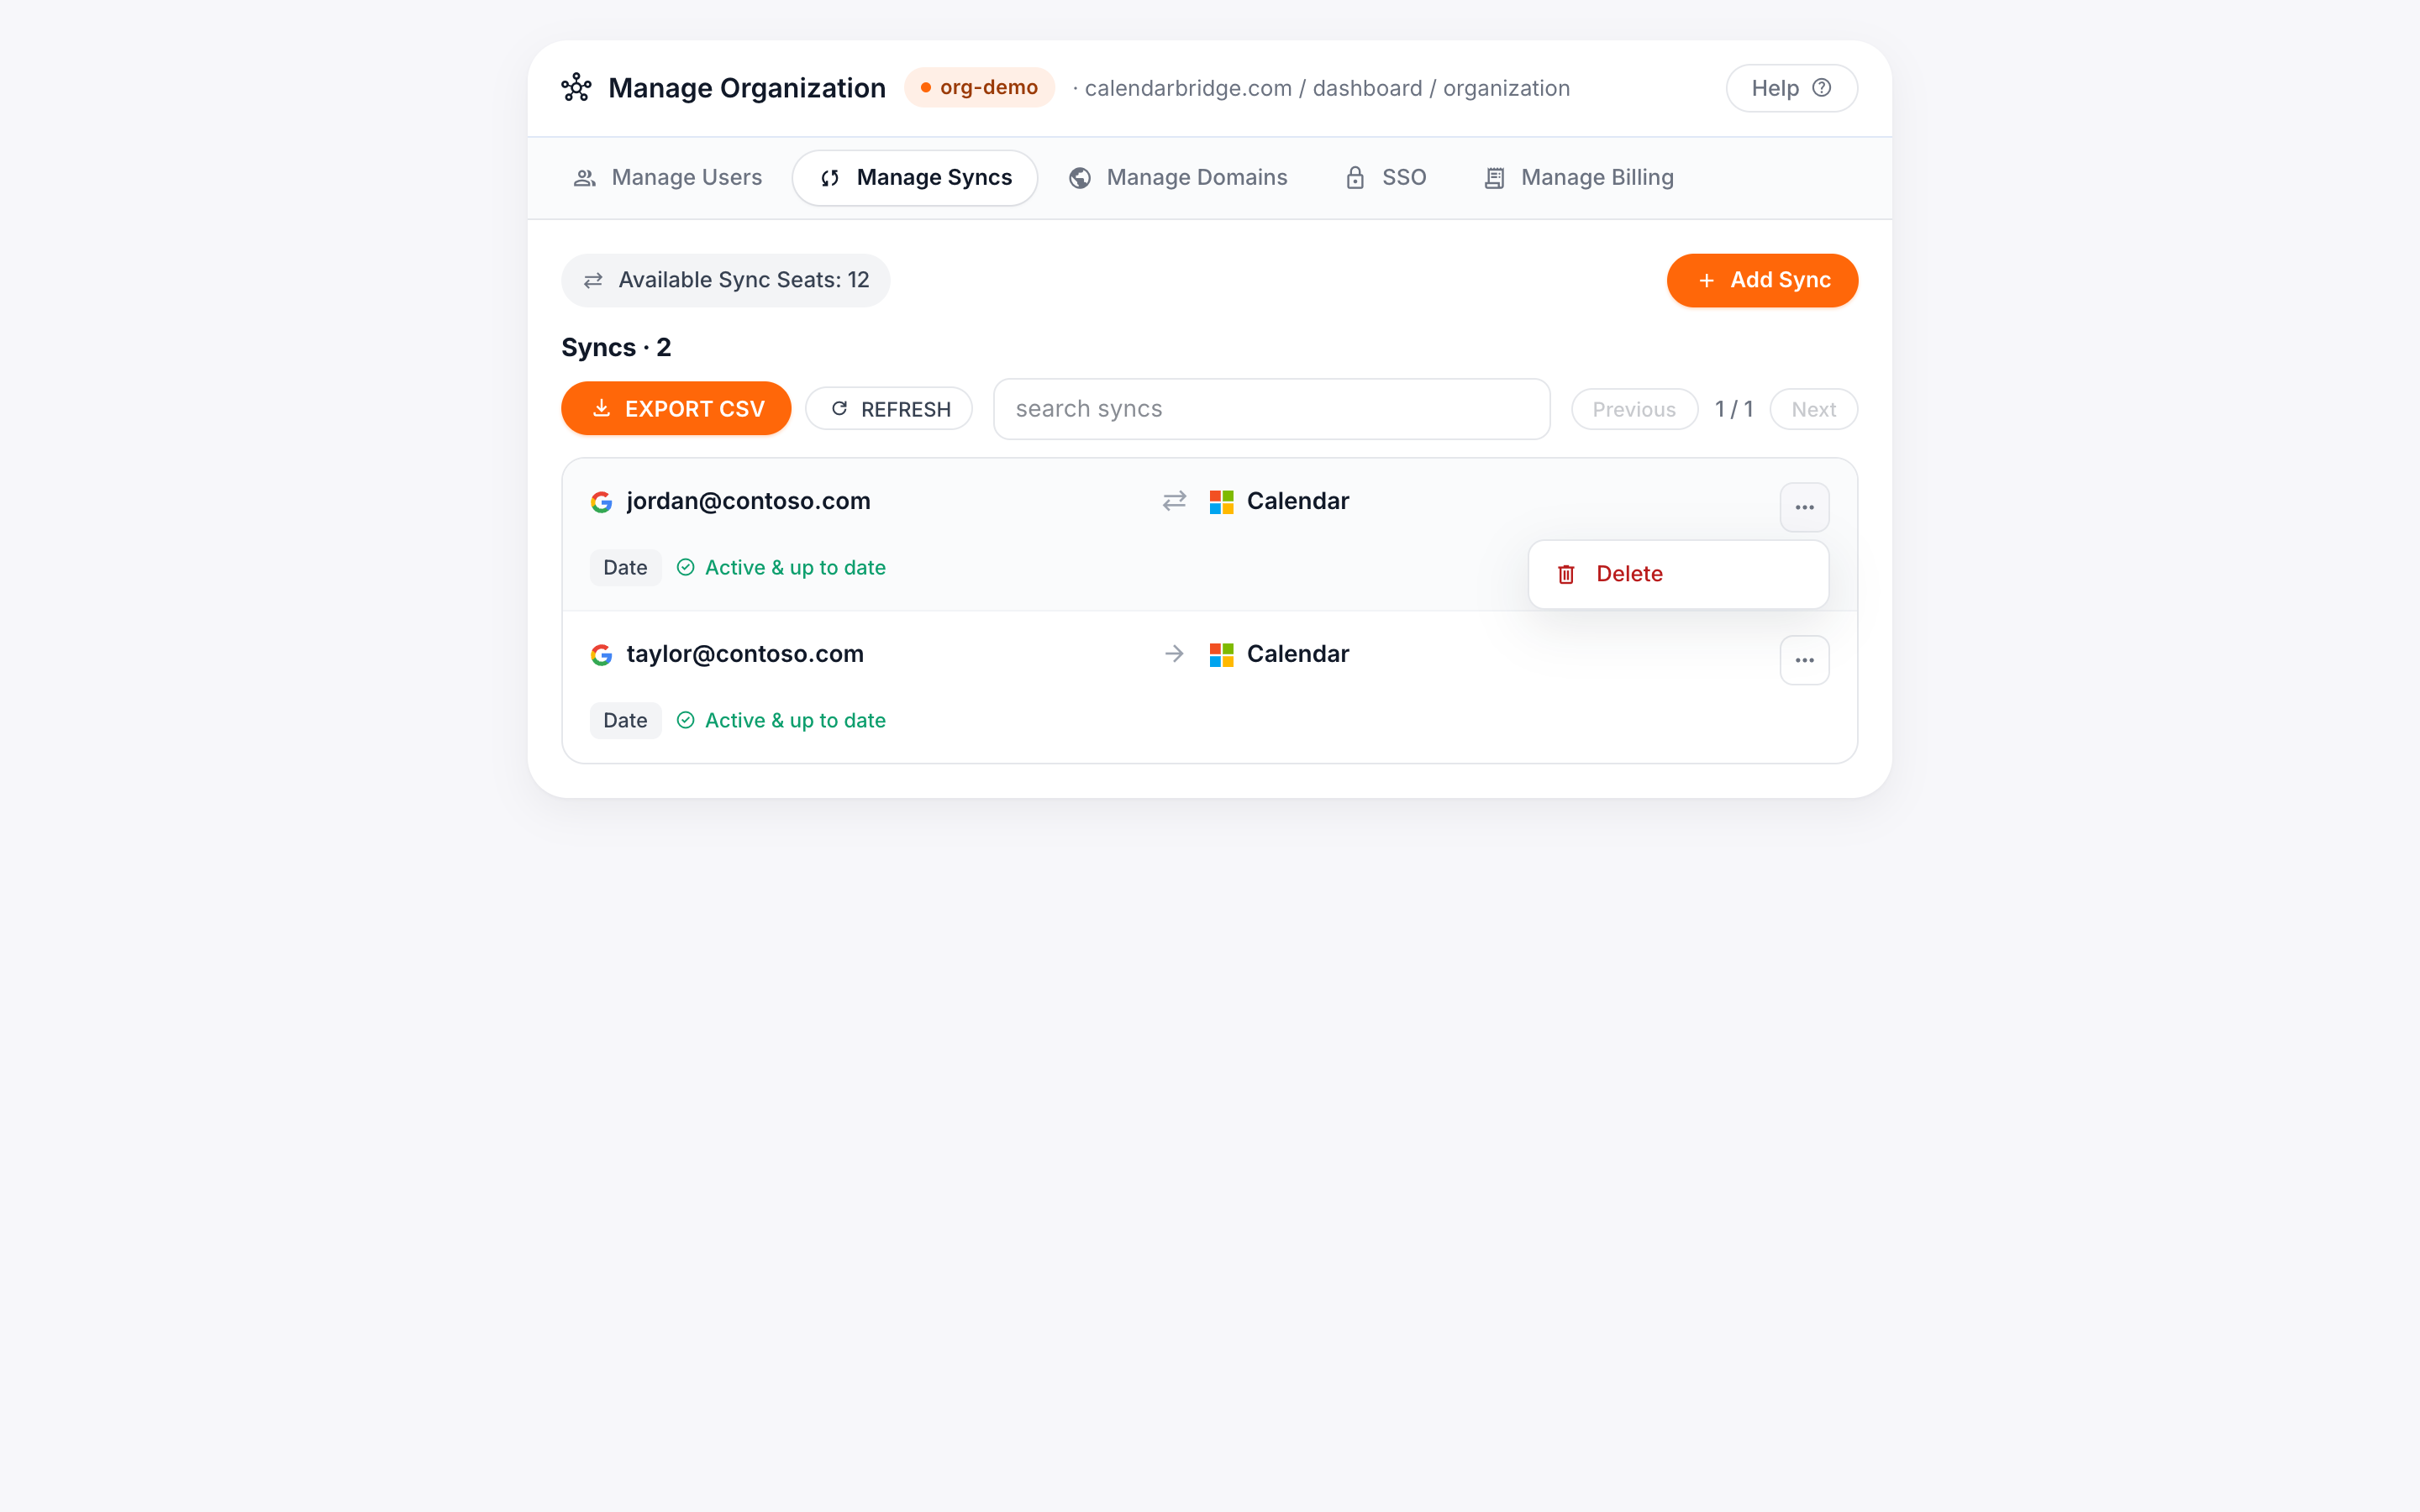
To unassign a sync license, delete the managed sync connection. At the bottom of the Manage Syncs panel, click the three dots on the connection and then click Delete.
When deleting, CalendarBridge attempts to remove all event copies it made (2–20 minutes depending on event count). If we no longer have access to the destination calendar, the delete will fail and you’ll see two options: Force delete (removes the connection but leaves copies on the destination) and Delete (retry after reconnecting the destination account).
Remove a license for the next billing cycle
-
Go to the Manage Billing tab
-
Decrease the number of available seats
Use the minus buttons for the license(s) you want to remove, then click “Add/Remove Seats.”
-
Click “Confirm”
At the next billing cycle you will be billed based on the reduced number of licenses.