Connecting and Disconnecting a Zoom Account
How to connect, reauthorize, and disconnect a Zoom account with CalendarBridge, plus how to remove CalendarBridge’s access directly from Zoom.
Connecting a Zoom Account
-
Go to your schedulers overview pageGo to your schedulers overview page at https://calendarbridge.com/dashboard/schedules.
-
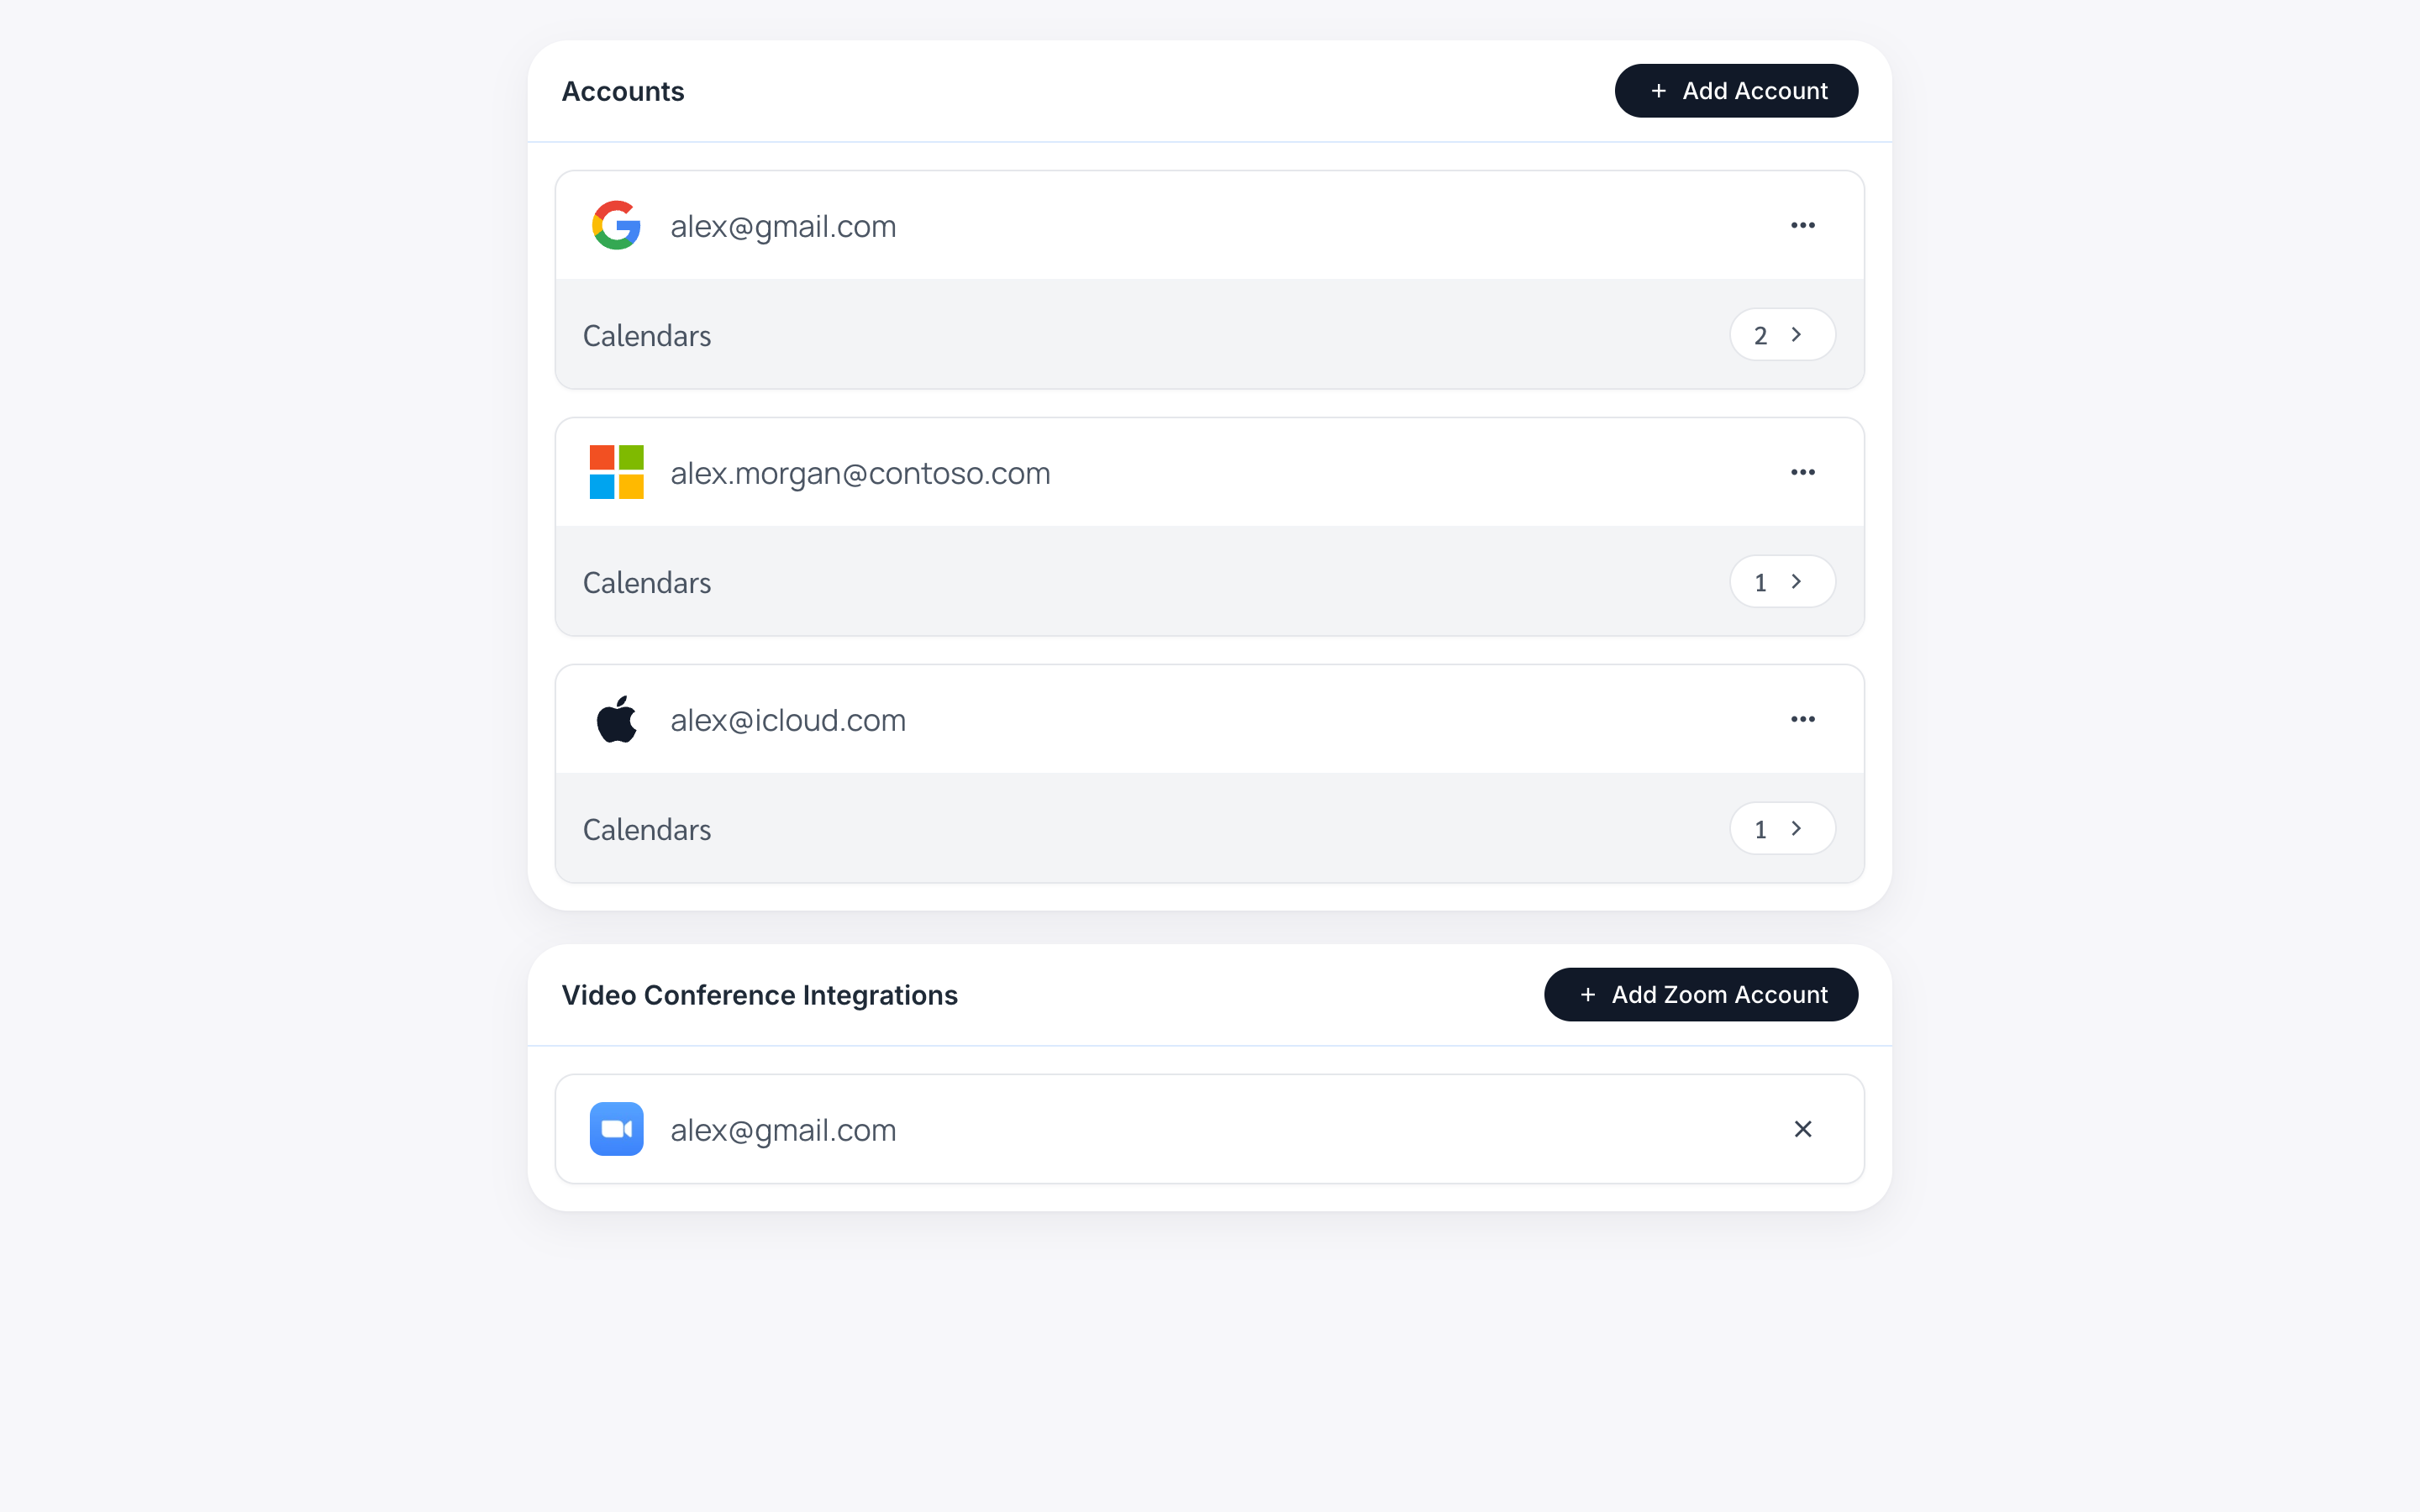
Expand the integrations panelClick “> Hide custom url and video conference integrations” to expand the panel.
-
Click “Add Zoom Account”
This will redirect you to the Zoom login page.
-
Login to ZoomSign in with your Zoom credentials.
-
Approve and Authorize CalendarBridge
After logging into Zoom, you will see one of three things based on whether CalendarBridge is approved on your Zoom account and whether you are a Zoom admin:
CalendarBridge has been pre-approved by your Zoom admin
If CalendarBridge is pre-approved, you will see the following:
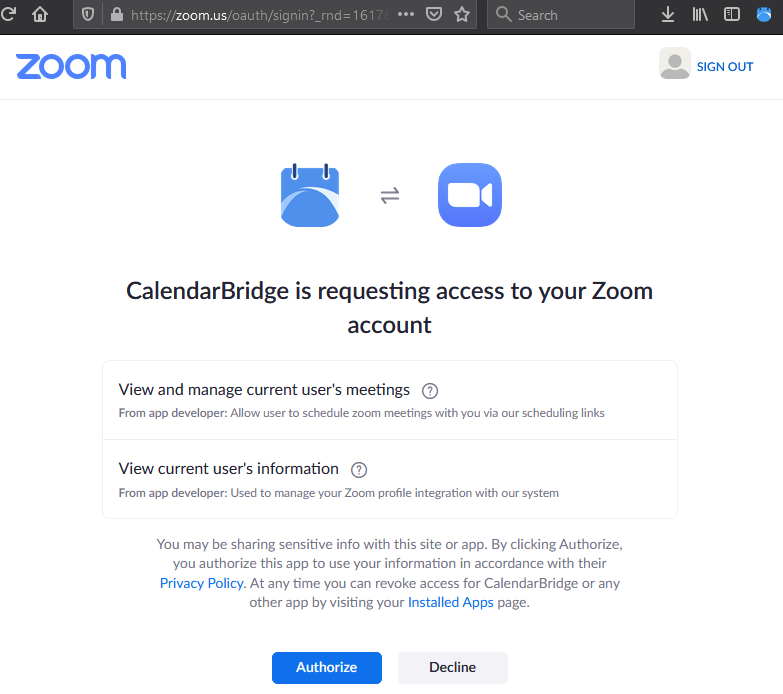
Click “Authorize” to grant CalendarBridge the permissions and be redirected back to calendarbridge.com.
Your zoom account should now be shown under “integrations” on your schedulers overview page:
CalendarBridge is not pre-approved, but you have authority to approve it
If CalendarBridge has not been pre-approved on your Zoom account, but you are a Zoom admin with authority to pre-approve it, you will see the following:
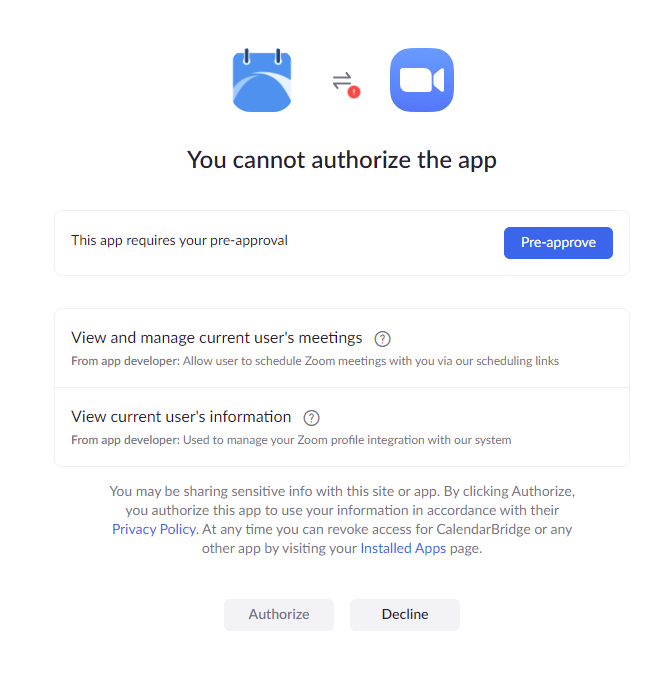
Click “Pre-approve,” to approve it for users on your domain/tenant, then click “Authorize” to authorize it on your account and be redirected back to calendarbridge.com.
Your zoom account should now be shown under “integrations” on your schedulers overview page:
CalendarBridge is not pre-approved and you do not have the authority to pre-approve it
In this case you will need to contact an admin of your Zoom account.
Let your admin know the CalendarBridge app can be found in the Zoom Marketplace at https://marketplace.zoom.us/apps/OrKixx9CQ8SMFvLeo8jQ_g
Reauthorizing a Zoom Account from Your Dashboard
- Click on Schedulers in the left menu
- Expand the dropdown next to “Hide custom url and video conference integrations”
- Click “add zoom account”
- Entering the username and password for a Zoom account that is already connected to CalendarBridge will refresh the authorization for that zoom account.
Disconnecting a Zoom Account from Your Dashboard
- Click on Schedulers in the left menu
- Expand the dropdown next to “Hide custom url and video conference integrations”
- Click the ‘x’ next to the zoom account you want to disconnect.
Removing CalendarBridge’s Access to Your Zoom Account
You can revoke CalendarBridge’s access to your Zoom account directly from Zoom:
- Login to your Zoom account and navigate to the Zoom Marketplace.
- Click Manage > Installed Apps or search for the CalendarBridge app.
- Click the CalendarBridge app.
- Click Uninstall.