Authorizing Access for Managed Syncs
These are the steps to authorize CalendarBridge to access calendars on a Google (“domain-wide delegation”) or Microsoft 365 tenant (granting “application permissions”).
Microsoft 365: grant application permissions
- Visit the following link: Domain Authorization.
- Log in with an administrator account for the tenant you want to authorize.
- You will see the list of permissions you are granting:
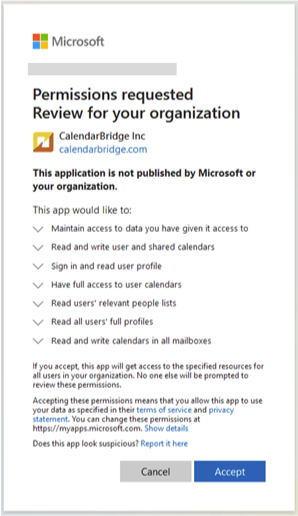
- Click “Accept.”
Once authorized you will be redirected back to CalendarBridge and see a success screen. CalendarBridge now has read and write access to all calendars on the tenant. To restrict access to only certain calendars, see Restrict CalendarBridge Access to a Security Group.
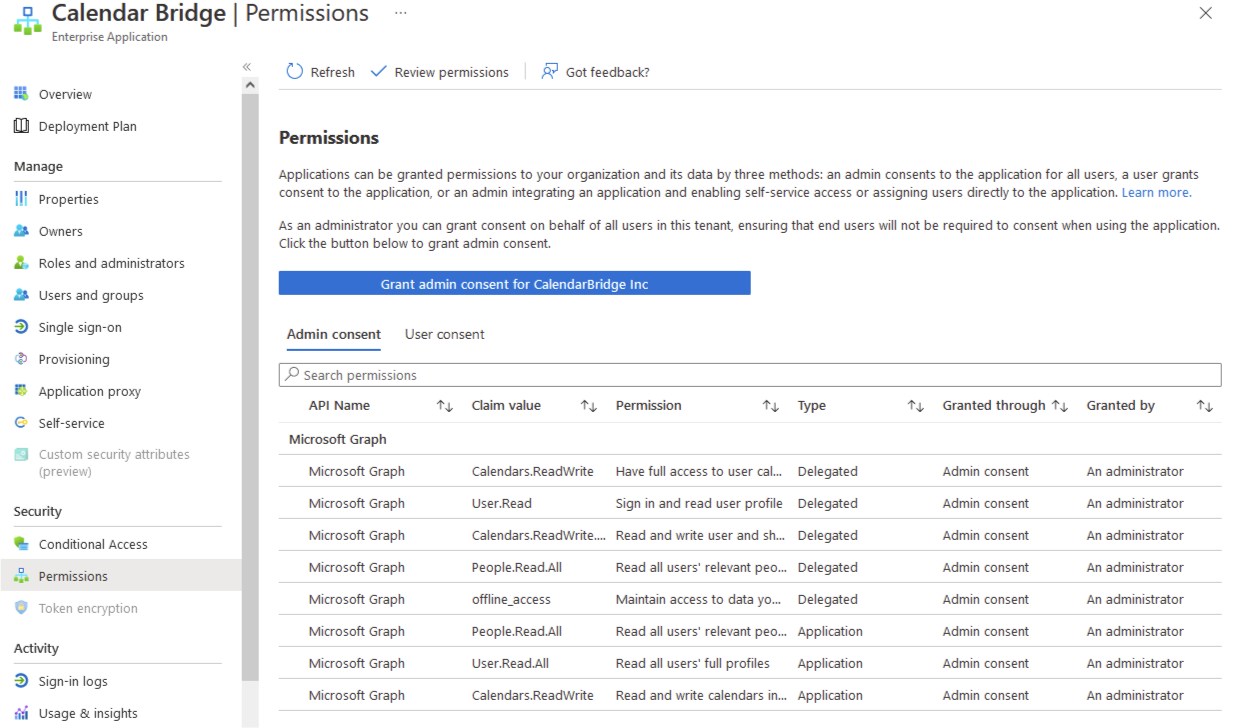
To verify the proper permissions were granted: log in to portal.azure.com with an admin account, click “Azure Active Directory,” click “Enterprise Applications,” click “CalendarBridge Inc” in the list, click “Permissions,” and check the “Admin consent” tab. It should look like this:
Google: domain-wide delegation
- Visit the following page in your Google Workspace admin panel: https://admin.google.com/ac/owl/domainwidedelegation.
- Click “Add New” to bring up the add-client dialog.
- Copy the following and paste it into the “Client ID” field:
102884401058997455704.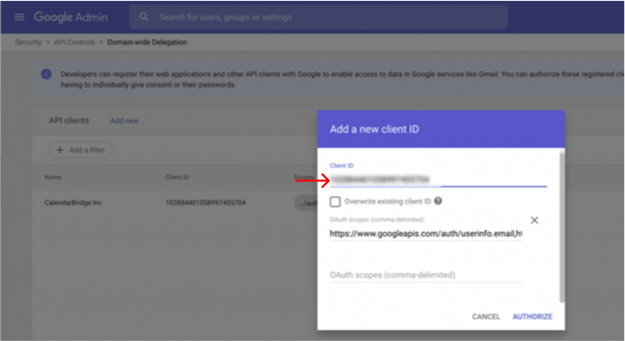
- Copy the following and paste it into the “OAuth scopes (comma delimited)” field:
https://www.googleapis.com/auth/userinfo.email,https://www.googleapis.com/auth/userinfo.profile,https://www.googleapis.com/auth/calendar.events,https://www.googleapis.com/auth/calendar.readonly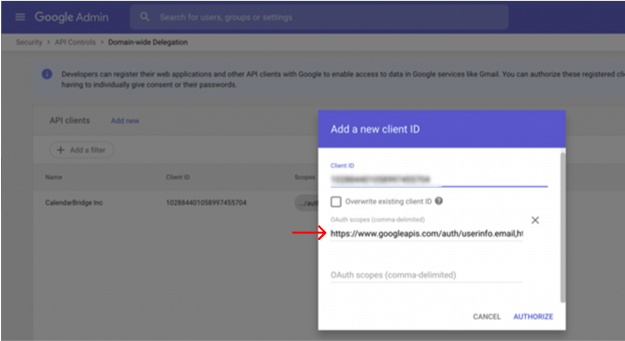
- Click “Authorize.”
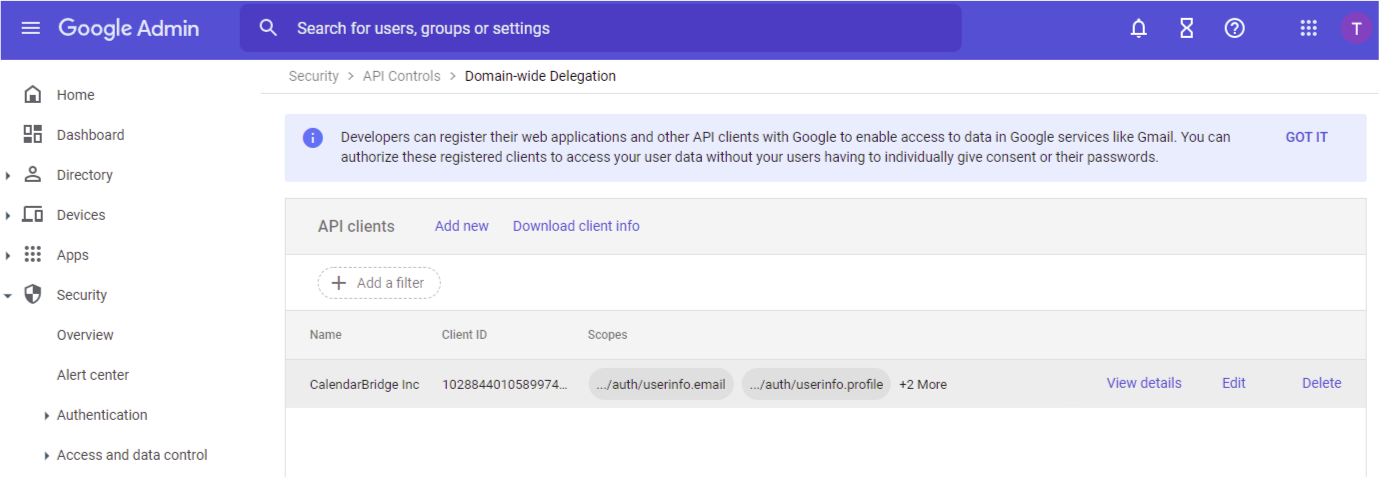
You should see the CalendarBridge service app in the listing:
CalendarBridge now has read and write access to all calendars on the tenant and you can proceed to add the authorized domains to your organization account.