Customize Your Assistant's Email Address
Put your AI scheduling assistant on your own domain. Instead of the shared CalendarBridge address, your assistant sends and receives from an address you choose — like Ava <ava@ai.yourcompany.com> — fully authenticated with DKIM and SPF.
A custom address is included on Pro plans for individual accounts. Organization admins can set one on any org assistant configuration from the Organization AI page — the panel and steps are identical. On other plans the panel shows an upgrade prompt.
You'll need two things: an assistant configuration that's already been created (see getting started with the AI assistant), and access to your domain's DNS settings at your registrar (GoDaddy, Cloudflare, Namecheap, Squarespace, or wherever your domain lives).
Pick your assistant's address
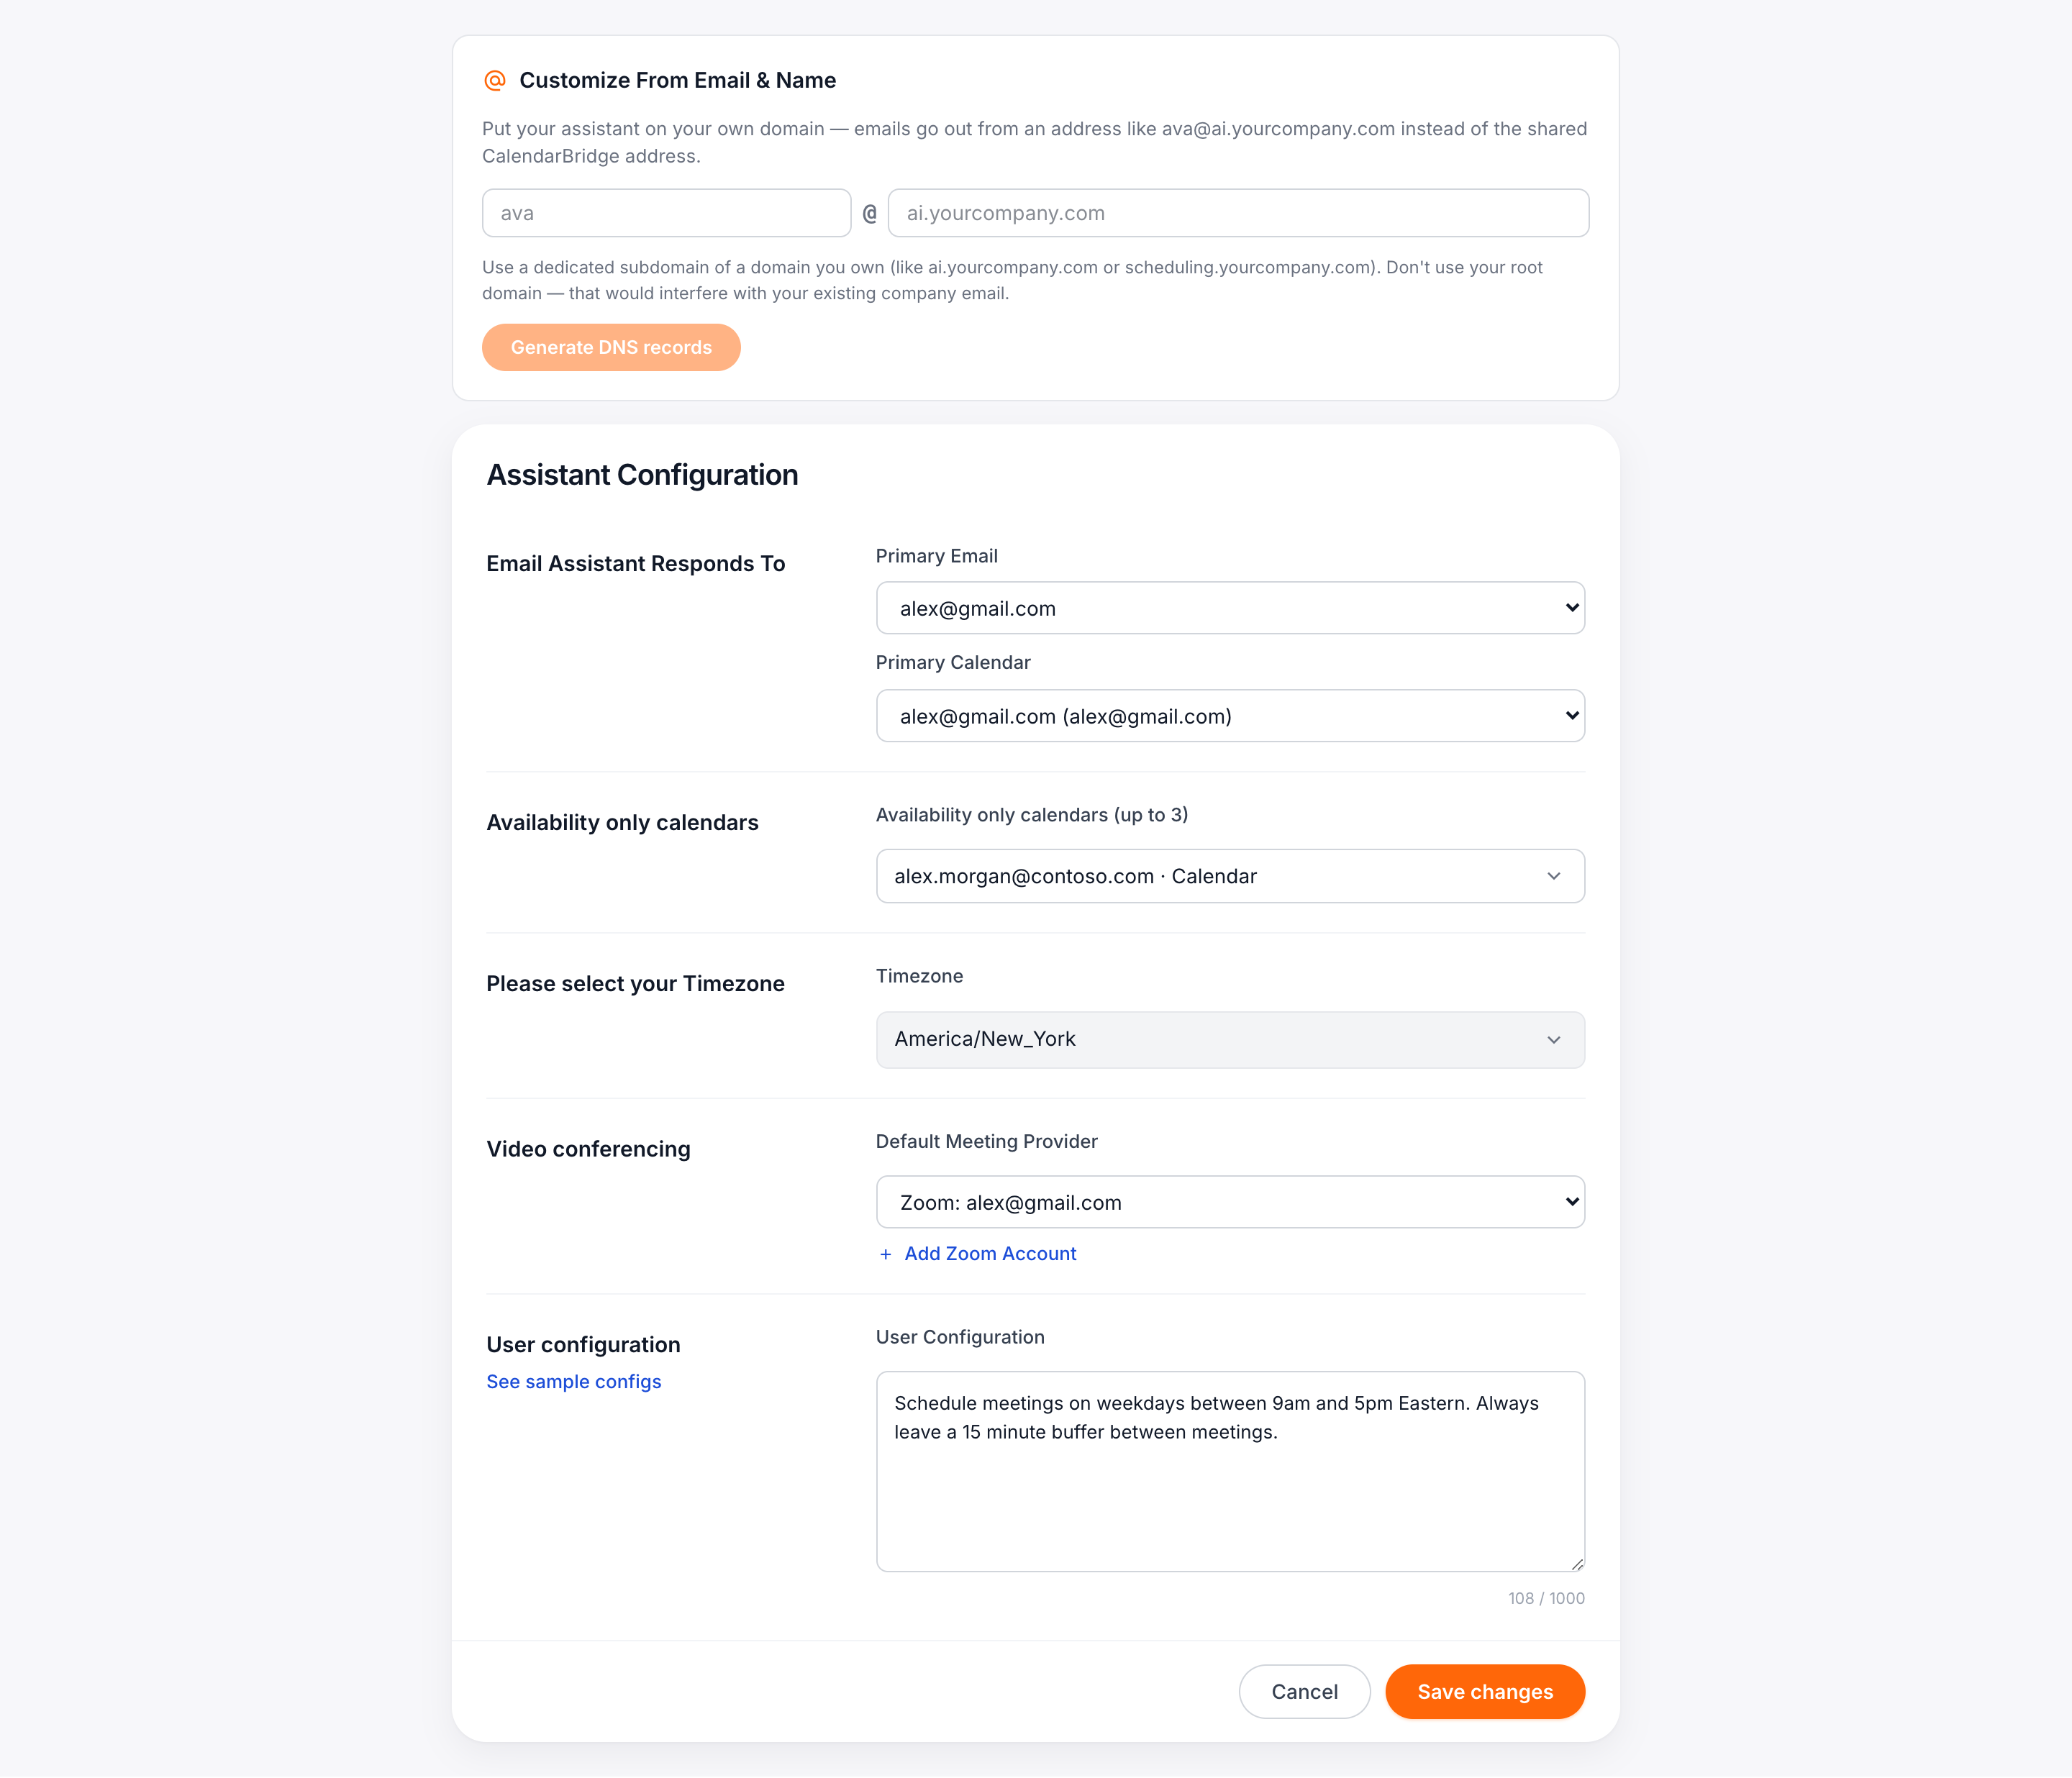
Go to AI Assistant in the dashboard and click Customize Email on your assistant's card (or Edit — the Customize From Email & Name panel sits at the top of the edit page).
Enter the address you want:
- The part before the @ is your assistant's mailbox name —
ava,scheduling,assistant, anything you like (lowercase letters, numbers, dots, dashes and underscores). - The domain must be a dedicated subdomain of a domain you own, like
ai.yourcompany.comorscheduling.yourcompany.com.
Click Generate DNS records. CalendarBridge creates the email identity for your subdomain and shows the DNS records you need to add.
Add the DNS records at your registrar
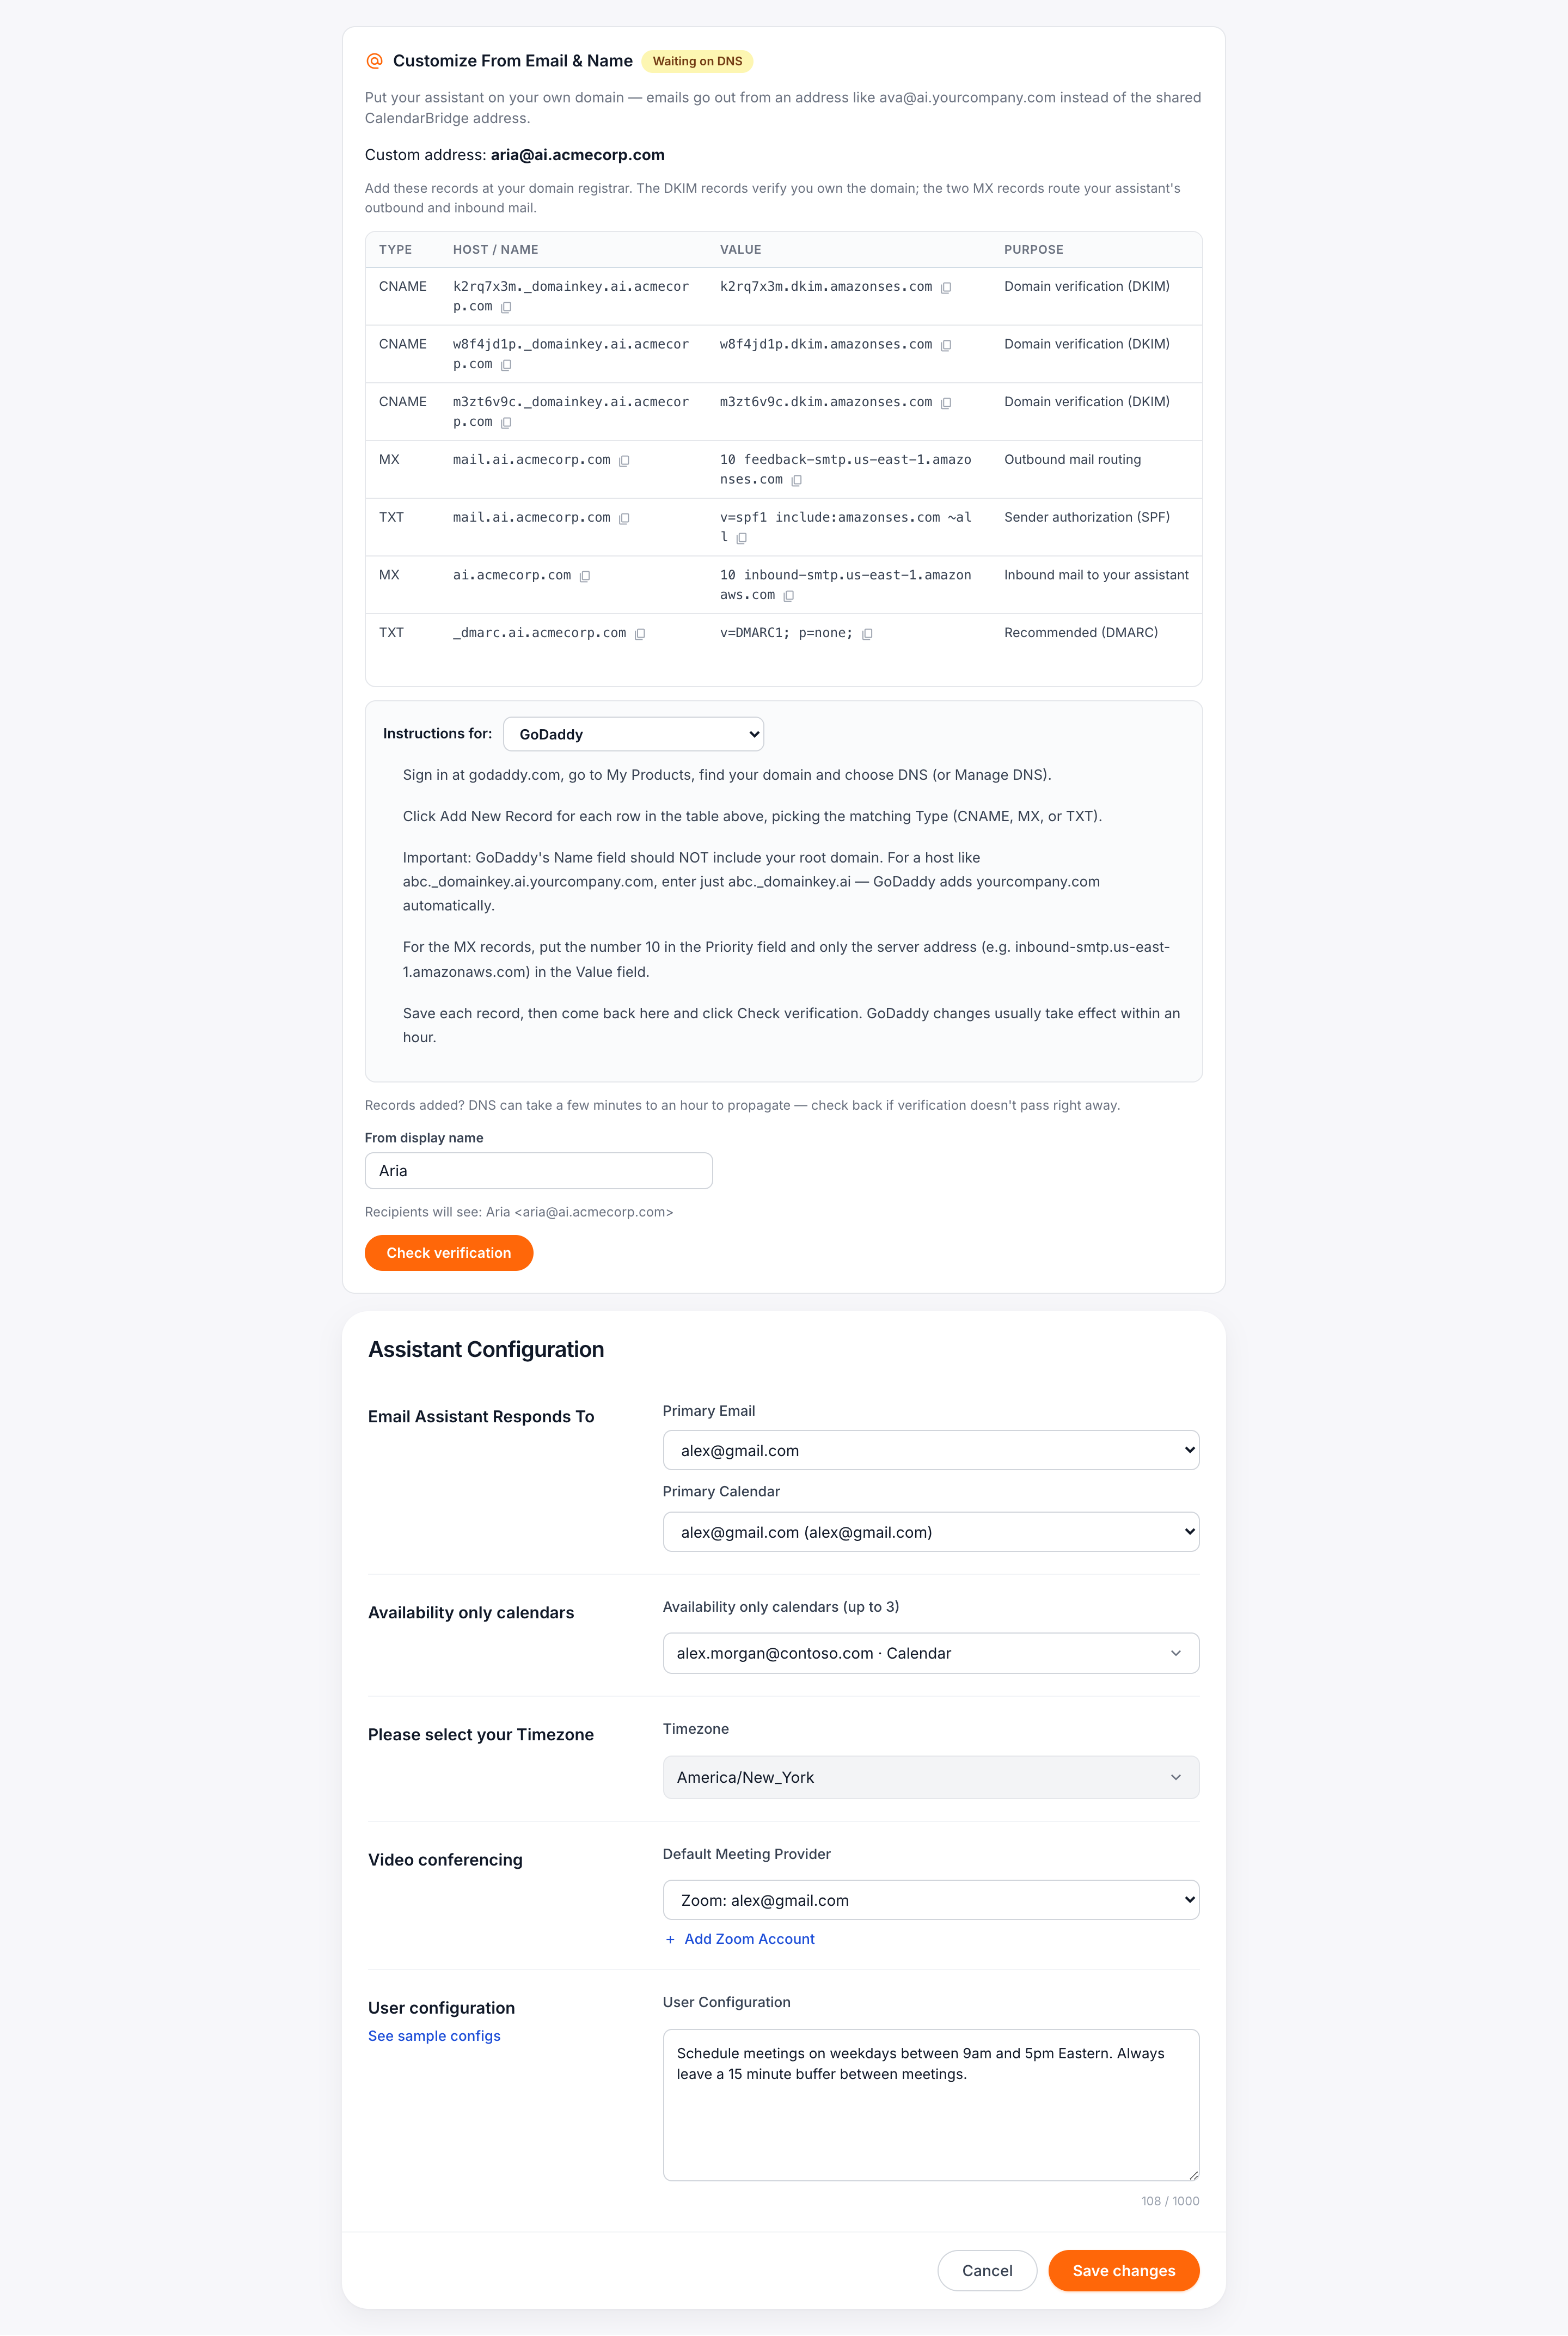
The panel lists every record with a copy button:
- 3 × CNAME — DKIM keys that verify you own the domain and cryptographically sign your assistant's mail.
- MX + TXT on
mail.<your subdomain>— outbound mail routing and SPF authorization. - MX on your subdomain — routes replies back to your assistant.
- TXT
_dmarc— a recommended DMARC policy record.
Below the table, choose your registrar from the Instructions for dropdown to get numbered steps for that provider: GoDaddy, Cloudflare, Namecheap, Squarespace / Google Domains, or a generic guide for anything else.
abc._domainkey.ai.yourcompany.com, enter just abc._domainkey.ai). On Cloudflare, CNAME records must be set to "DNS only" (grey cloud) — proxied records will never verify.Verify and set the From name
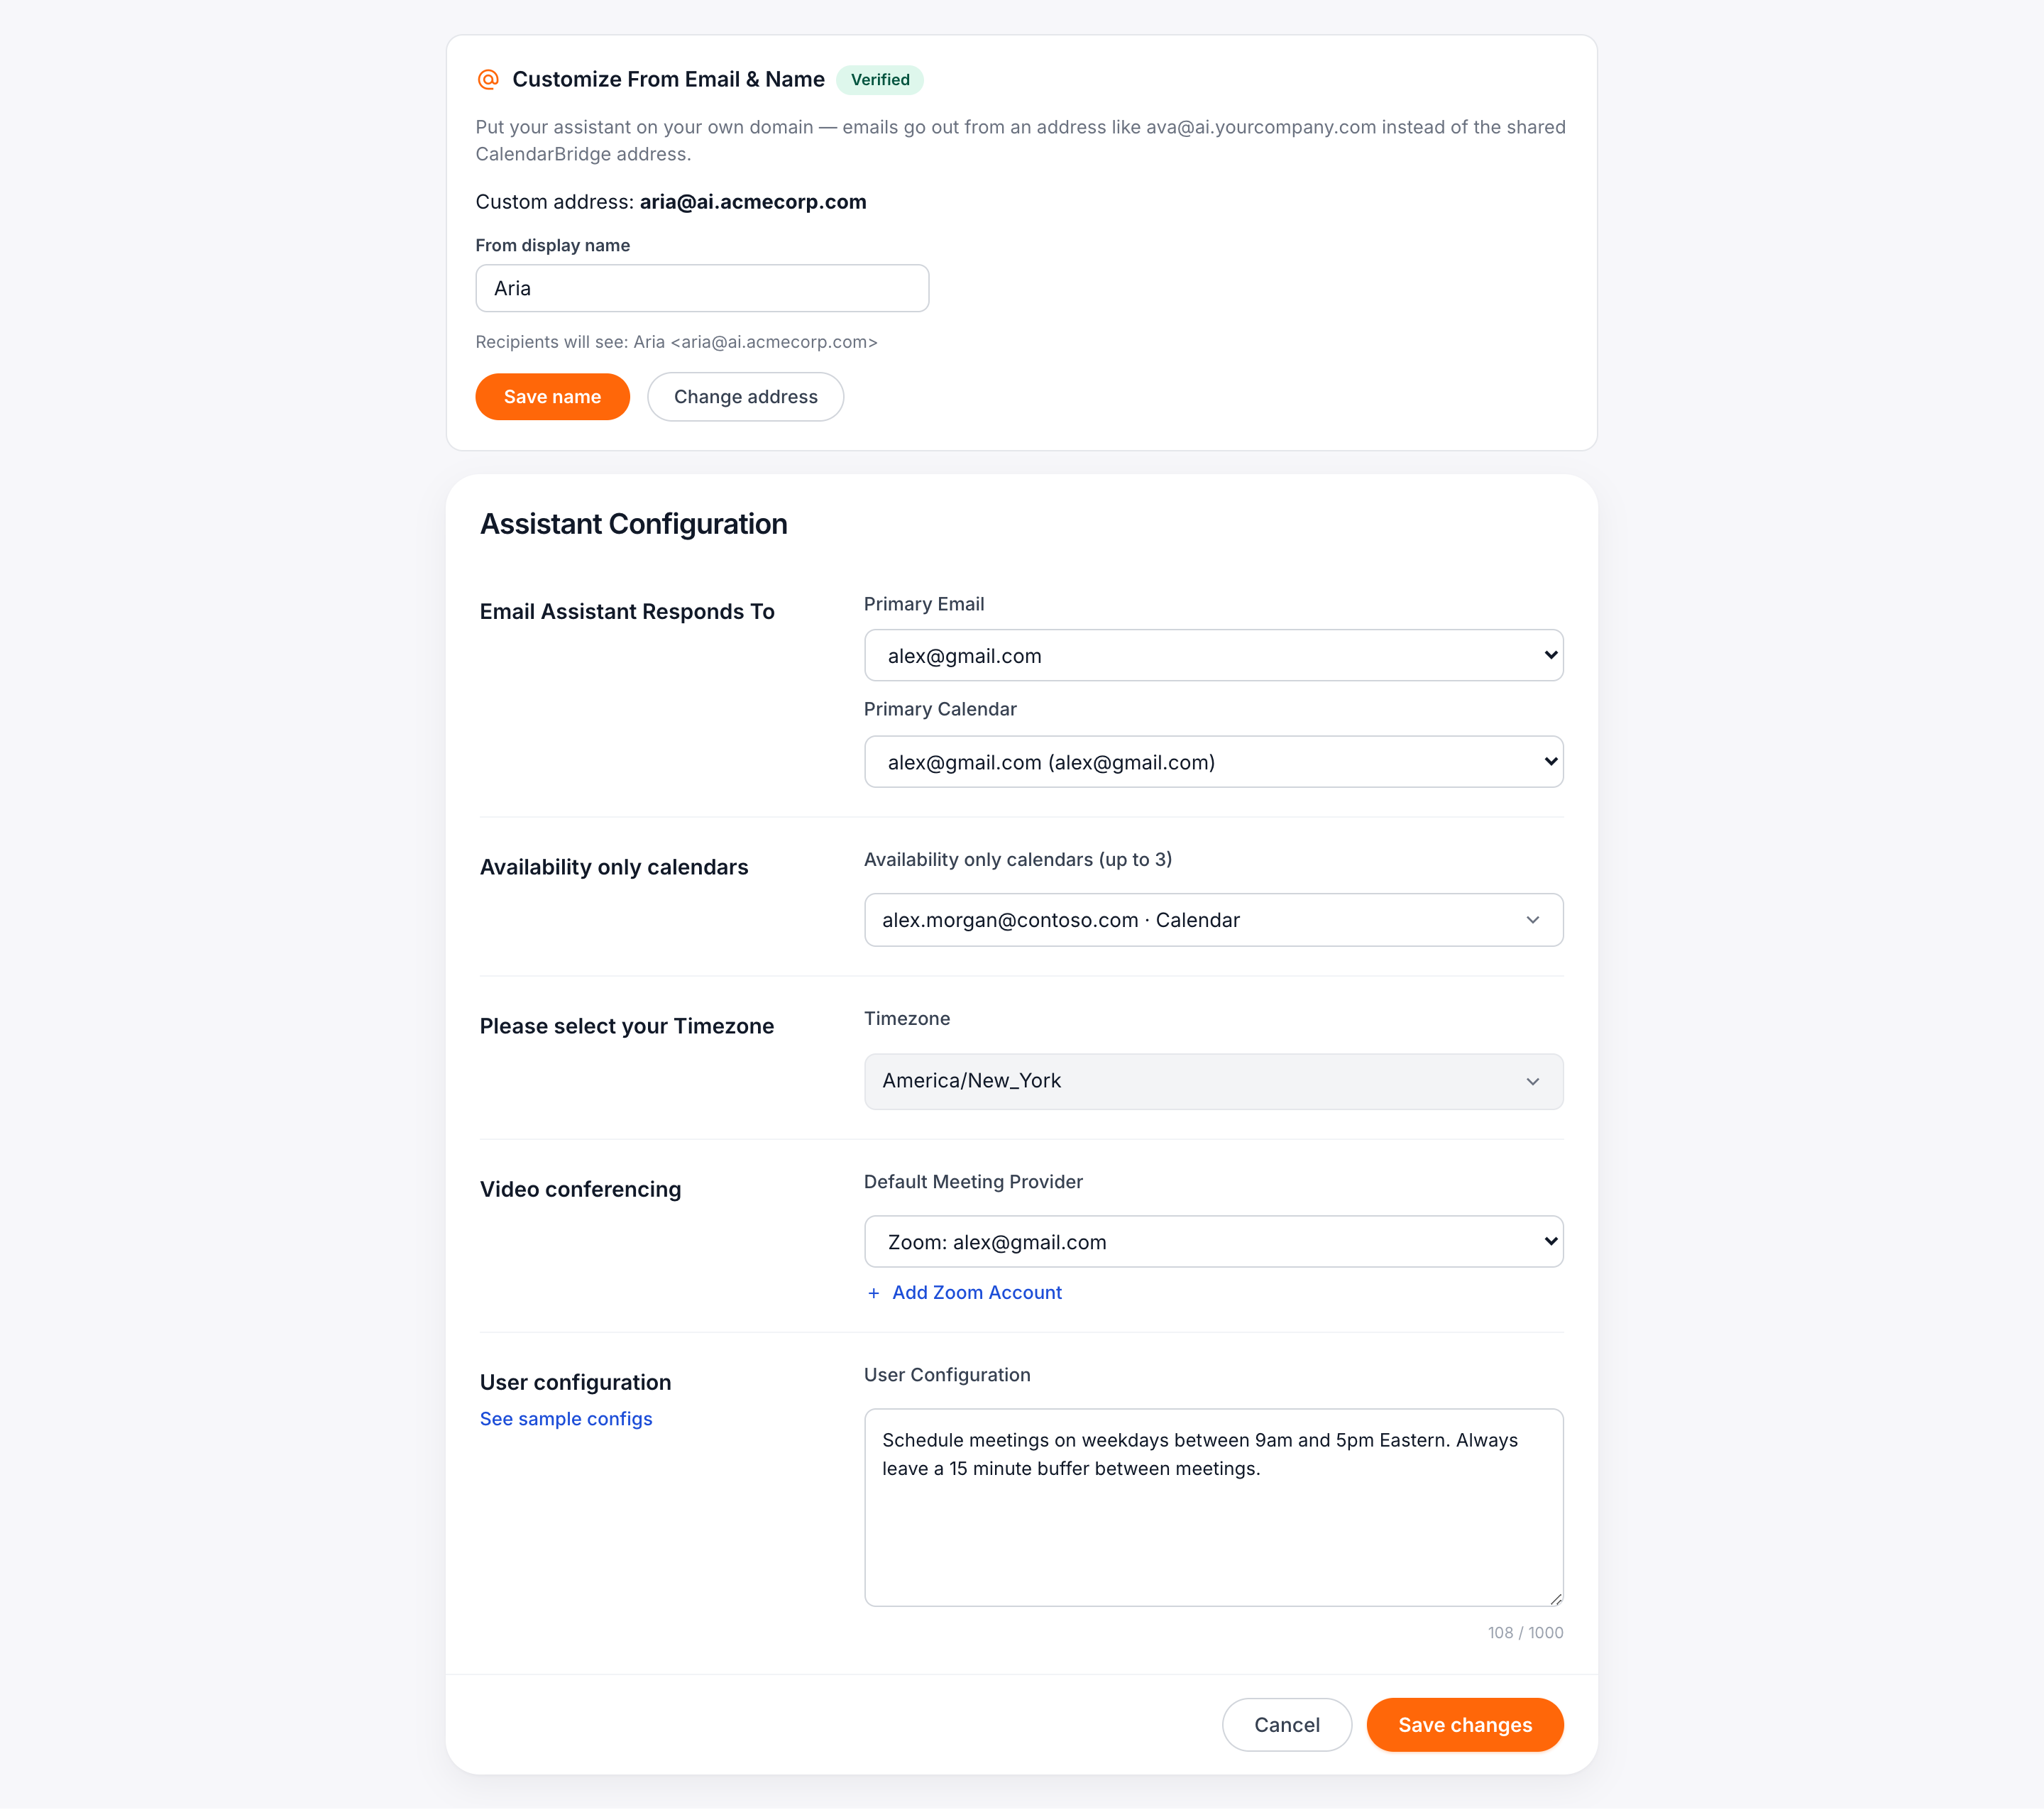
Once the records are saved at your registrar, click Check verification. DNS changes usually propagate within an hour (occasionally longer). When verification passes:
- the panel shows a Verified badge,
- your assistant's address switches to the custom one automatically, and
- inbound delivery to the new address is enabled — replies reach your assistant instantly.
Finally, set the From display name — what recipients see next to the address in their inbox. The preview shows the exact result, e.g. Ava <ava@ai.yourcompany.com>. You can change the display name any time without touching DNS.
DNS records reference
For a subdomain ai.yourcompany.com, the records look like this (your DKIM values are unique — always copy them from the panel):
| Type | Host | Value | Purpose |
|---|---|---|---|
| CNAME ×3 | <token>._domainkey.ai.yourcompany.com | <token>.dkim.amazonses.com | Domain verification (DKIM) |
| MX | mail.ai.yourcompany.com | 10 feedback-smtp.us-east-1.amazonses.com | Outbound mail routing |
| TXT | mail.ai.yourcompany.com | v=spf1 include:amazonses.com ~all | Sender authorization (SPF) |
| MX | ai.yourcompany.com | 10 inbound-smtp.us-east-1.amazonaws.com | Inbound mail to your assistant |
| TXT | _dmarc.ai.yourcompany.com | v=DMARC1; p=none; | Recommended (DMARC) |
Troubleshooting
- "Check verification" keeps saying waiting on DNS. Propagation can take up to an hour (rarely, up to 72 for DKIM). Double-check the Host fields: on GoDaddy/Namecheap they must not repeat your root domain, and a trailing dot or stray space will break a CNAME.
- Records look right on Cloudflare but never verify. The orange "proxied" cloud on a CNAME hides it from verification — switch each CNAME to DNS only.
- "Use a dedicated subdomain" error. Root domains (like
yourcompany.com) are rejected on purpose — see the note above. Create a subdomain instead. - "That domain is already configured with CalendarBridge." The subdomain is registered to another account (often an earlier manual setup). Contact support@calendarbridge.com and we'll sort it out.
- Switching from the shared address. Nothing breaks — existing conversations continue, and new messages go out from your custom address. Changing to a different custom address later re-runs the same DNS flow for the new subdomain.