Creating a Group Account
Step-by-step instructions for creating a group account with CalendarBridge.
Steps
-
Login / sign up with the account administrator’s email
Use the email address of the person who will administer the group account.
-
Go to the Billing page
In the left navigation, click Billing.
-
Click “Create Organization Group Account”
On the Billing page, click Create Organization Group Account. This takes you to the Create Organization page.
-
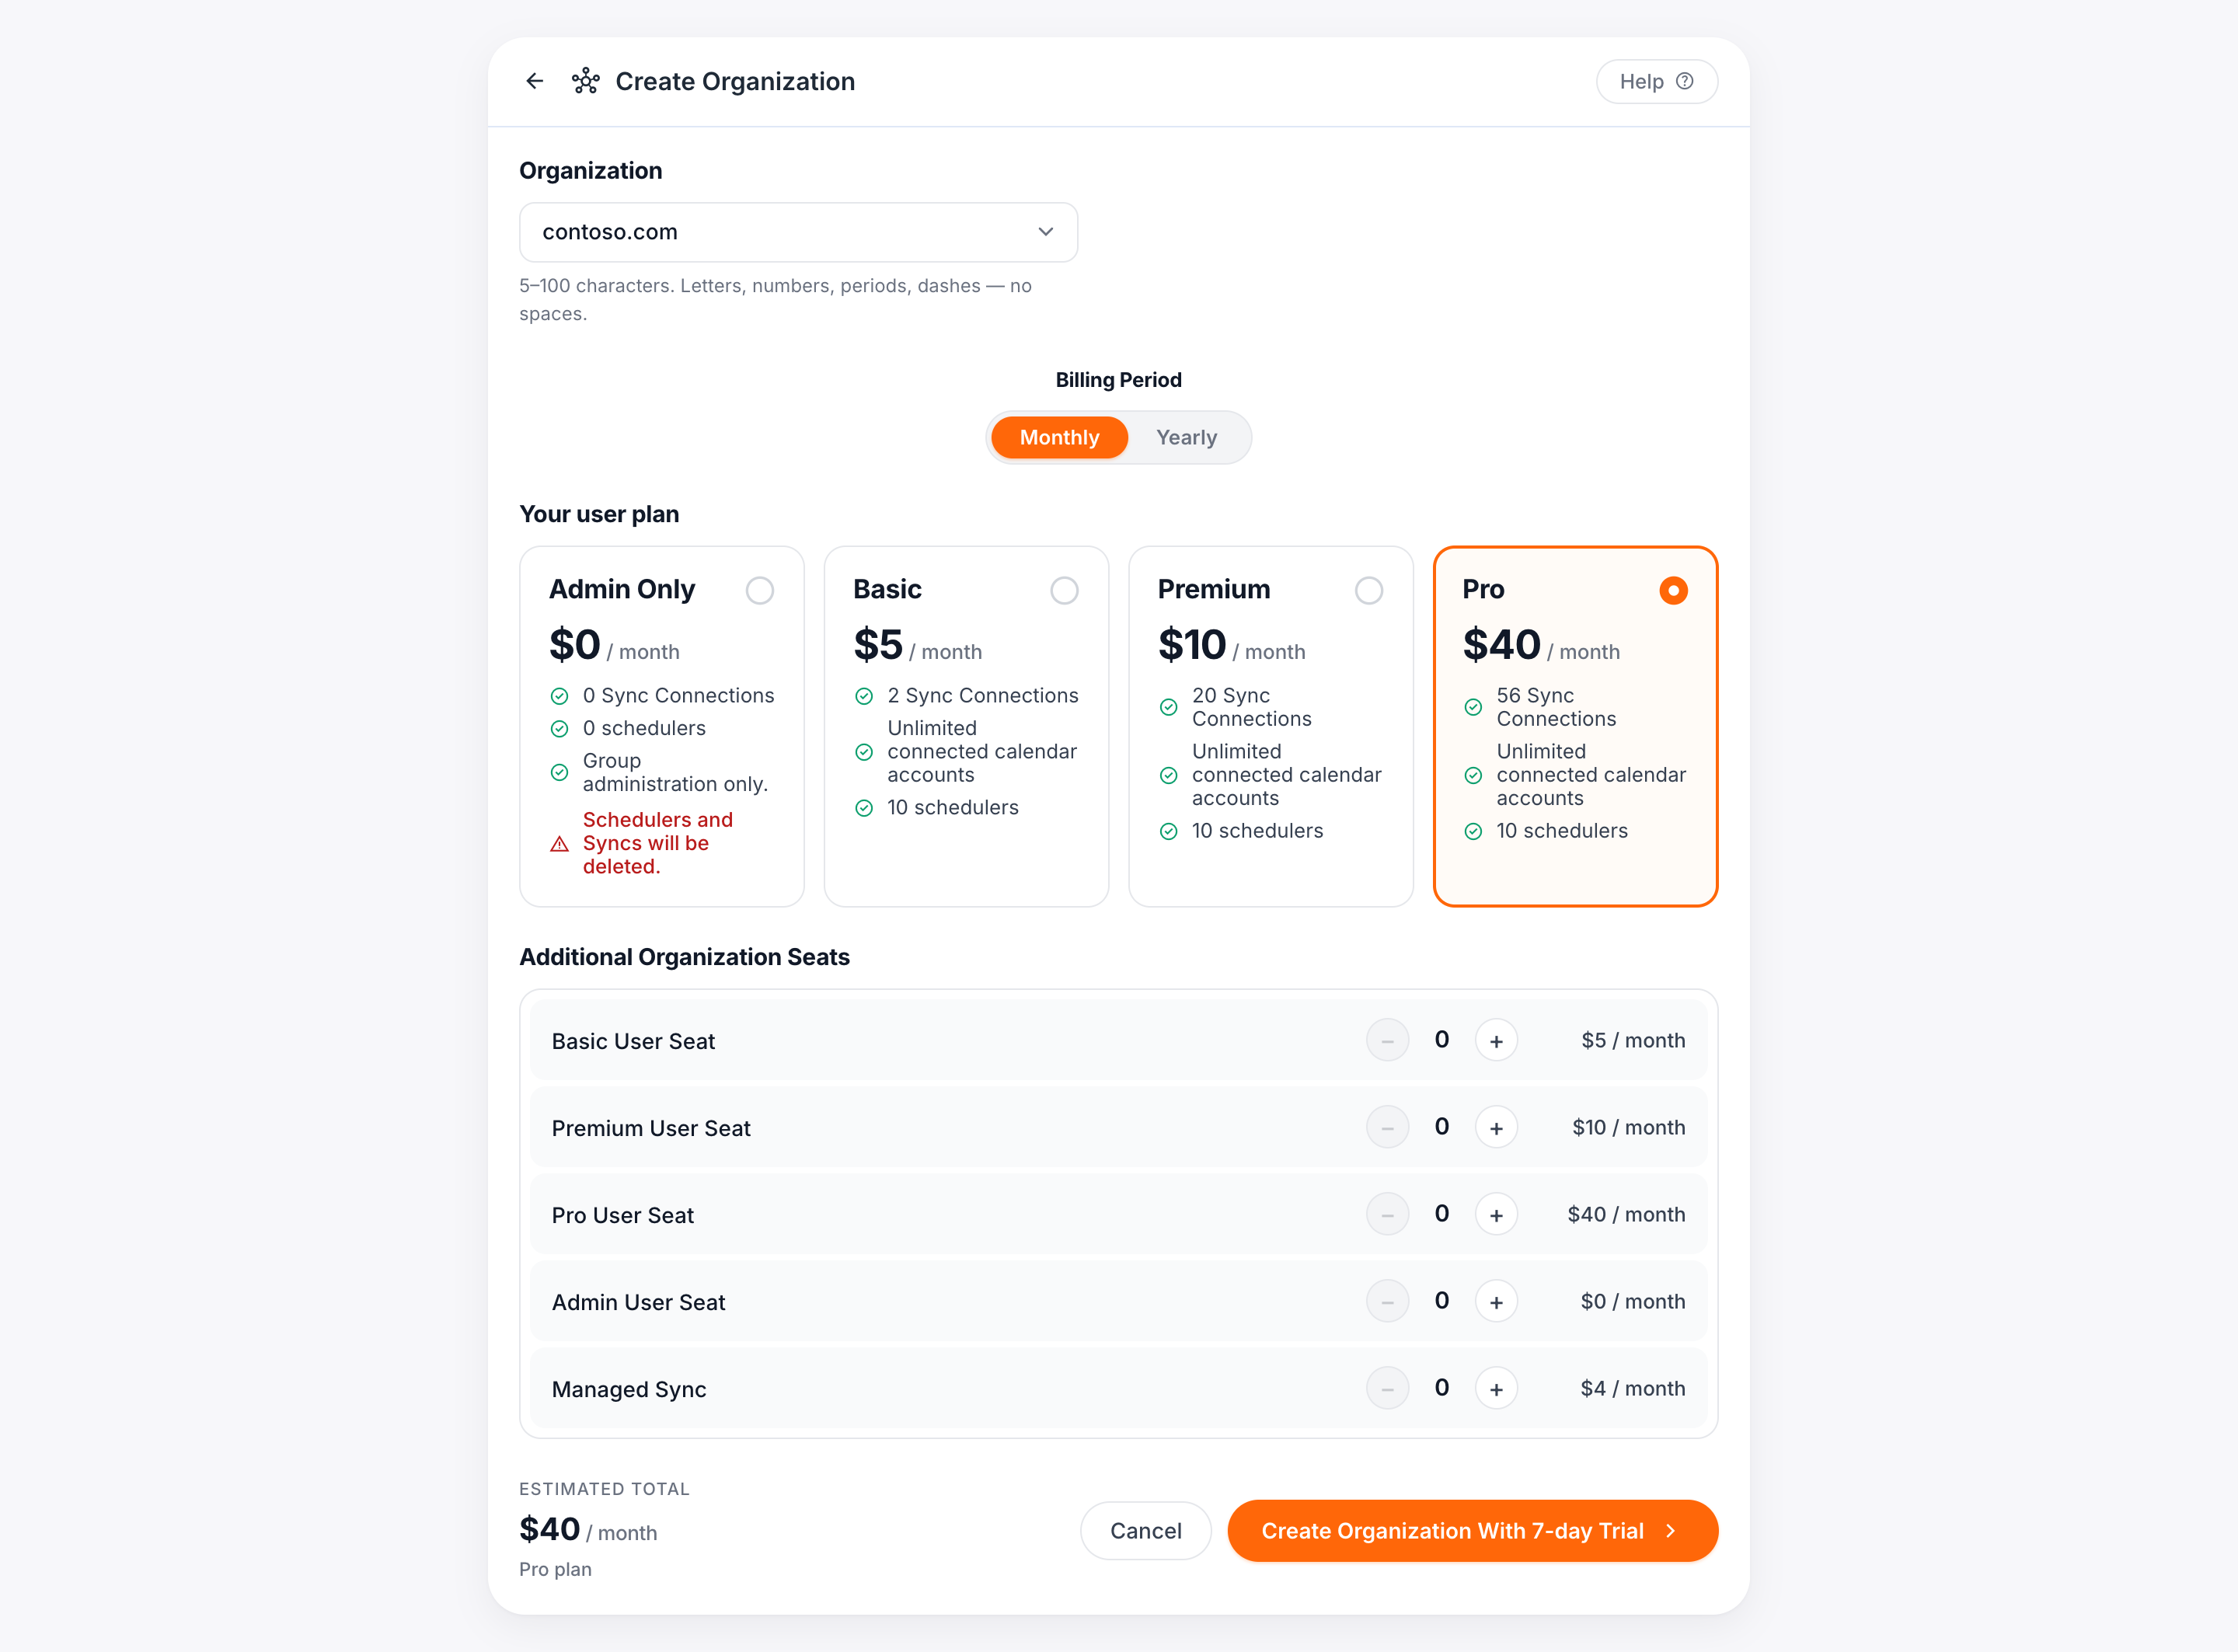
Select your organization ID
From the dropdown, select which of the domains of your connected accounts to use as your organization ID. Which domain you pick has no impact on the users or sync connections that can be created under the account.
-
Select your plan
Use the radio buttons to select your plan (i.e., the license for your user account).
-
Add additional seats
Use the ‘+’ and ‘−’ buttons to purchase additional seats / licenses that you can later assign to other users. You can add user licenses, sync licenses, or a combination. See Group Account License Types for the differences. Once the account is set up you can add seats for a prorated charge and remove seats for the next billing cycle — see Managing Group Licenses.
-
Click “Create Organization”
This takes you to the checkout page.
-
Use the back button to adjust seats (if needed)
If you need to adjust the number of seats, click the arrow at the top and make the changes on the previous screen.
-
Enter billing information
Enter credit/debit card number, expiration date, CVC, name on card, and billing address.
If you are in a country that requires a VAT ID on your invoice, check the “I’m purchasing as a business” box, then enter your business name and VAT ID.
-
Click Subscribe
This completes the purchase and charges the card.