Setting up Calendar Syncing
CalendarBridge now has two methods for setting up calendar syncing: create a single one-way sync connection, or sync multiple calendars in all directions at once.
CalendarBridge now has two methods for setting up calendar syncing:
Create a Single Sync Connection
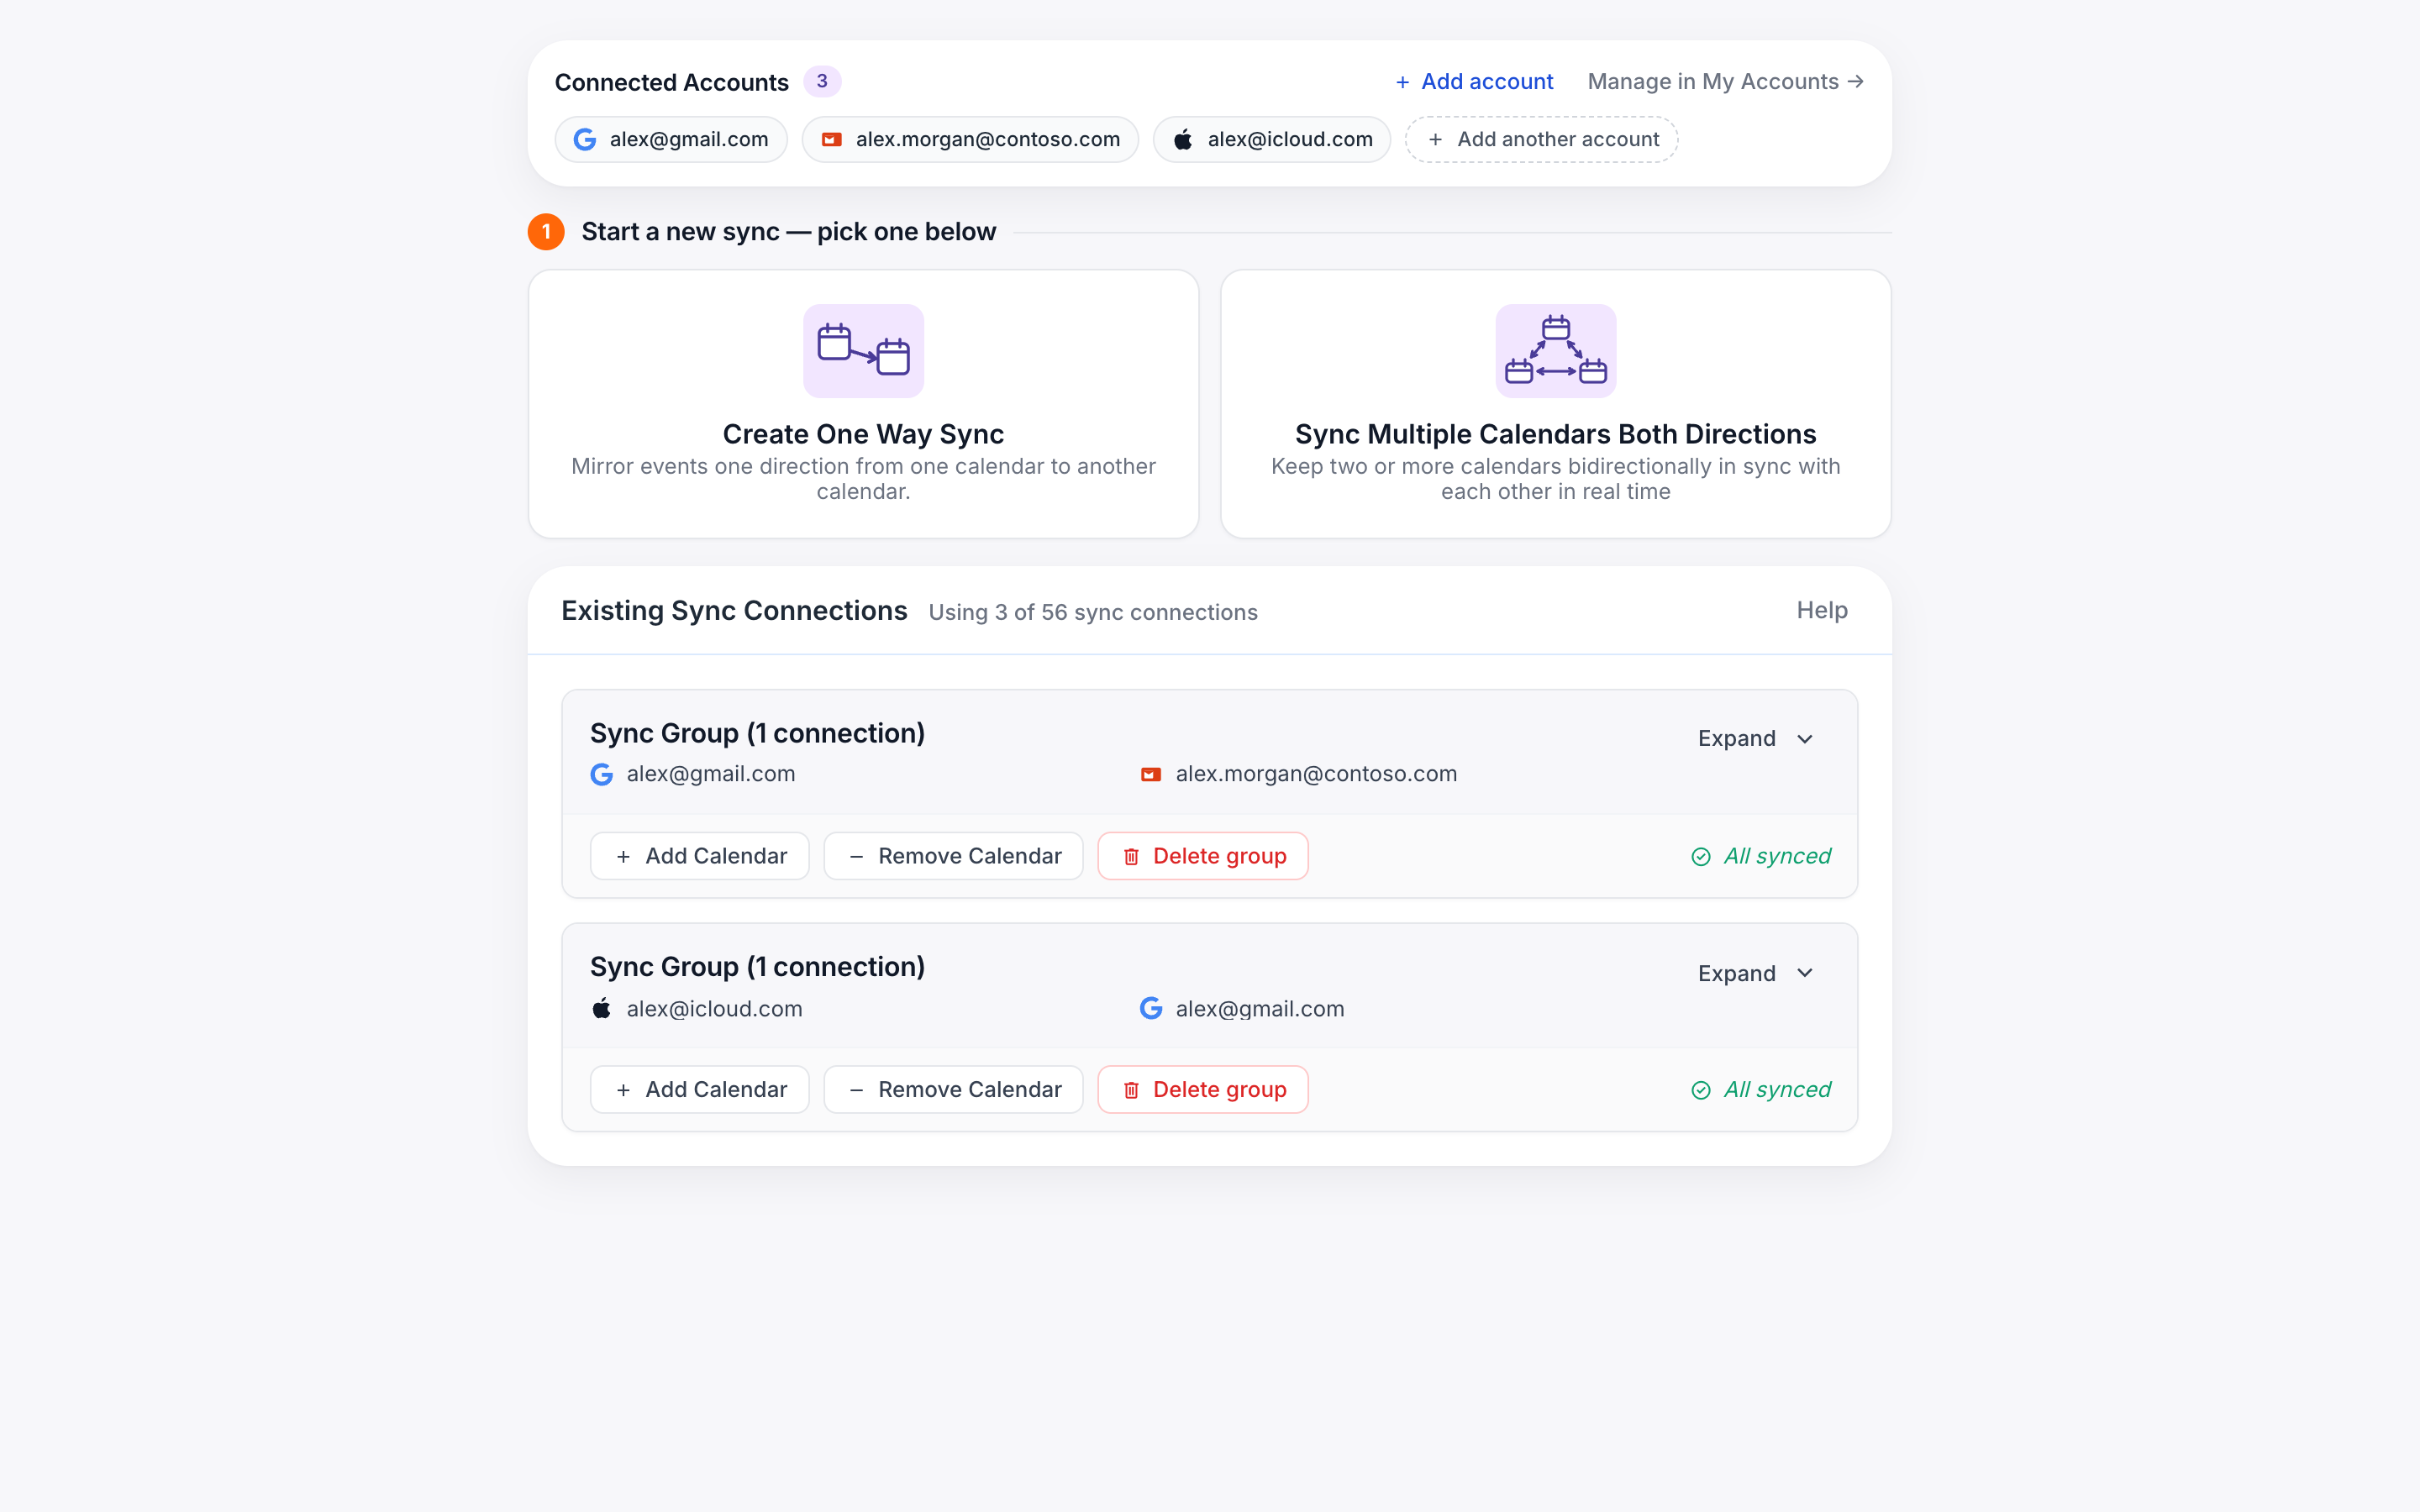
Select one single calendar that you want to be the source and one single calendar that you want to be the destination. Syncing will be setup in one-direction only.
Use this method if you want to sync from calendar A to calendar B but NOT sync in the other direction from calendar B to calendar A.
Sync Multiple Calendars
Select “Sync Multiple Calendars” if you want to sync in both directions between two or more calendars. It creates 2 sync connections between each pair of calendars in the selected group of calendars. So selecting 2 calendars creates 2 sync connections, selecting 3 calendars creates 6 connections, and so on.