Configuring SCIM Directory Sync (Provisioning)
Once single sign-on is active, CalendarBridge can automatically create, update, and deactivate user accounts from your identity provider using SCIM 2.0. This means users are provisioned the moment they are assigned in your directory and deprovisioned the moment they leave — no manual license management.
What SCIM provisioning does
SCIM (System for Cross-domain Identity Management) is the open standard identity providers use to push user lifecycle changes to applications. With SCIM enabled, your IdP sends CalendarBridge a request whenever a user is assigned, updated, or removed, and CalendarBridge keeps its user list in sync automatically.
- Standard: SCIM 2.0.
- Prerequisite: an active SSO configuration for the same verified domain. See Configuring Single Sign-On first — the SCIM section appears under each active SSO configuration.
- Who can configure it: only a CalendarBridge organization administrator.
- Operations: create user, update user attributes, and deactivate (deprovision) user.
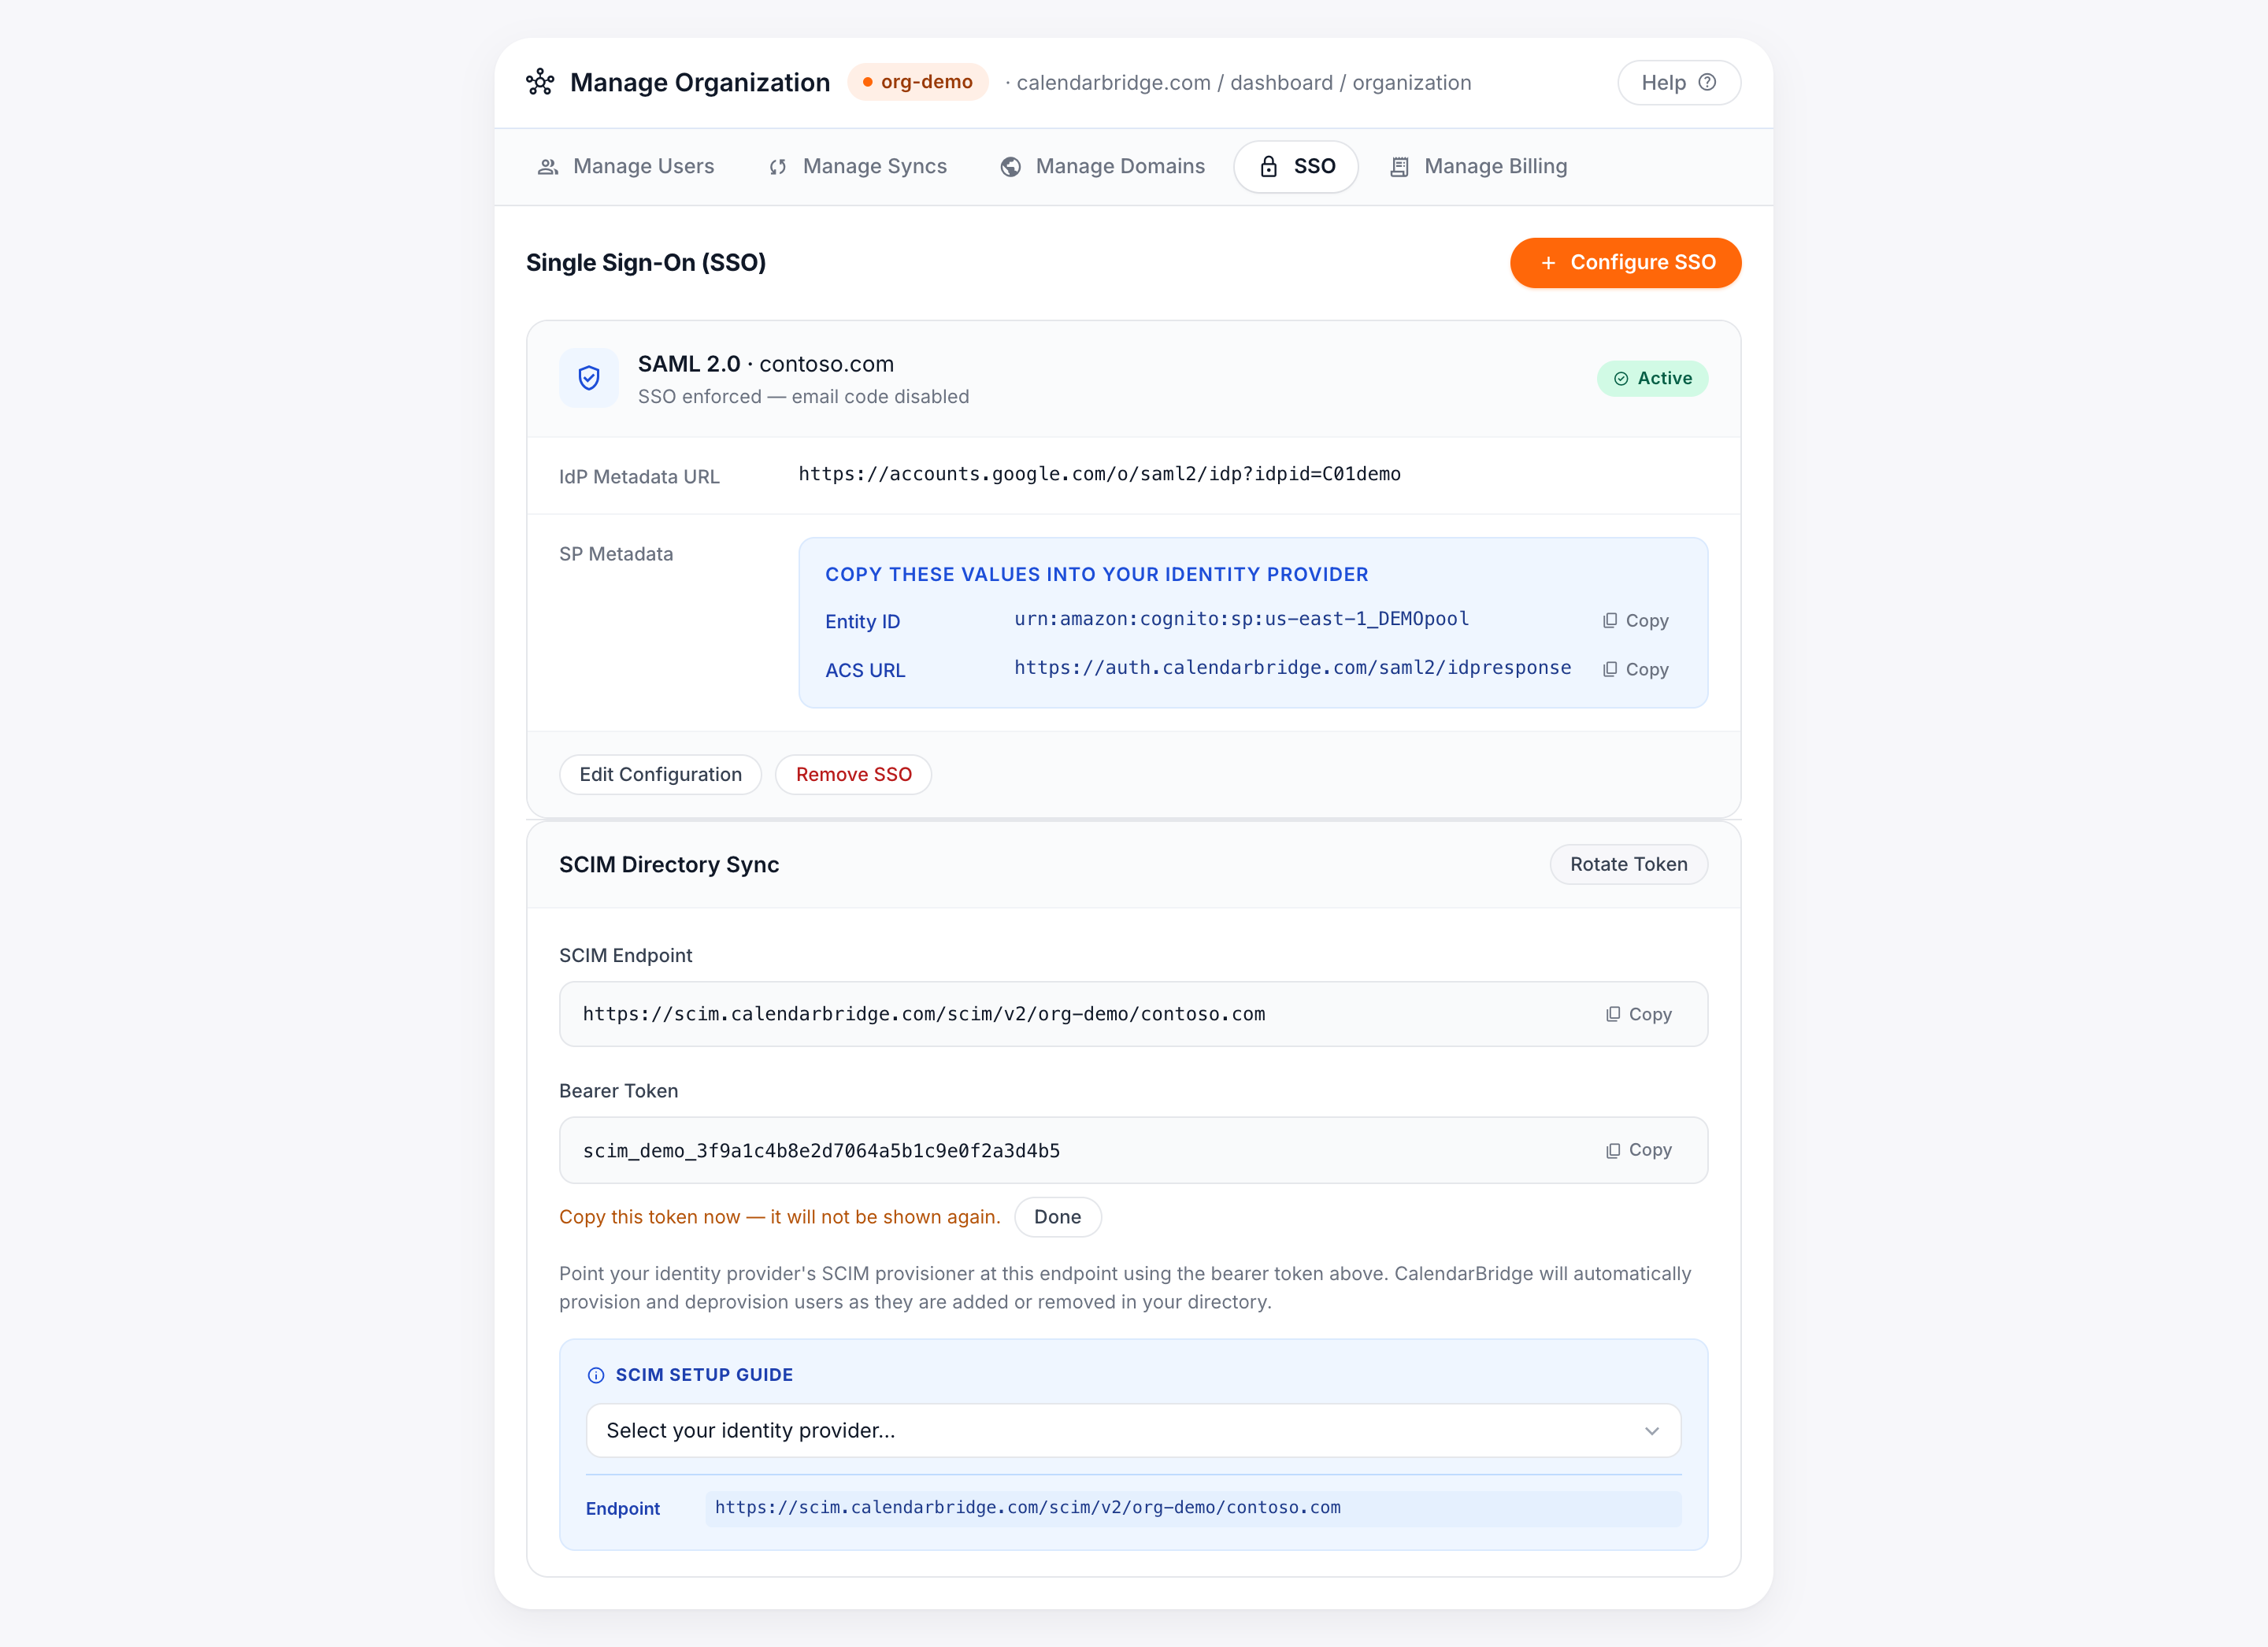
Your SCIM endpoint and token
When SCIM is enabled for a domain, the Single Sign-On tab shows two values your identity provider needs:
| Value | Description |
|---|---|
| SCIM endpoint (Base URL / Tenant URL) | The base URL your IdP sends SCIM requests to. Copy it from the SSO tab with the Copy button. |
| Bearer token (API token / Secret token) | The authentication token your IdP presents on every request. It is shown only once when generated or rotated — copy it immediately and store it in your IdP. |
Authentication
CalendarBridge authenticates SCIM requests with an OAuth 2.0 bearer token presented in the HTTP Authorization header. Enter the token in your IdP's SCIM connector exactly as shown (in Okta, do not include the word "Bearer" — Okta adds it). You can rotate the token at any time from the SCIM section without reconfiguring SSO.
Supported resources and attributes
CalendarBridge implements the SCIM 2.0 Users resource. The attributes CalendarBridge reads are listed below; additional attributes sent by your IdP are accepted and ignored.
| SCIM attribute | Maps to in CalendarBridge | Notes |
|---|---|---|
userName | User's unique login (email) | Required. Must be on a verified domain for the organization. |
emails[primary] / emails[work] | Email address | Used to match the user to your domain and SSO. |
name.givenName | First name | Populates the display name. |
name.familyName | Last name | Optional. |
active | Account enabled / disabled | Setting active=false deprovisions (deactivates) the CalendarBridge user. |
active=false (soft delete), which deactivates the user in CalendarBridge and frees their license. Re-assigning the user reactivates them.Enabling SCIM in your identity provider

Open the Single Sign-On tab, find the active configuration for your domain, and scroll to the SCIM section. Select your identity provider from the built-in guide for exact menu paths, then follow the steps for your IdP below. In every case you will paste the SCIM endpoint and bearer token from the portal.
Microsoft Entra ID (Azure AD)
-
Open the app's Provisioning blade
In the Microsoft Entra admin center, go to Enterprise applications, open your CalendarBridge app, and select Provisioning.
-
Set Provisioning Mode to Automatic
Then enter the credentials: Tenant URL = the SCIM endpoint from the portal; Secret Token = the bearer token from the portal.
-
Test Connection, then Save
Click Test Connection to confirm Entra ID can reach the endpoint and authenticate, then Save. Leave the default user attribute mappings.
-
Turn provisioning on and assign users
Set Provisioning Status to On and save. Under Users and groups, assign the users or groups to sync. Entra ID provisions them on its next cycle.
Okta
-
Open the Provisioning tab
In Okta Admin, open your CalendarBridge app, go to the Provisioning tab, and click Configure API Integration → Enable API integration.
-
Enter the SCIM credentials
Base URL = the SCIM endpoint from the portal; API token = the bearer token from the portal (without a
Bearerprefix). Click Test API Credentials, then Save. -
Enable provisioning actions
Under Provisioning → To App, enable Create Users, Update User Attributes, and Deactivate Users.
-
Assign users or groups
Assign users or groups to the app; Okta pushes them to CalendarBridge immediately.
Google Workspace
-
Open Auto-provisioning
In the Google Admin console, go to Apps → Web and mobile apps, open your CalendarBridge SAML app, and click Auto-provisioning.
-
Enter the SCIM credentials
Base URL = the SCIM endpoint from the portal; API token = the bearer token from the portal. Click Test connection.
-
Map attributes
Map Primary email → userName, First name → name.givenName, Last name → name.familyName.
-
Set scope and turn it on
Choose the users, OUs, or groups to provision, then toggle Auto-provisioning ON.
JumpCloud
-
Open Identity Management
In JumpCloud Admin, open your CalendarBridge SAML app and go to the Identity Management tab.
-
Enable SCIM and enter credentials
Base URL = the SCIM endpoint from the portal; Token = the bearer token from the portal. Click Test and Save.
-
Assign users or groups
Assign users or user groups to the app; JumpCloud syncs them to CalendarBridge.
Rotating the SCIM token
If a token is exposed, lost, or you simply want to rotate it on a schedule, click Rotate token in the SCIM section. The new token is shown once; the previous token stops working immediately, so update it in your IdP's SCIM connector right away to avoid a sync interruption.
Troubleshooting
| Symptom | Likely cause & fix |
|---|---|
| Test connection fails with 401 / unauthorized | The bearer token is wrong or was rotated. Copy the current token from the SCIM section (rotate if needed) and re-enter it. In Okta, make sure you did not add a Bearer prefix. |
| Users are not being created | Confirm provisioning is turned on and the users are assigned to the app in your IdP, and that their email is on a verified domain. |
| "User must exist on a verified domain" type error | The user's userName/email is on a domain that is not verified for this organization. Add and verify the domain, or limit provisioning scope to verified domains. |
| Removed users still have access | Deprovisioning happens when the IdP sends active=false. Make sure Deactivate Users (or your IdP's equivalent) is enabled and the user was unassigned, not just hidden. |
Getting help
If SCIM provisioning is not behaving as expected, contact CalendarBridge support with your organization's domain, your identity provider, and a description of what was assigned versus what synced.