Syncing Shared & Resource Calendars
How to sync Google resource calendars and shared calendars with CalendarBridge, starting by delegating the resource calendar to a user.
Google Resource Calendars
You must delegate the resource calendar to a user
The following steps need to be performed by someone with permissions to edit a resource calendar. The default is that these steps must be performed by a Super Admin of the Google Workspace tenant.
-
Log into Google Calendar as a Super Admin (or other admin that has been granted full access to resource calendars)
-
Click the gear at the top and go to “settings”
-
In the list of calendars on the left of the settings page, click the resource calendar to be synced. Then click “Share with specific people or groups”
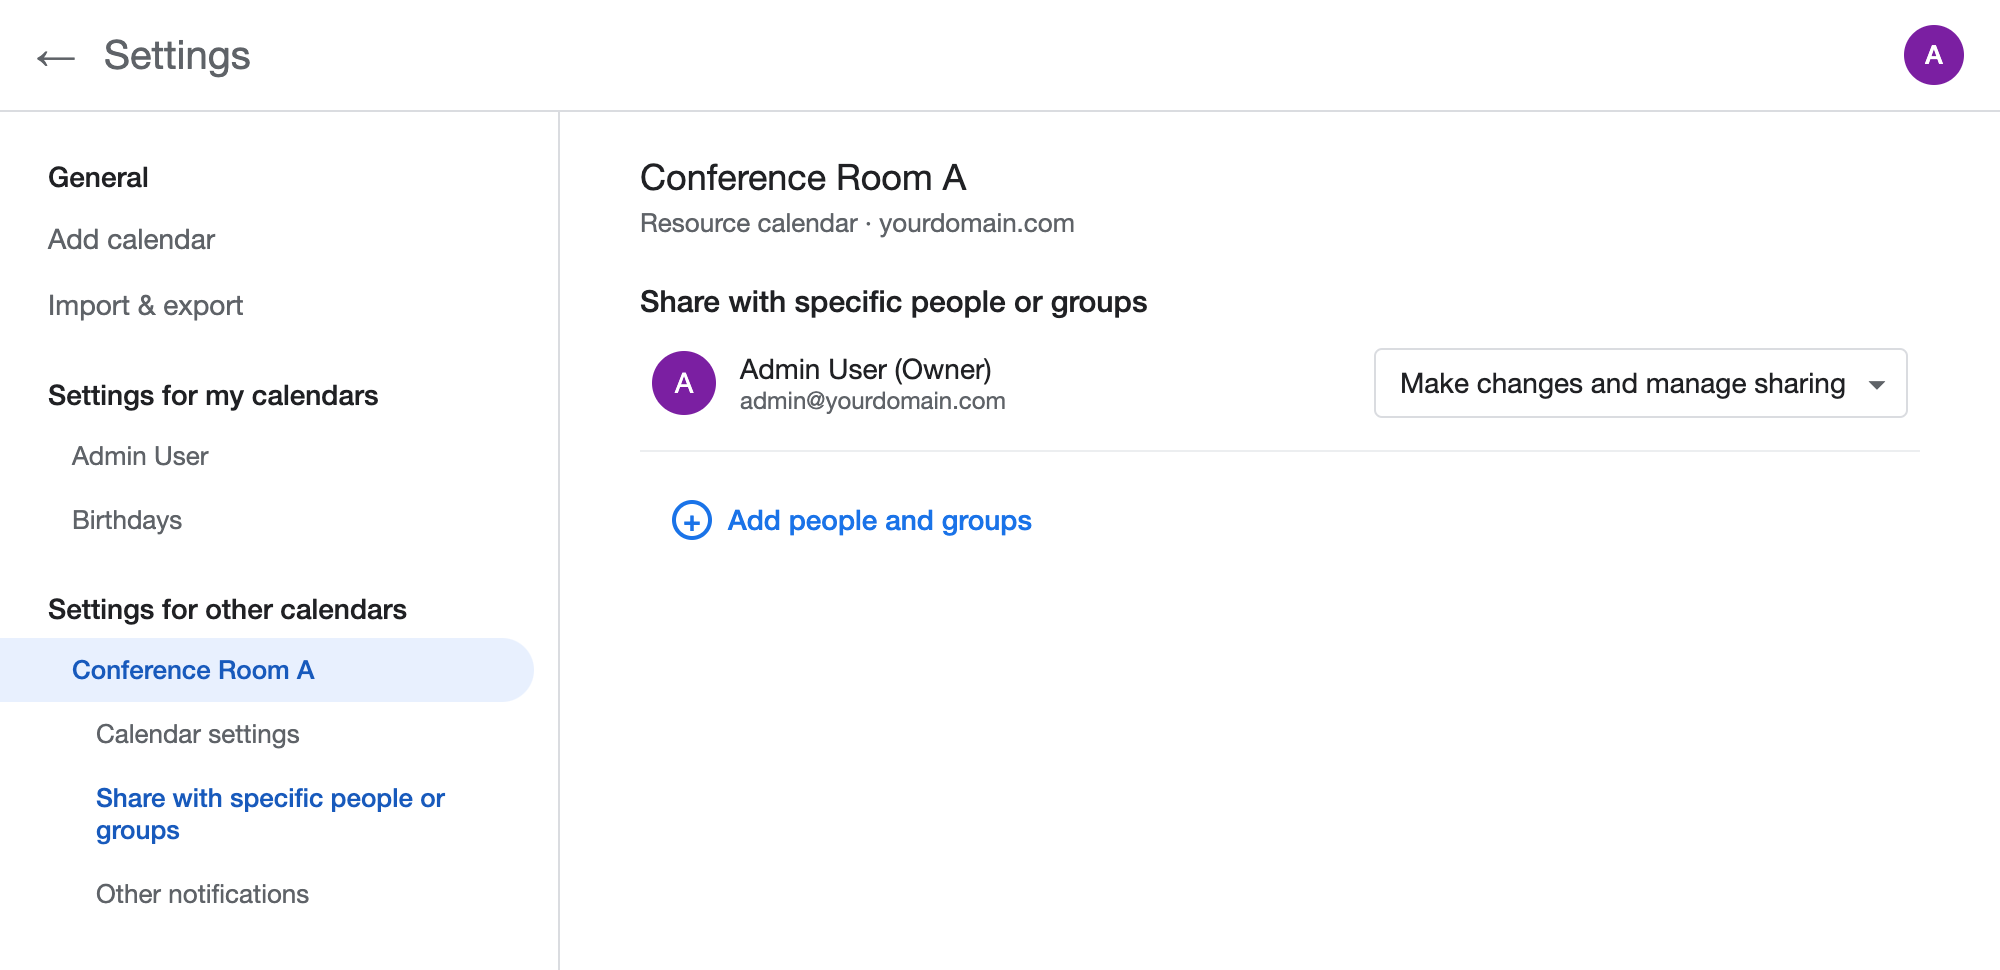
Google Calendar settings › the resource calendar › Share with specific people or groups. -
Click “Add people and groups” and share the calendar with the user who will set up the sync
Enter the email address of the user whose account will be connected to CalendarBridge, and set the permission to “Make changes to events” (or “Make changes and manage sharing”). This permission level is required for CalendarBridge to be able to sync to the resource calendar. Then click “Send”.
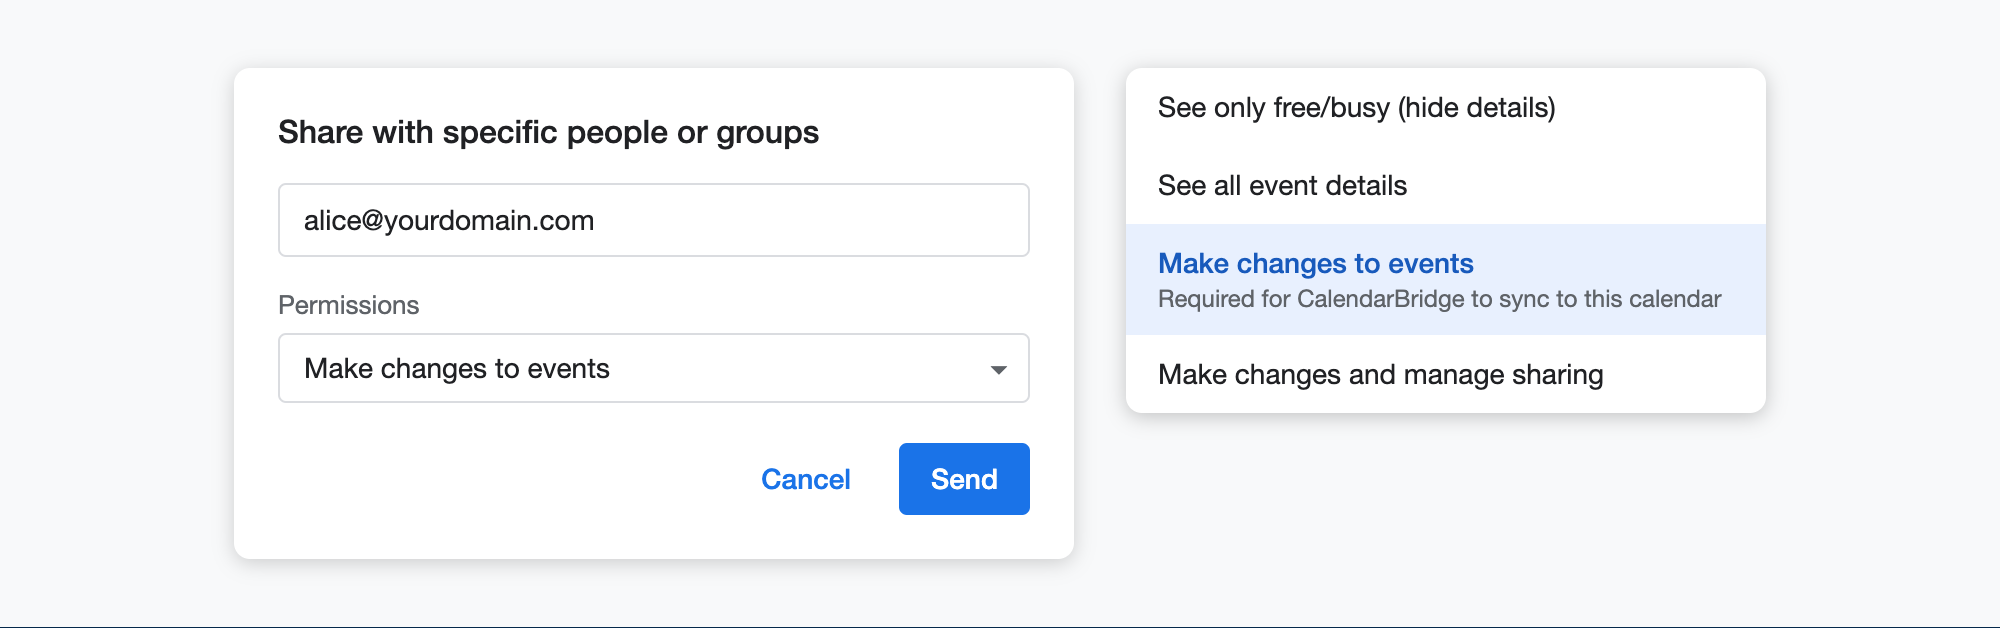
Share the resource calendar with “Make changes to events” permission. -
Have the user add the resource calendar to their calendar list
The user will receive an email notification that the calendar has been shared with them. After clicking the link in that email (or adding the calendar manually), the resource calendar will appear under “Other calendars” in their Google Calendar.
-
Create the sync in CalendarBridge
Connect that user’s Google account to CalendarBridge (if it isn’t connected already). The resource calendar will now appear in the calendar dropdown menus when creating a sync connection, and can be used as a source or destination calendar.
Google Shared Calendars
CalendarBridge can only sync a shared Google calendar if it was shared such that the recipient is permitted to view calendar details. What CalendarBridge can do with the shared calendar depends on the sharing permission level:
- “Make changes to events” or “Make changes and manage sharing” — CalendarBridge can sync to and from the shared calendar when accessing it via the recipient’s Google account.
- “See all event details” — CalendarBridge can only sync from (not to) the shared calendar. This is indicated by a red “Read only” icon next to the calendar in the drop down menu of the “Select source calendar” step. The calendar will not show up in the dropdown menu of the “Select destination calendar” step.
- “See only free/busy (hide details)” — the shared calendar is not available for syncing, and will not show up in the recipient’s list of calendars in CalendarBridge.
To change the permission level, the calendar’s owner can update the share under “Share with specific people or groups” in their Google Calendar settings.
Microsoft Shared and Resource Calendars
For group plans using Managed Syncs
You can directly use the email address of the resource / conference room when creating the sync connection in the manage syncs panel.
For individual plans and group plans using Managed Users
To sync resource calendars, you first need to share that calendar (with edit permission) with a user. Then that user will be able to create a sync connection involving the resource calendar. The detailed instructions below require an Exchange administrator. (In the examples, the user support@yourdomain.com is being given access to the Conference Room calendar.)
-
Give the user delegate access to the resource in the Exchange admin portal
This will enable the user to log in as the resource and share the calendar.
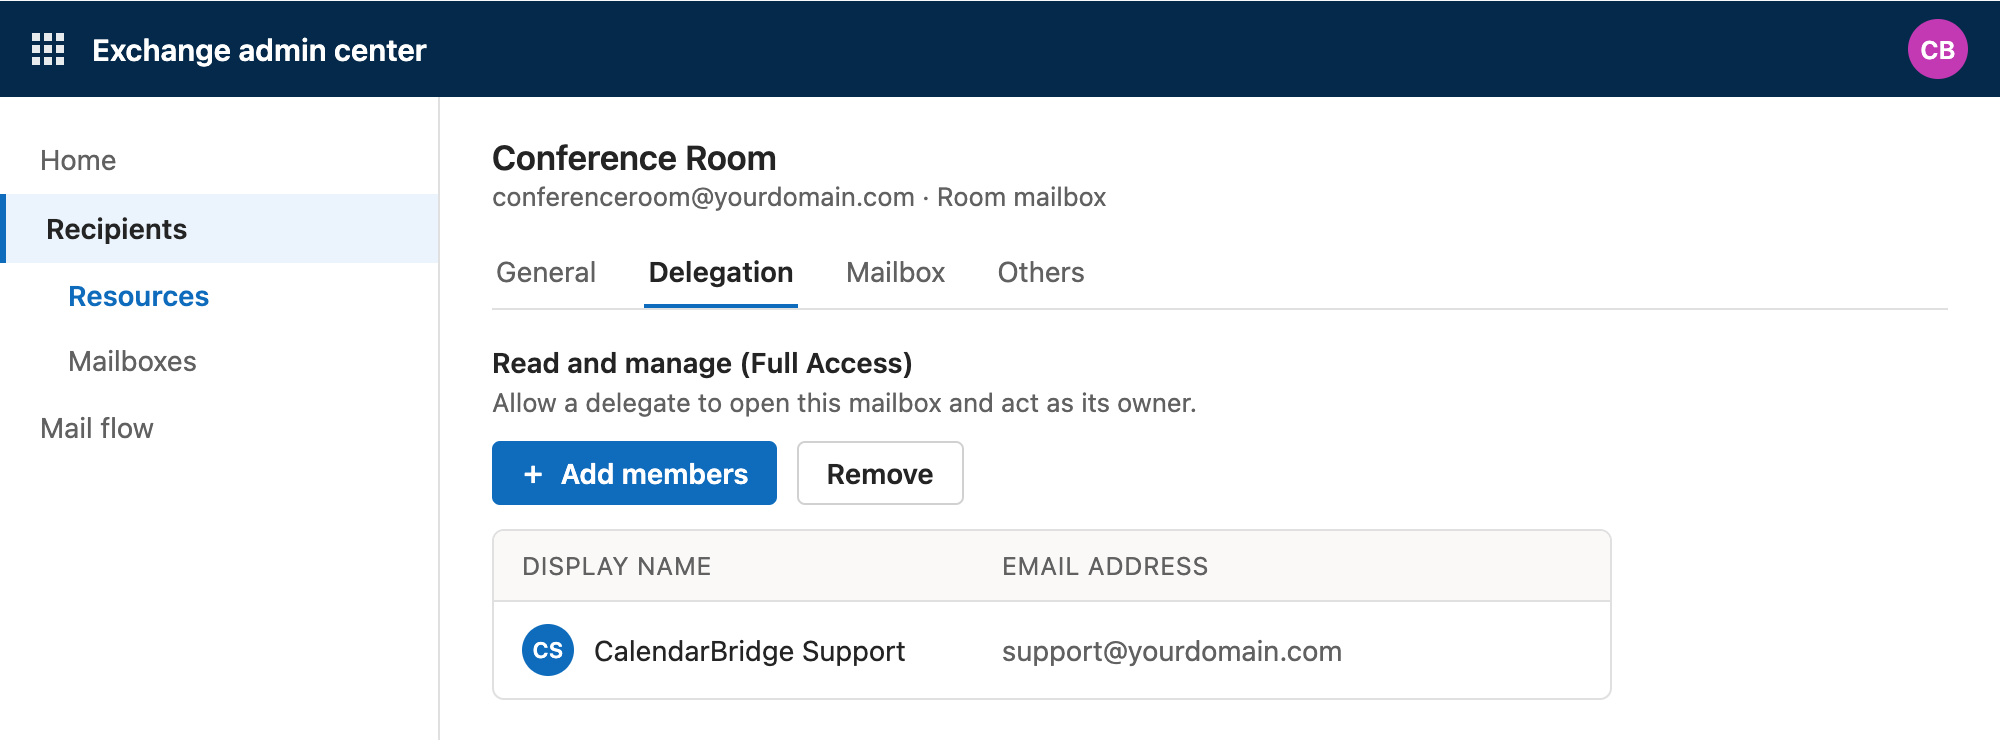
Exchange admin center › Recipients › Resources › the resource › Delegation. -
Log in to Outlook on the web as the delegate user
Use the account of whoever was given delegate access to the resource.
-
Click the profile picture and click “Open another mailbox”
Type in the email address of the resource to log in “as” the resource.
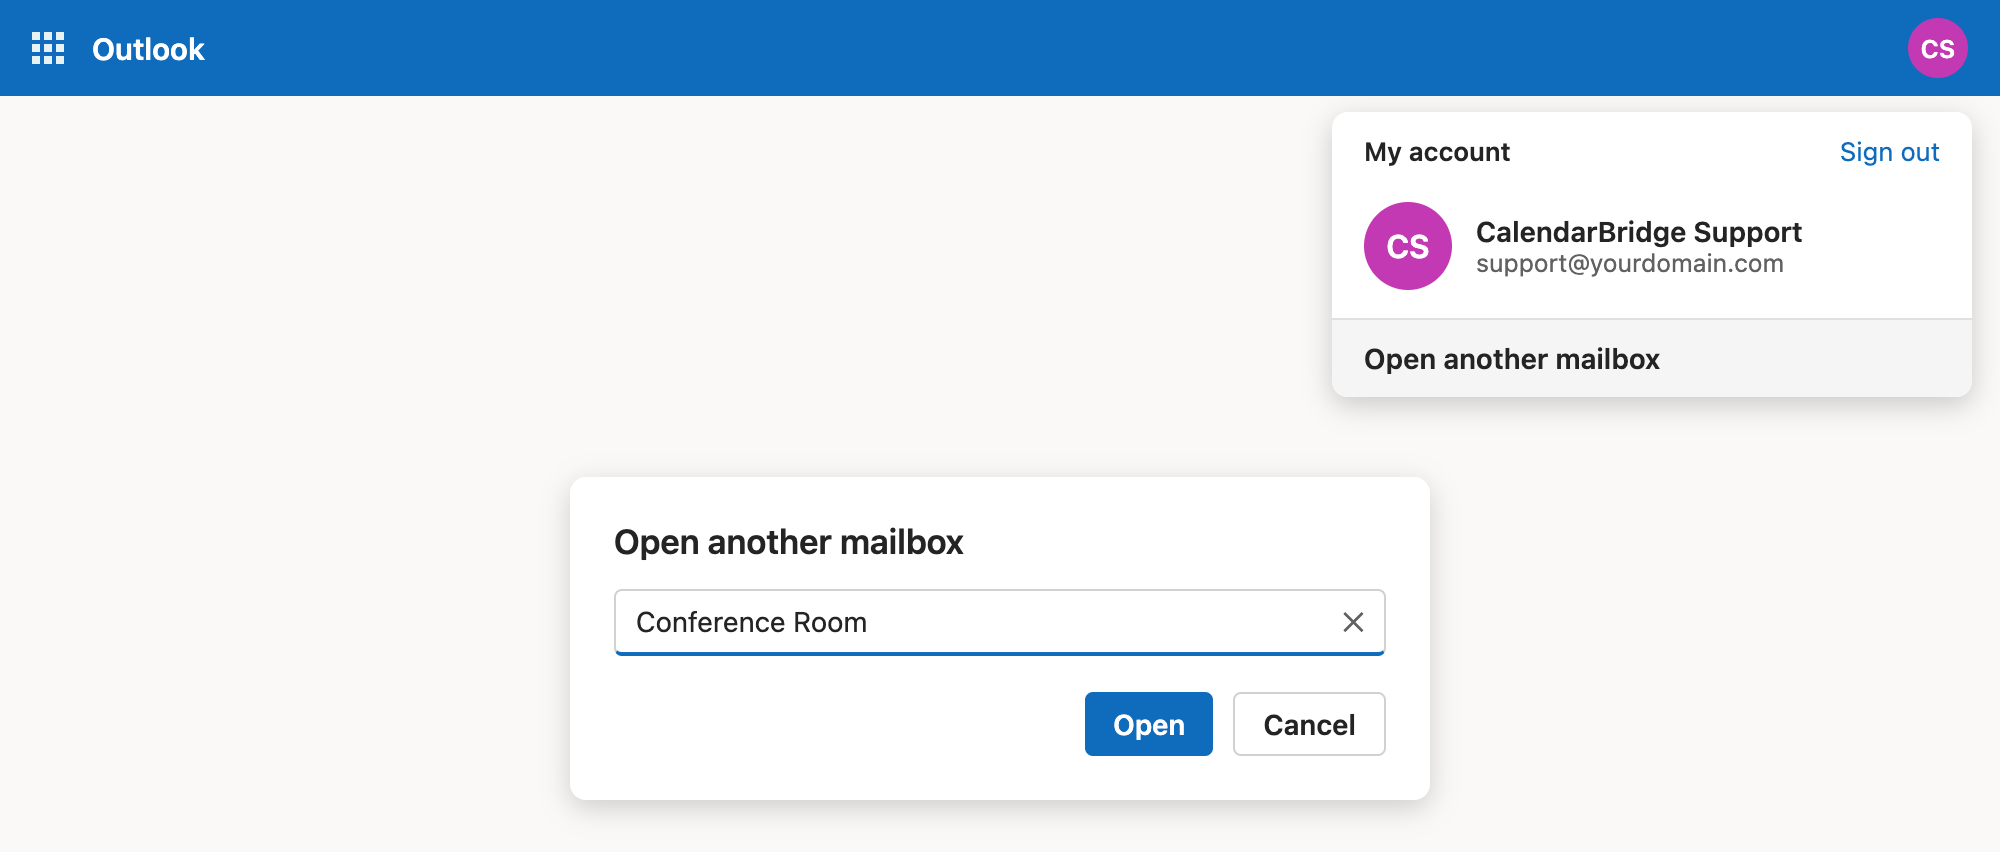
Outlook on the web › profile picture › Open another mailbox. -
Share the resource’s calendar with the sync user
Once logged in as the resource, go to the calendar tab, click the three dots next to the calendar, and select “Sharing and permissions”. Within the sharing and permissions window, share the calendar (with “Can edit” permission) with the user whose account will be used to set up the sync connection.
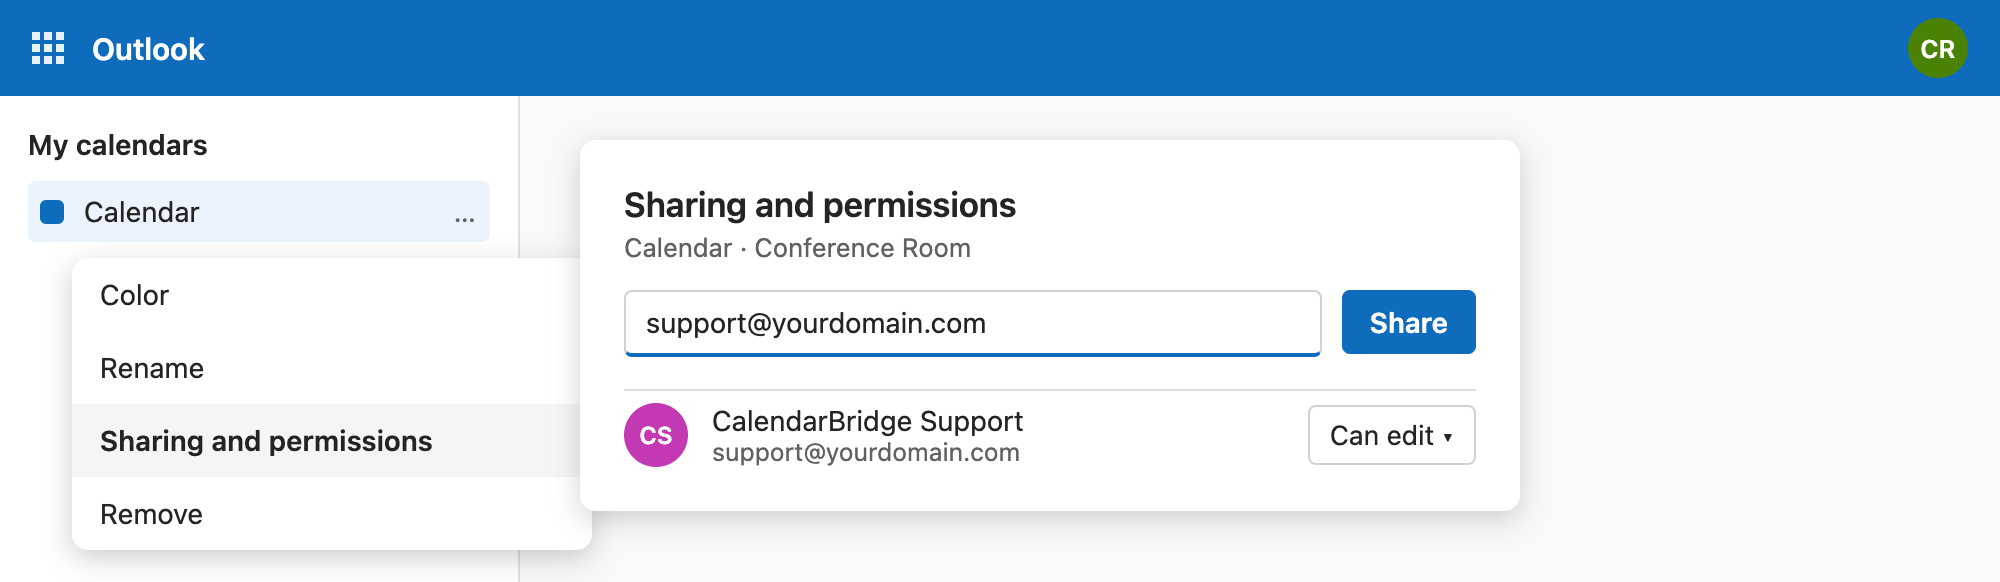
Calendar › … › Sharing and permissions › share with the sync user. -
Accept the sharing invitation as the sync user
Go back / log in to Outlook as the user with whom you just shared the calendar and accept the sharing invitation. The resource calendar now shows up in that user’s list of calendars.
-
Create the sync in CalendarBridge
Connect that user’s Microsoft account to CalendarBridge (if it isn’t connected already). The resource calendar will appear in the calendar dropdown menus when creating a sync connection.
Shared Microsoft calendars work the same way: once a calendar has been shared with a user with edit permission and the user has accepted the share, it can be used in sync connections from that user’s account. Calendars shared with view-only permission can only be used as a source (read-only) calendar.