Getting Started with Managed Users
How to set up a group account and add users — assigning a license and access-control policy, adding or delegating calendar accounts, and (optionally) blocking the AI scheduling assistant and MCP access for a user.
Steps
- Follow the steps in Create a Group Account.
- Go to Managing Group Licenses and follow the steps to “Assign a user license / add a user.”
Optionally, if you are a Microsoft 365 admin and you would like to restrict which users can use CalendarBridge, follow the steps in Restrict CalendarBridge Access to Certain Microsoft 365 Users.
Add a user, step by step
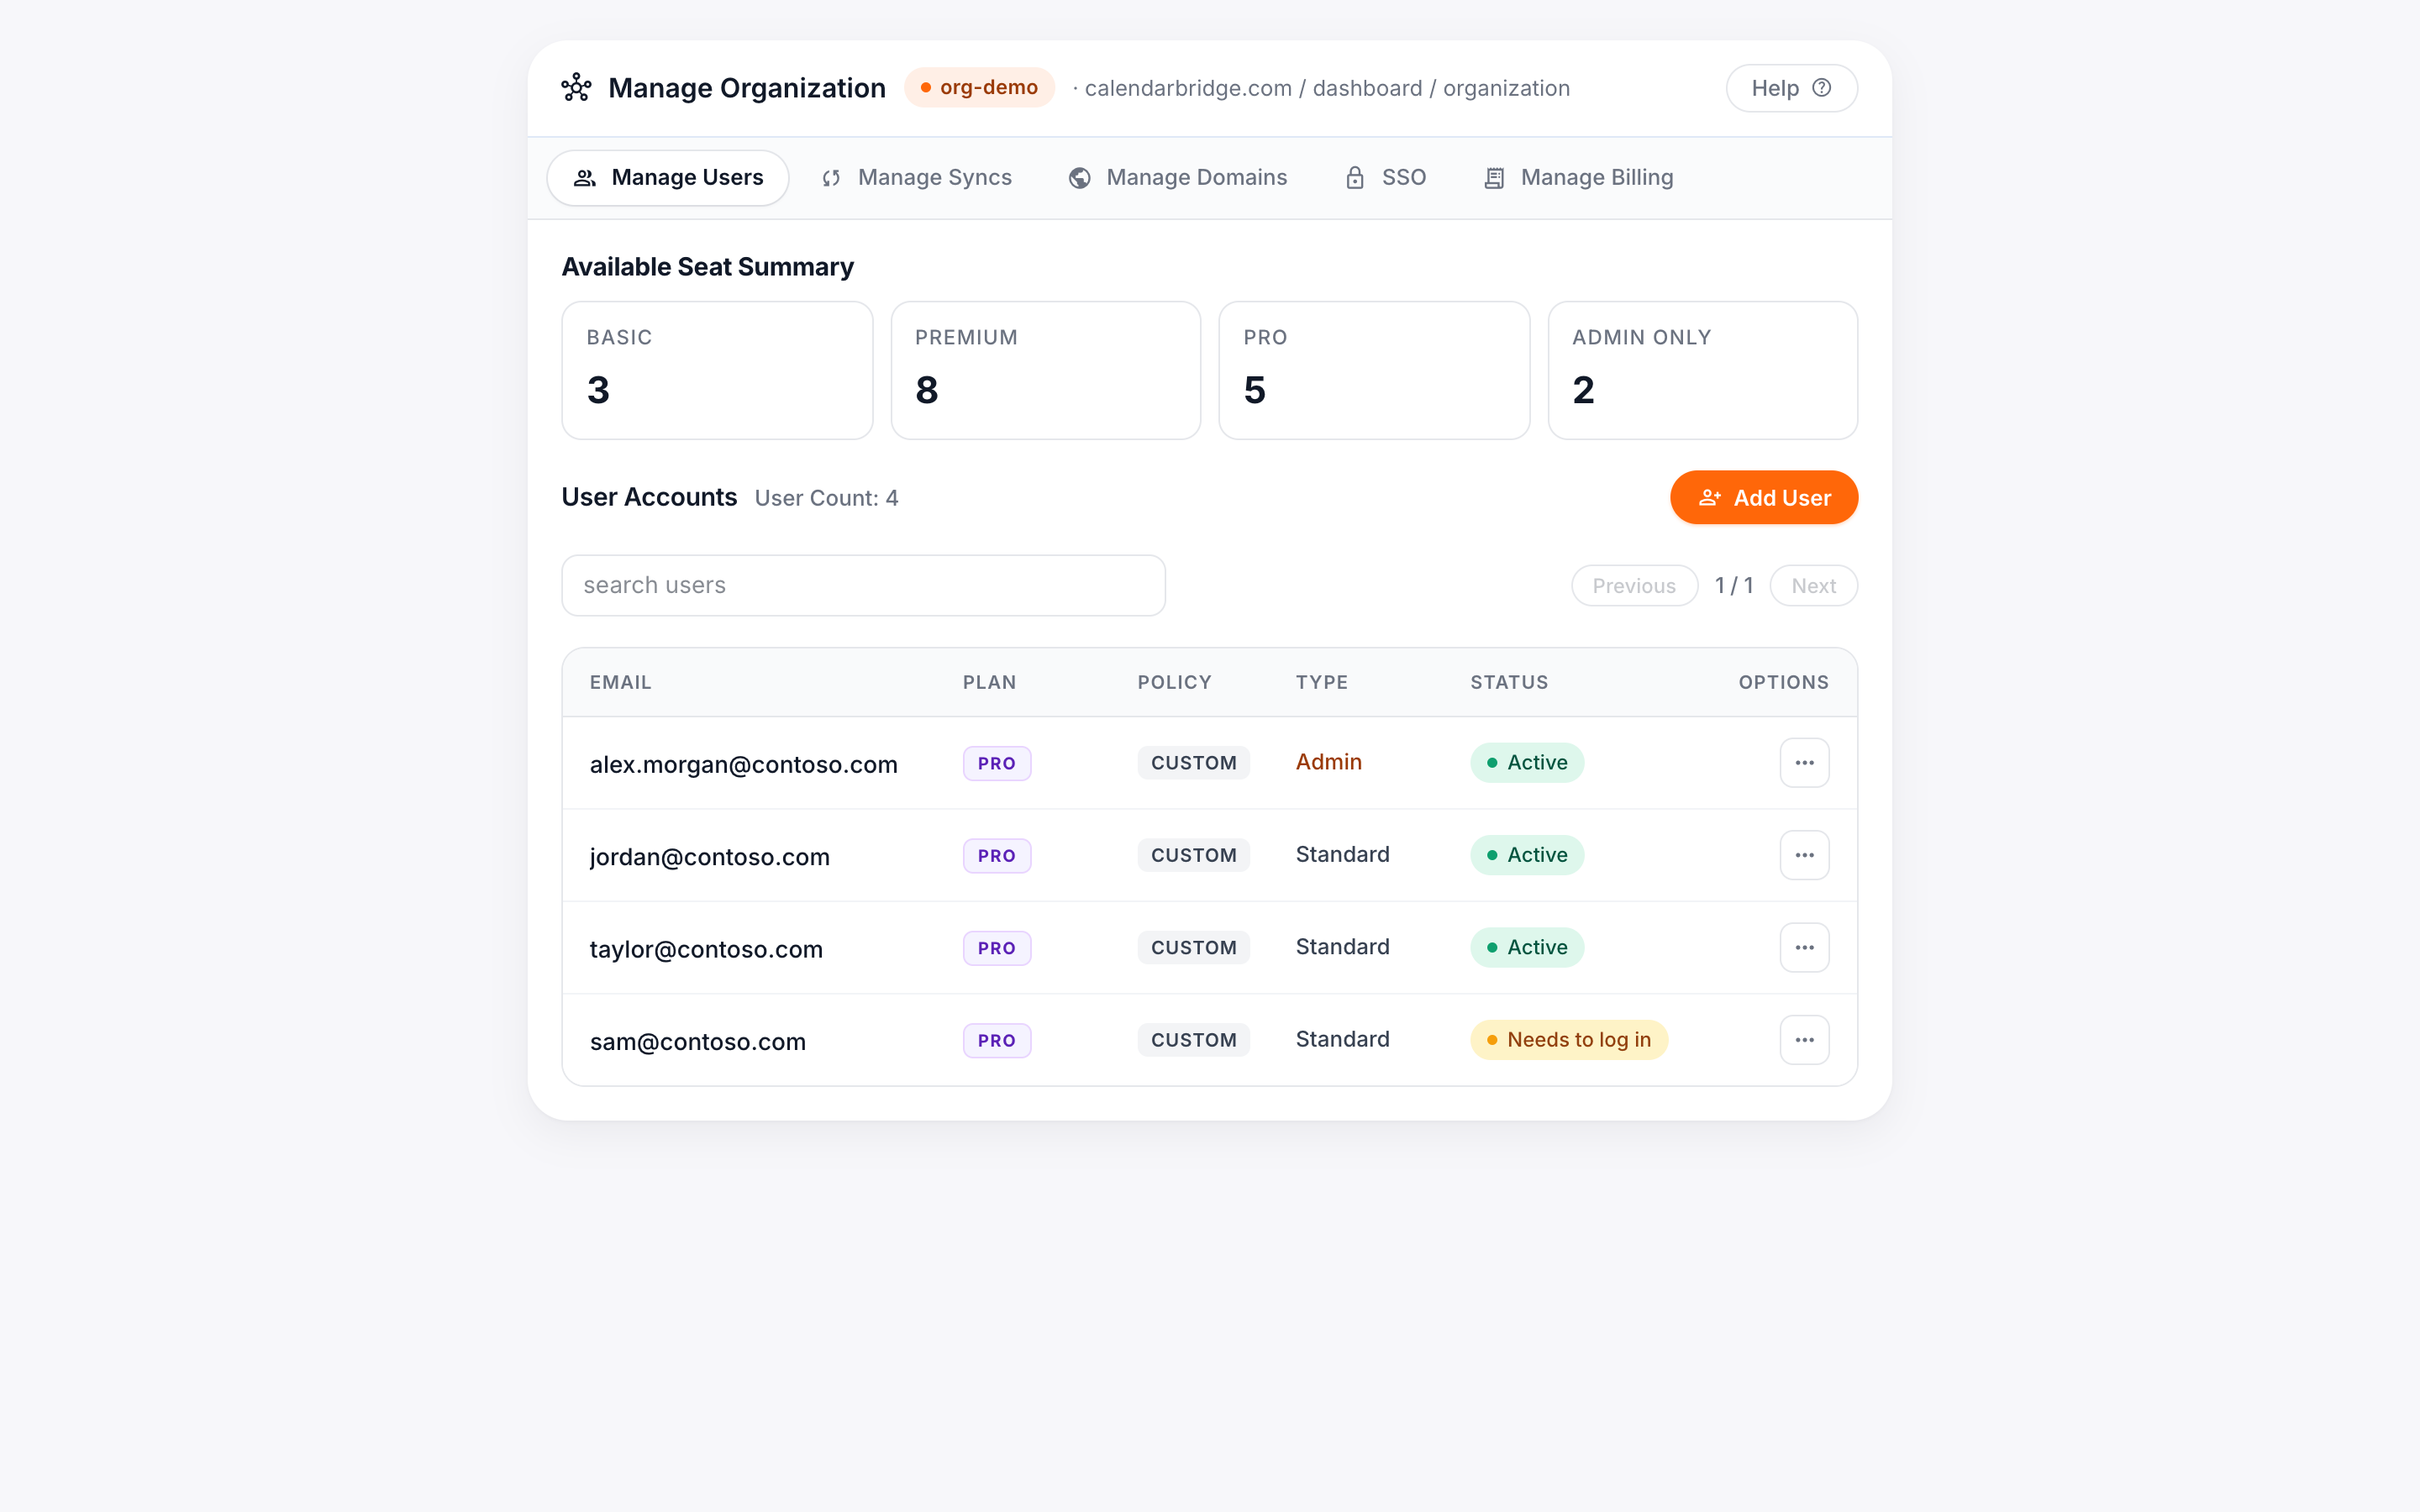
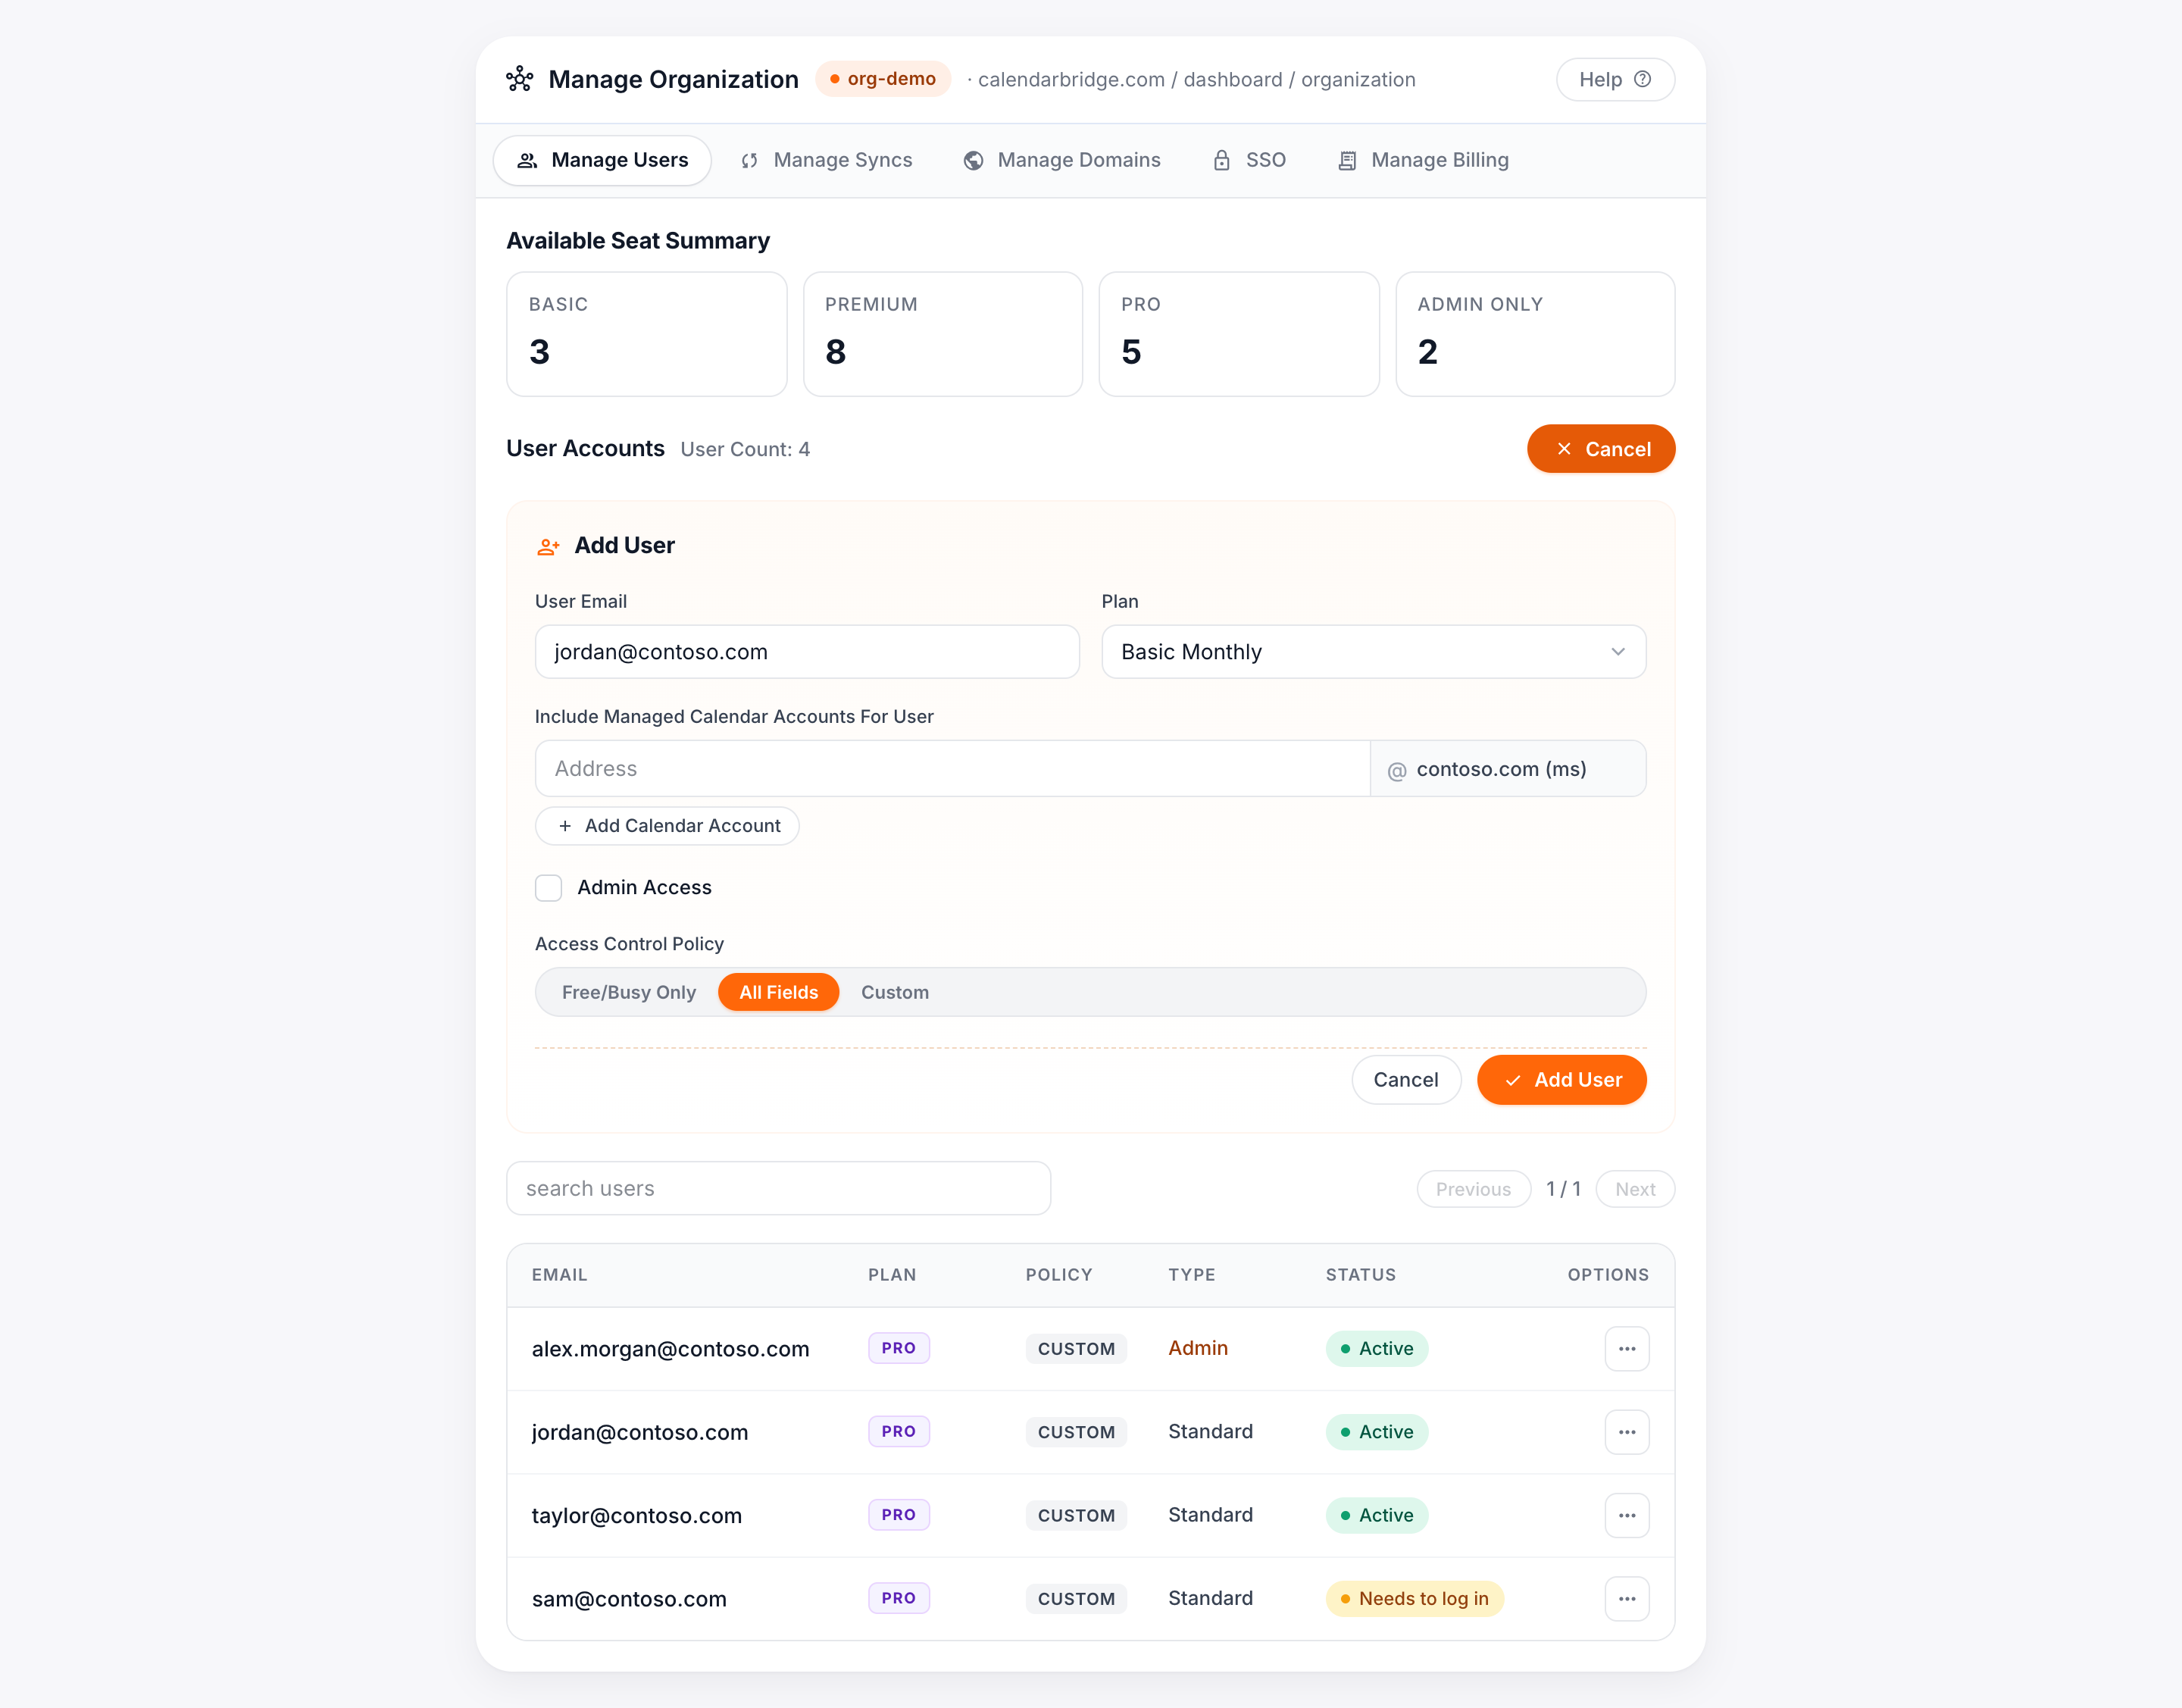
Once your group account exists and you have at least one available license/seat, open the Manage Users tab of the organization admin portal. It shows an Add User section (if you have no available seats, purchase a license first — see Managing Group Licenses).
-
Enter the user’s email address
Type it in the User Email box. This is the address the user logs in with; it has no effect on which calendars they can connect.
-
Choose the license (plan)
In the Plan dropdown, pick the license to assign from your available seats.
-
(Optional) Add/delegate a calendar account
Under “Include Managed Calendar Accounts for User,” enter the email address of an account on an authorized domain whose calendars you want this user to access through CalendarBridge.
Adding or delegating a calendar account is useful in two common scenarios:
- Delegate one person’s calendars to another person. The delegate does not need to be part of your Google Workspace or Microsoft 365 organization. For example, if contoso.com is an authorized domain, admin@outsourcedco.com can be added as a user on the Contoso CalendarBridge organization and they can be given delegate access to the calendars of userA@contoso.com, without needing an account on Contoso’s Google Workspace or Microsoft 365 tenant.
- Add the user’s own calendar on their behalf. This provides two benefits:
- The user does not need to complete the OAuth connection process themselves.
- CalendarBridge’s access to the user’s calendar will not need to be reauthorized when the user changes their password.
-
Set the access-control policy
Choose what the user’s sync connections may copy: Free/Busy only (no event details), All Fields, or Custom (pick individual fields such as subject, description, location).
-
(Optional) Block the AI assistant & MCP access
Check “Block AI assistant & MCP access” to turn off CalendarBridge’s AI scheduling assistant and the MCP (agent) server for this user. See the section below for details.
-
Click “Add User”
This provisions the license and emails the user an invitation. The new user then appears in the Manage Users list with their plan, policy, and edit/delete controls.
Block AI assistant and MCP access for a user
Organization admins can turn off CalendarBridge’s AI features for any individual user with the “Block AI assistant & MCP access” checkbox. It appears in the Add User form and in the edit-user form on the Manage Users tab, so you can set it when you add a user or change it later.
When AI access is blocked for a user:
- The AI scheduling assistant is turned off — the assistant tools are hidden from that user, so they cannot use natural-language scheduling.
- The MCP (Model Context Protocol) server is disabled for that user — any AI agent or app that tries to reach CalendarBridge on their behalf over MCP is denied, even outside the web app. Blocking the assistant in the UI alone would not stop programmatic agent access; this setting enforces it on the server.
To block AI assistant and MCP access for an existing user, open the Manage Users tab, edit the user, check “Block AI assistant & MCP access,” and save. To restore access, edit the user again and uncheck it. Leaving the box unchecked allows the assistant and MCP as normal.