Accept Payments for Bookings
Charge for meetings booked through your scheduling links. You connect your own Stripe account, so every payment goes straight to you.
How paid booking links work
A paid booking link lets you collect payment when someone picks a time on your calendar. Pricing applies per scheduling link, so you can charge for a strategy session while keeping your quick intro call free.
Connect your Stripe account once in Step 6, Payments, and set a price. The person booking pays before the meeting is created, so you never have to chase an unpaid invoice. We cover the money details at the end of this article.
Connect your Stripe account
Payments live in Step 6, Payments in the scheduler editor. Open Schedulers from the side menu, click Edit on a scheduler, and scroll to the last step. Everything here is optional. If you leave payments turned off, your scheduler works normally.
Click Connect Stripe. Stripe opens in a new tab where you can sign in or create an account. Your work in the scheduler editor is kept. Once you finish, the Stripe tab closes and brings you right back to your editor.
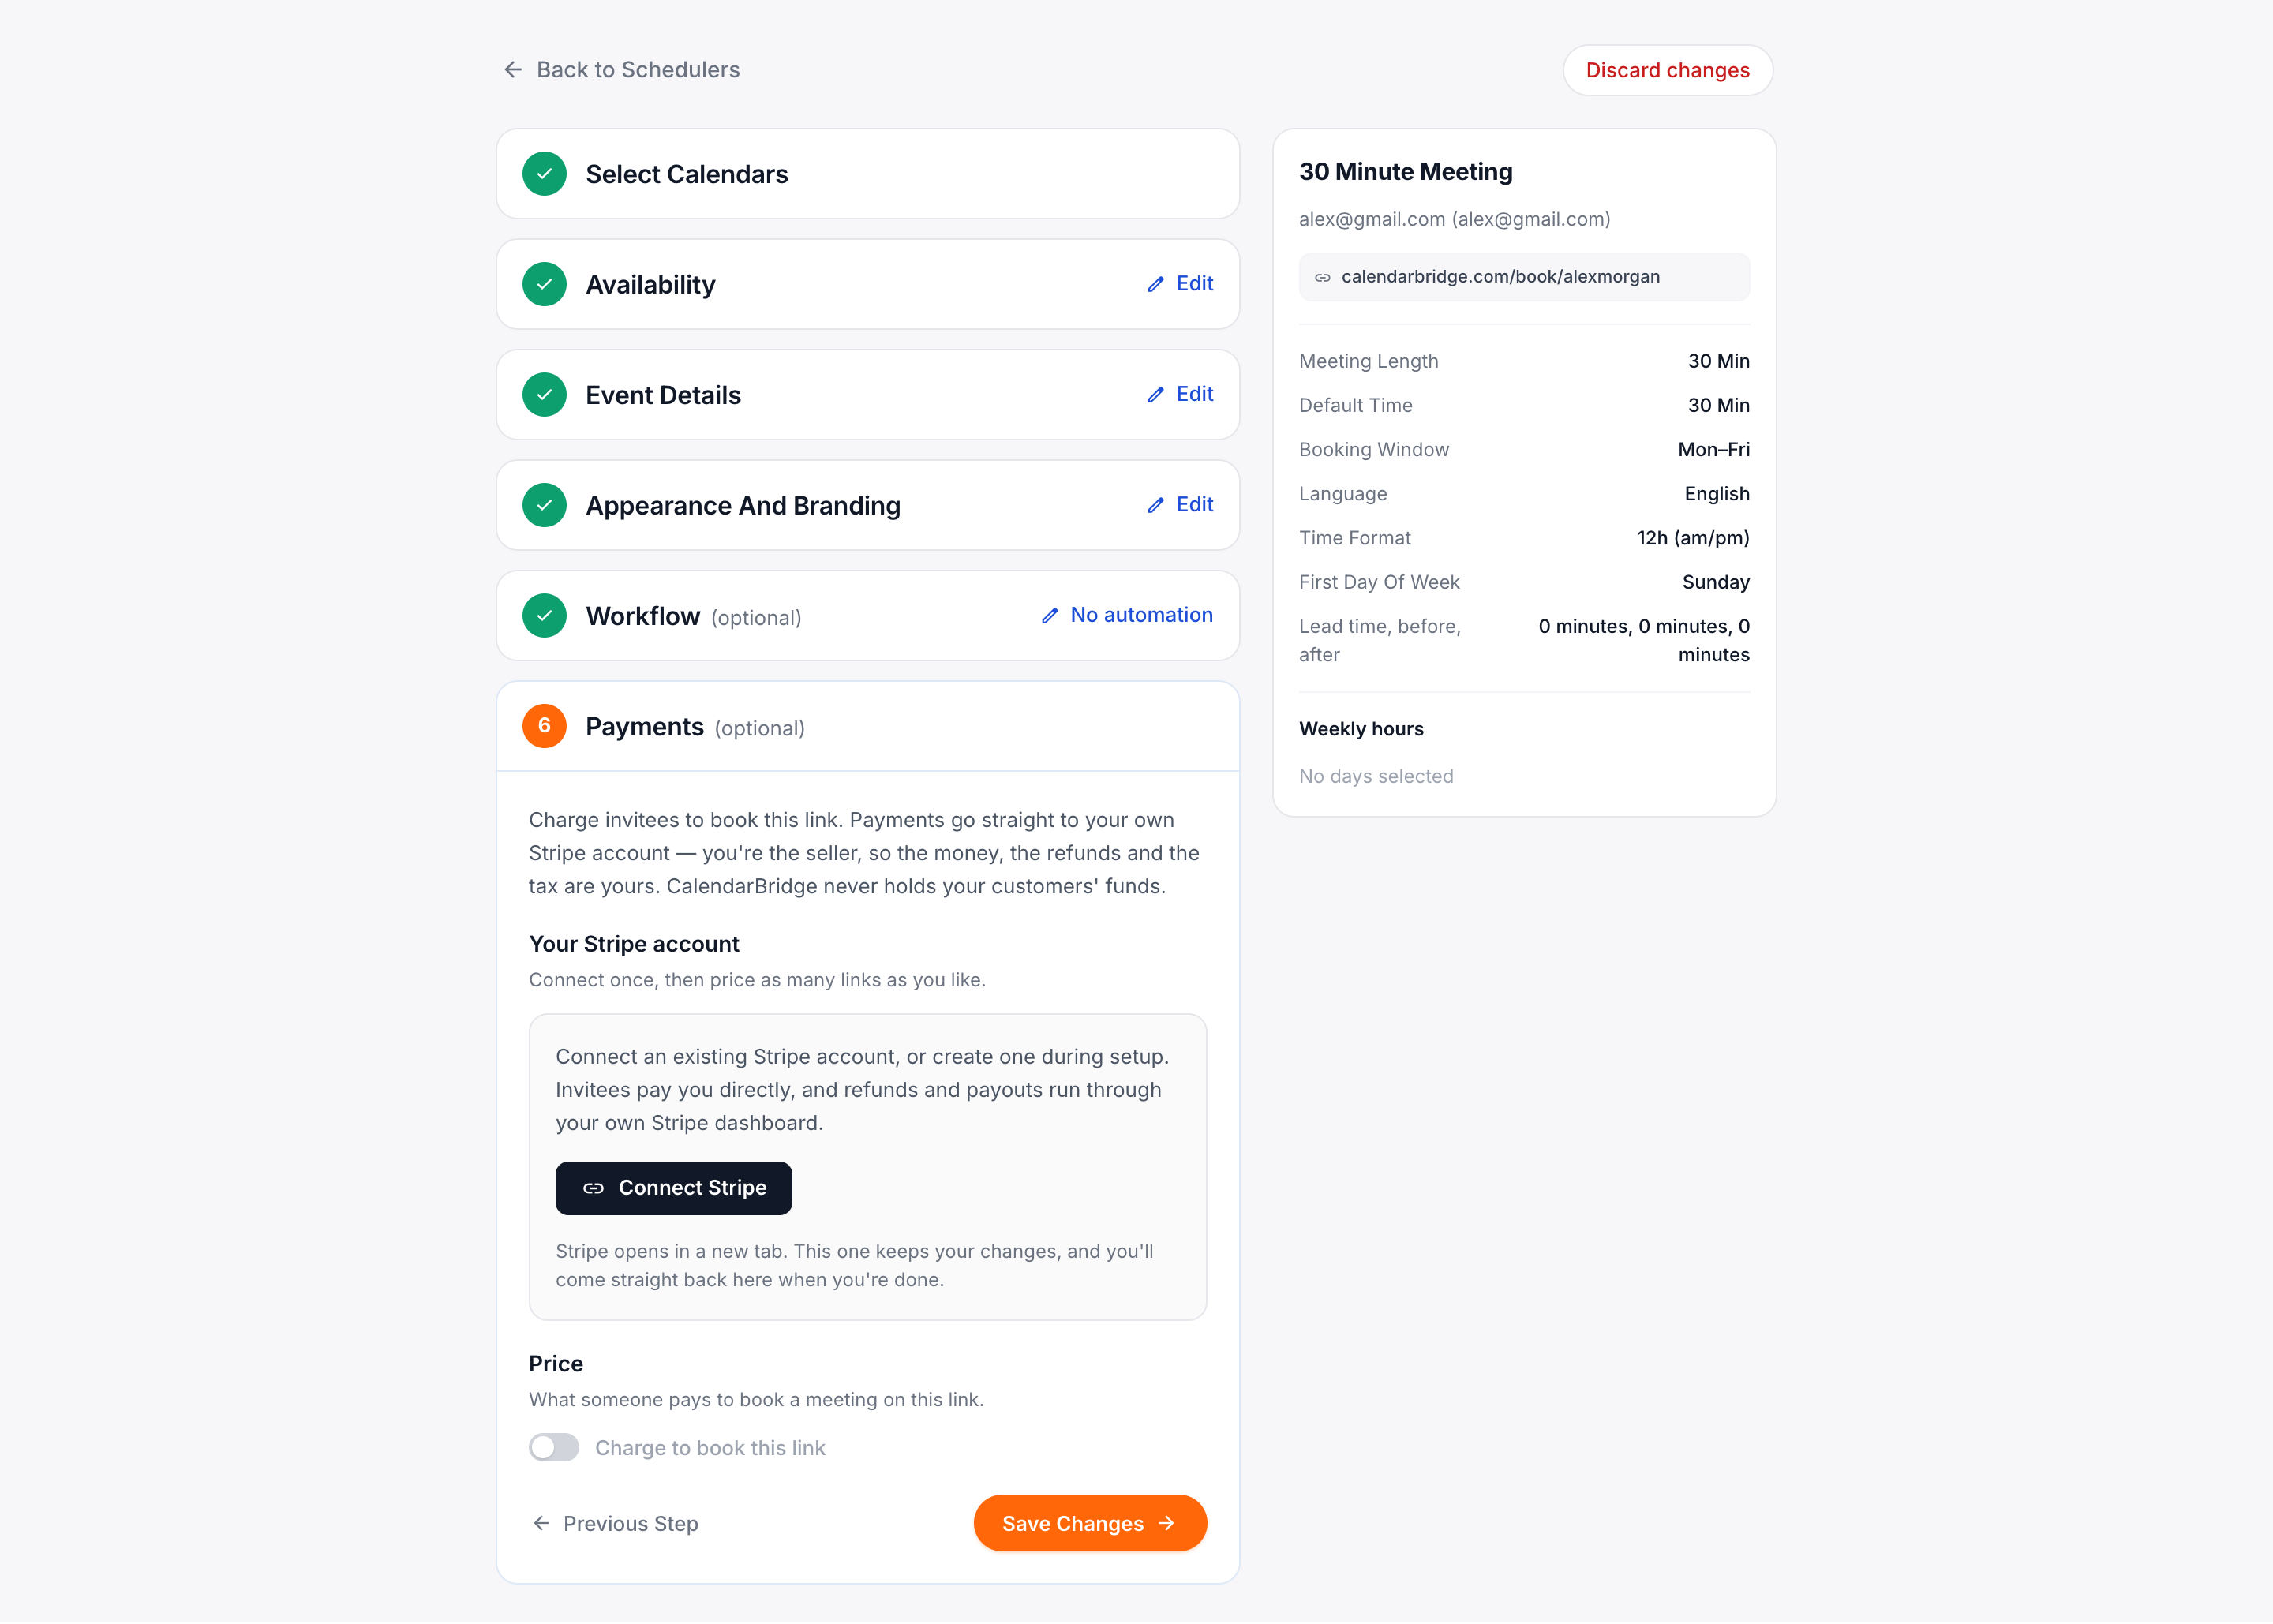
You only need to connect Stripe once. After that, you can set prices on any link you create.
Set a price
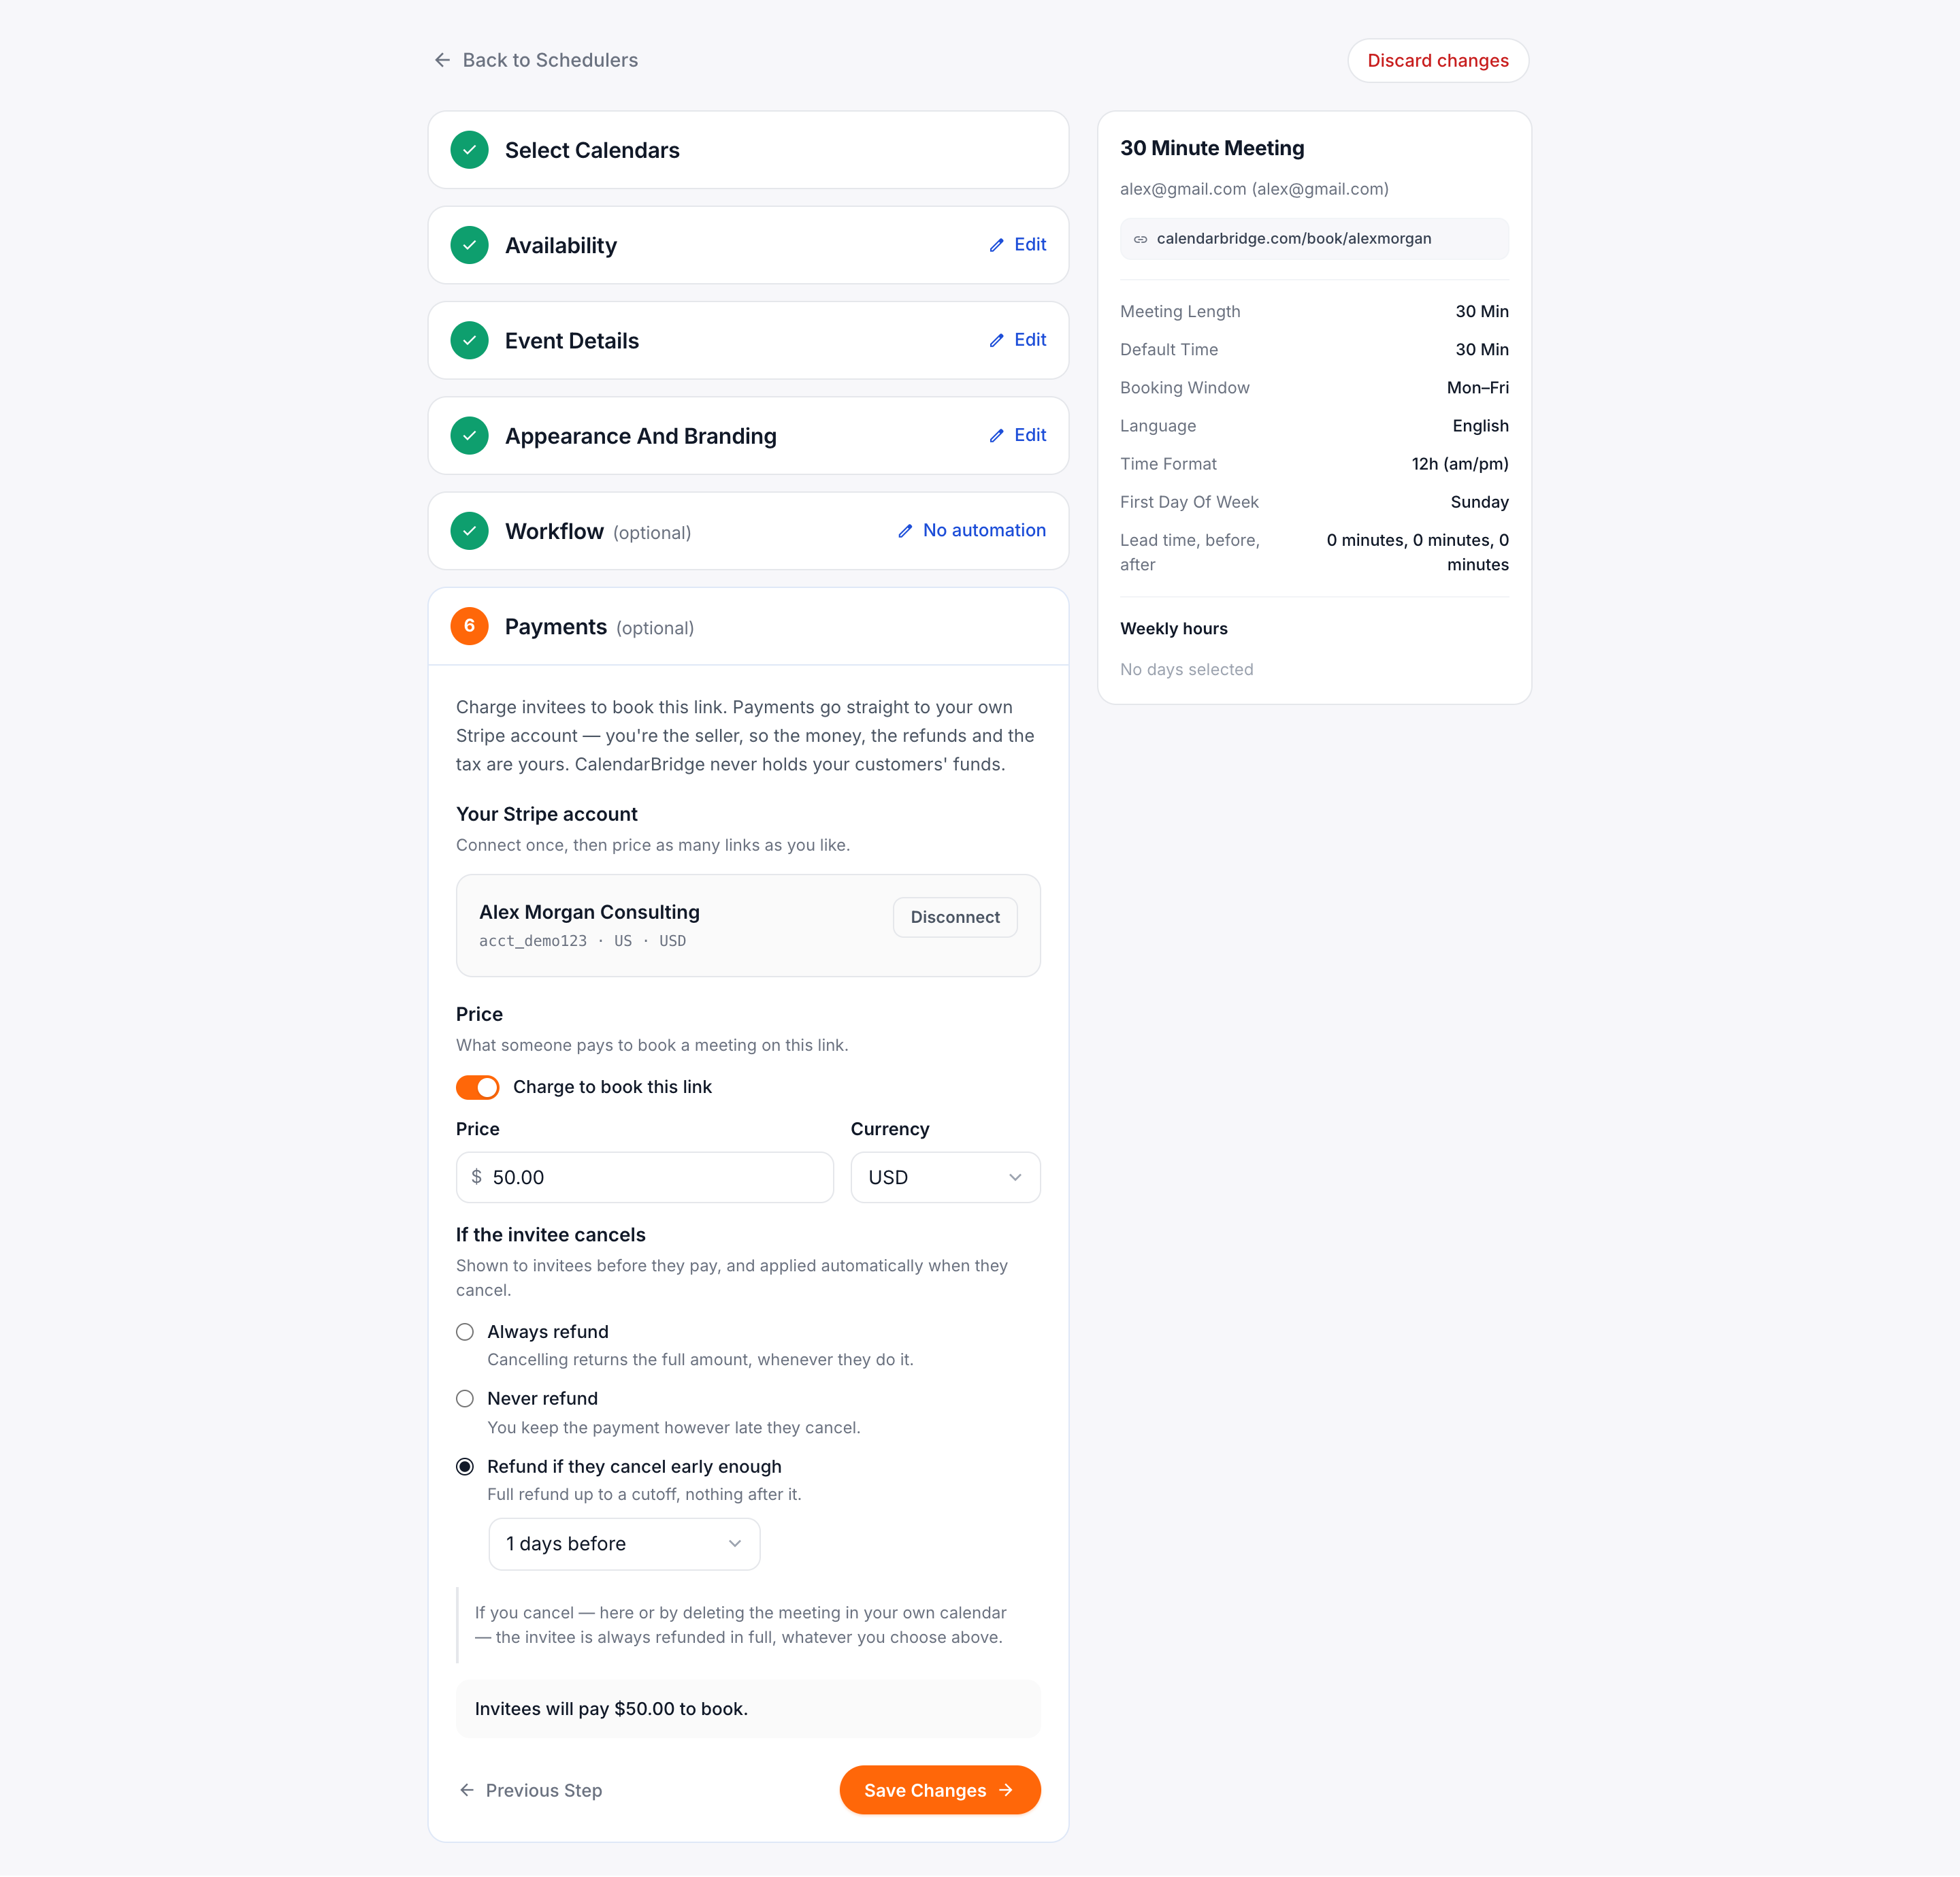
Turn on Charge to book this link, then enter the amount and currency.
If your link includes multiple meeting lengths, you can set a price for each one. For instance, a 30-minute call and a 90-minute session rarely cost the same. If you leave a duration blank, it defaults to the main price, so bookings are never free by mistake.
Choose a refund policy
Choose what happens when an invitee cancels:
- Always refund: Cancelling returns the full payment, no matter when they cancel.
- Never refund: You keep the payment even if they cancel.
- Refund if they cancel early enough: They get a full refund up to your cutoff time, and nothing after it.
Your policy is shown to clients before they pay, and CalendarBridge applies it automatically on cancellation. You do not need to issue refunds manually.
What the person booking sees
Invitees see the price on the booking form upfront. When they continue, they complete checkout on a secure Stripe page. After paying, they see a confirmation screen while the meeting is added to your calendar.
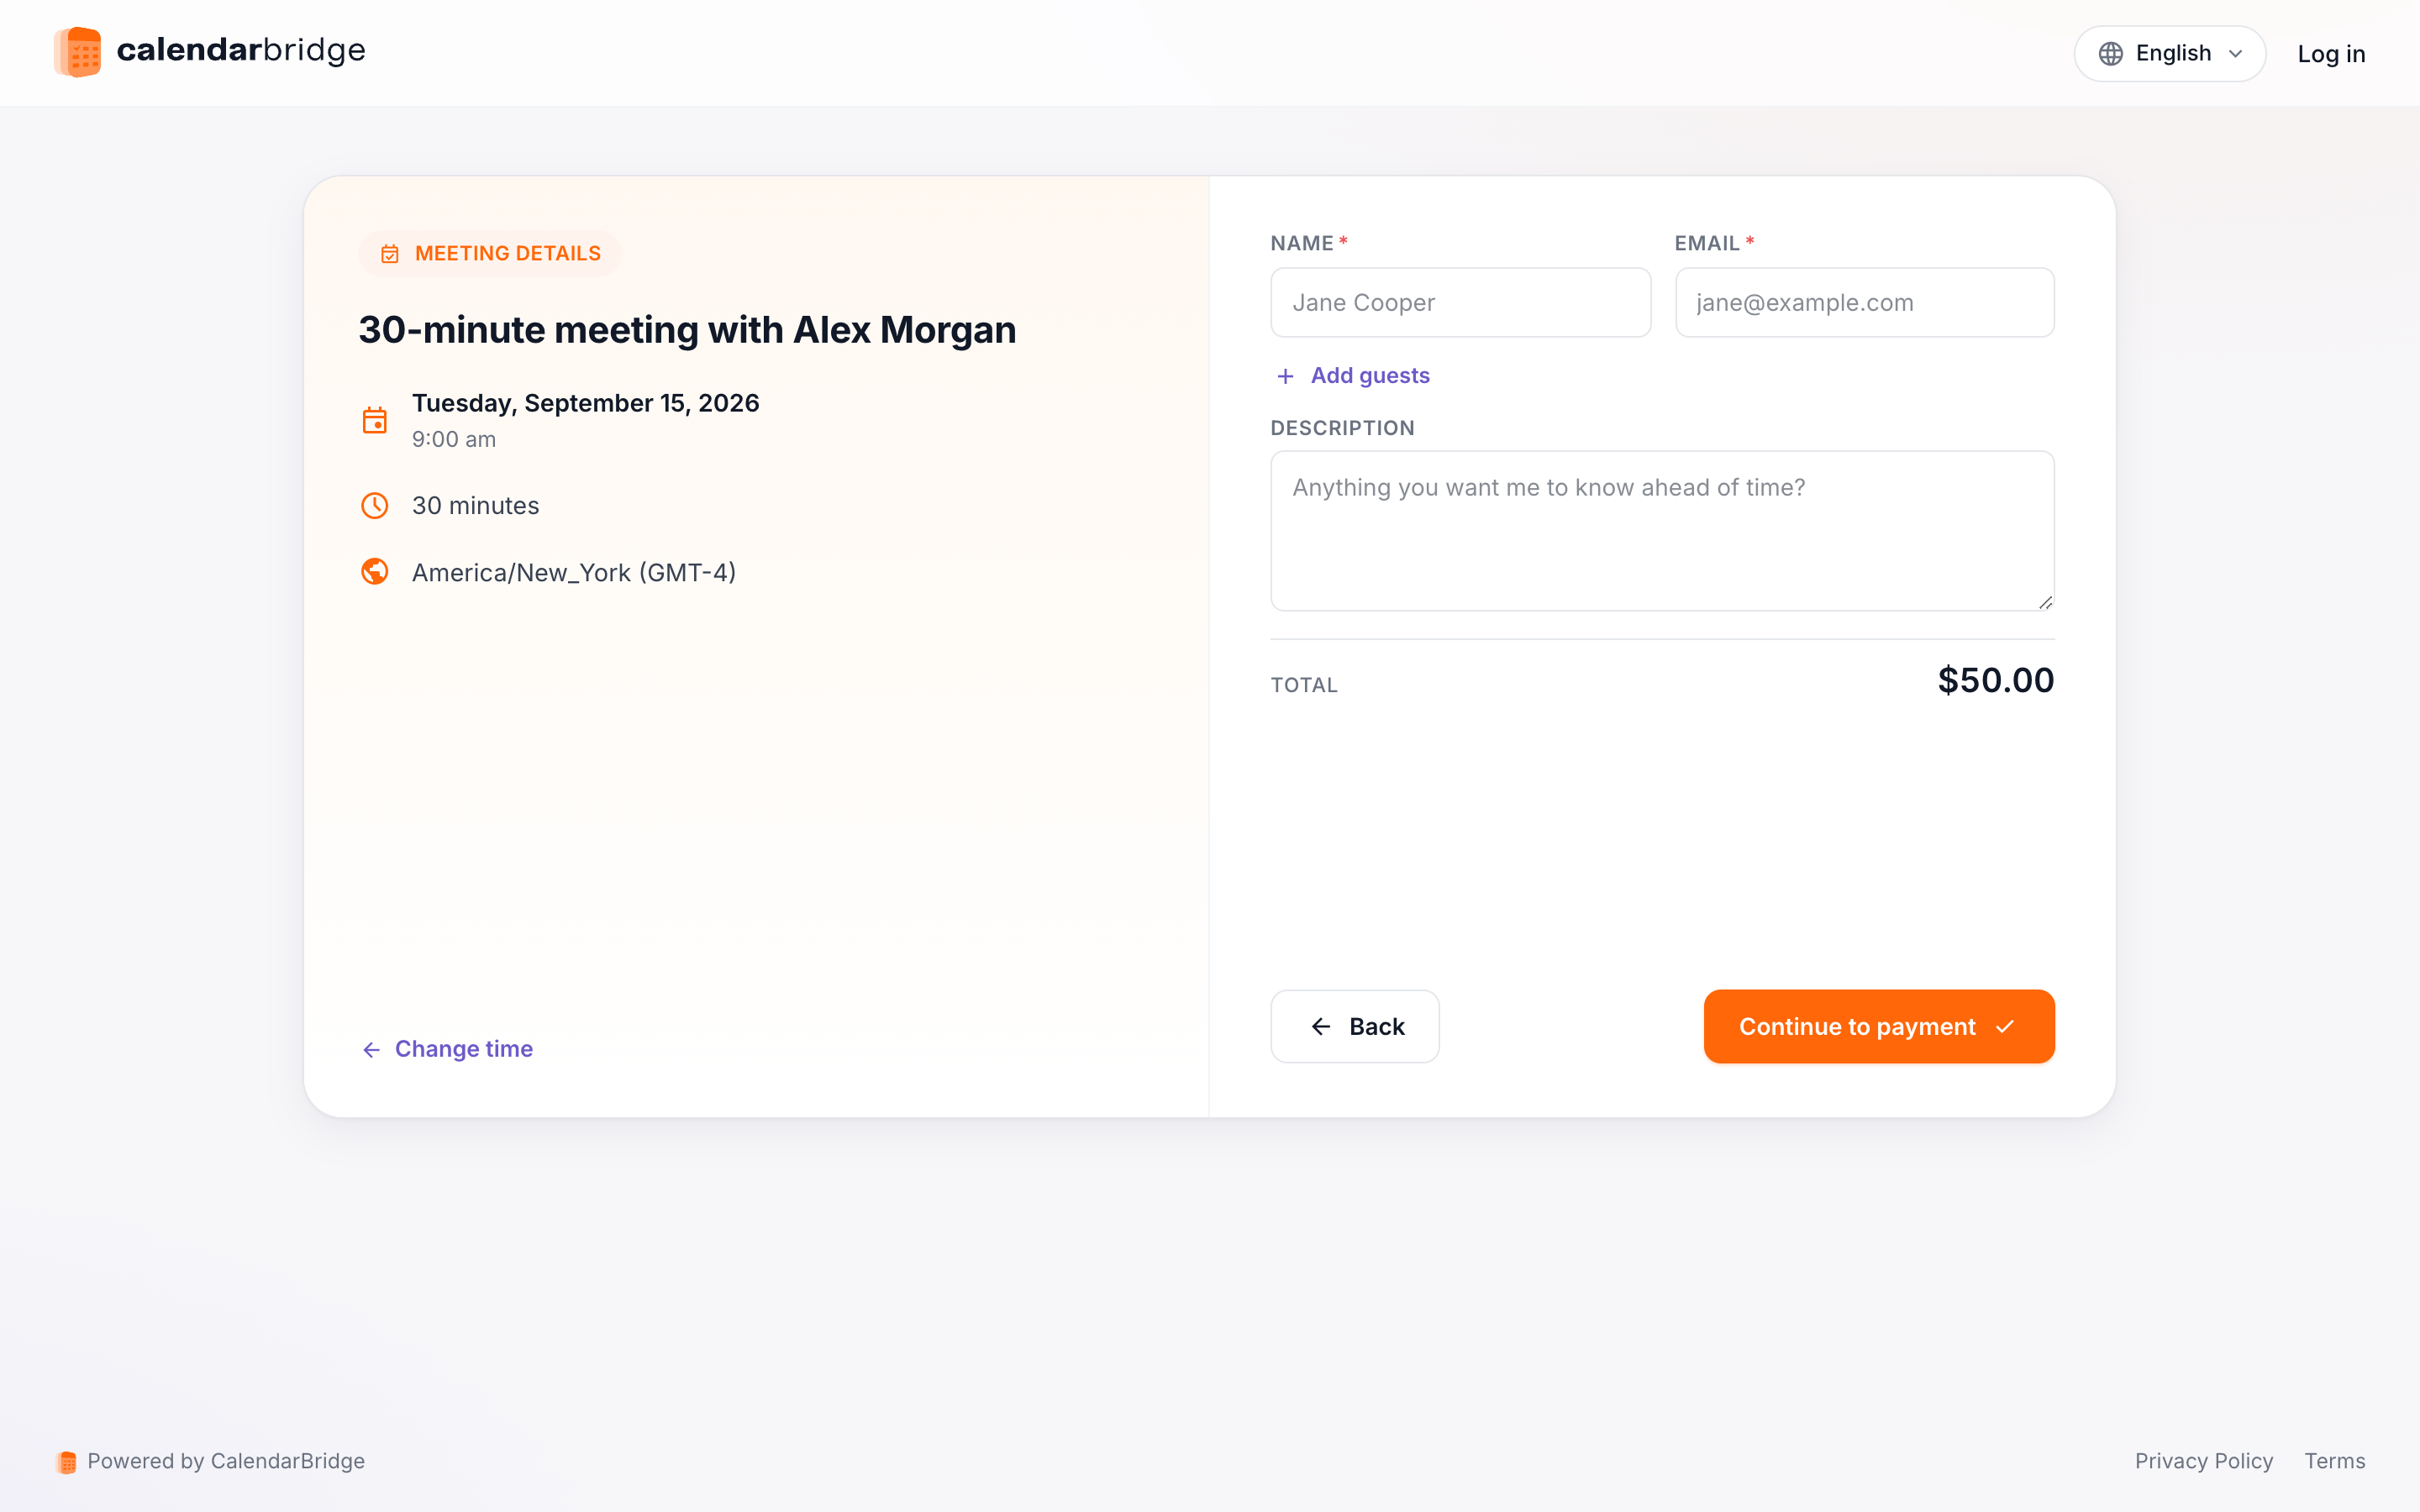
The meeting is only created after the charge succeeds. If someone closes the payment page, they are not charged and nothing appears on your calendar.
If the time is taken while someone is paying
CalendarBridge does not hold time slots while checkout is open. If two people try to book the same slot at once, the second person is refunded in full automatically and asked to pick another time. No meeting is created on your calendar.
This is rare, since checkout takes only a minute or two.
Cancellations and refunds
Paid bookings use the standard reschedule and cancel links included in the calendar invite.
- Rescheduling never moves money. The payment stays as it is.
- Cancelling applies your refund policy, and the page tells them what will happen before they confirm.
- Refunds return to the original payment method and usually take 5 to 10 business days to appear on a card statement.
Troubleshooting
- “This host can’t take payments right now.” Your Stripe connection is disconnected, or Stripe has restricted the account. Reconnect it in Step 6 and check your Stripe dashboard for alerts.
- The Payments step is missing. Payments are configured in the last step of the scheduler editor. If that step is missing, it is not enabled on your account yet.
- A payment method isn’t showing. Turn it on in your Stripe dashboard, and verify that Stripe supports it in your country.
- Someone says they paid but has no invitation. Look up the charge in Stripe. If it succeeded, the meeting should exist. Check the calendar your scheduler writes to. If you still cannot find it, contact support with the Stripe payment reference.
- Refund hasn’t arrived. Stripe processes refunds immediately, but banks take 5 to 10 business days to post the credit. The refund status in your Stripe dashboard is the source of truth.
Stripe, fees, and where the money goes
You are the seller. CalendarBridge never holds your funds and takes no cut of your revenue. Payments go directly into your Stripe account. Payouts, refunds, disputes, and taxes belong to you, just as if you sent an invoice directly. Stripe charges its standard processing fees.
Stripe emails clients a payment receipt from your business, separate from the calendar invitation. Every transaction appears in your Stripe dashboard, which is also where you issue manual refunds if needed.
The currencies listed in the Payments step match what Stripe supports for your account.
Which payment methods appear
You manage payment methods in your Stripe dashboard, not in CalendarBridge. Clients see the methods you have active there, such as credit cards, Apple Pay, Google Pay, PayPal, and Klarna. Available options depend on where your Stripe account is registered.
If an option is missing, turn it on under Settings → Payment methods in Stripe. You do not need to change anything in CalendarBridge.